Lease Creation | RentMouse
This comprehensive guide walks you through every step of creating a lease in RentMouse—from accessing tenant management to signing, printing, and managing your lease documents.
Complete lease creation walkthrough in RentMouse
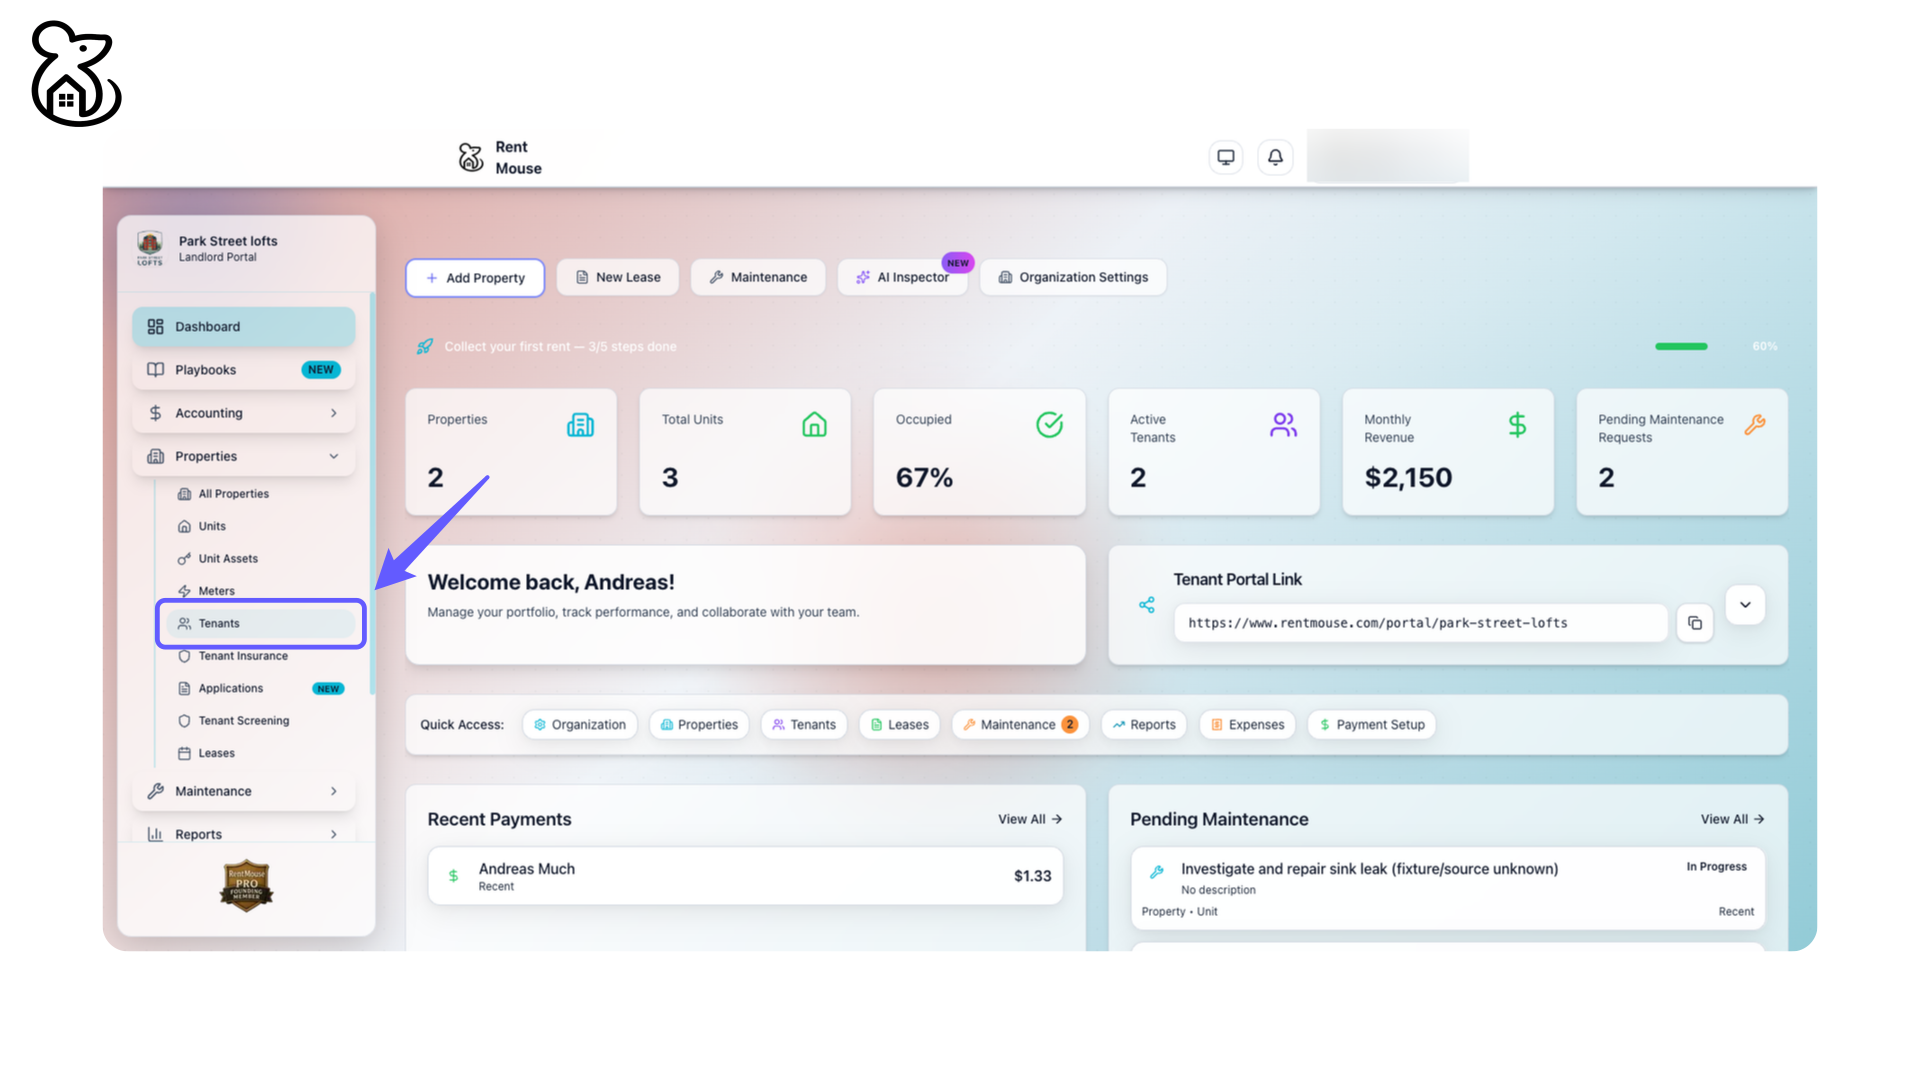
Step 1: Access Tenant Management
Click on 'Tenants' to manage tenant details, applications, and leasing information efficiently.
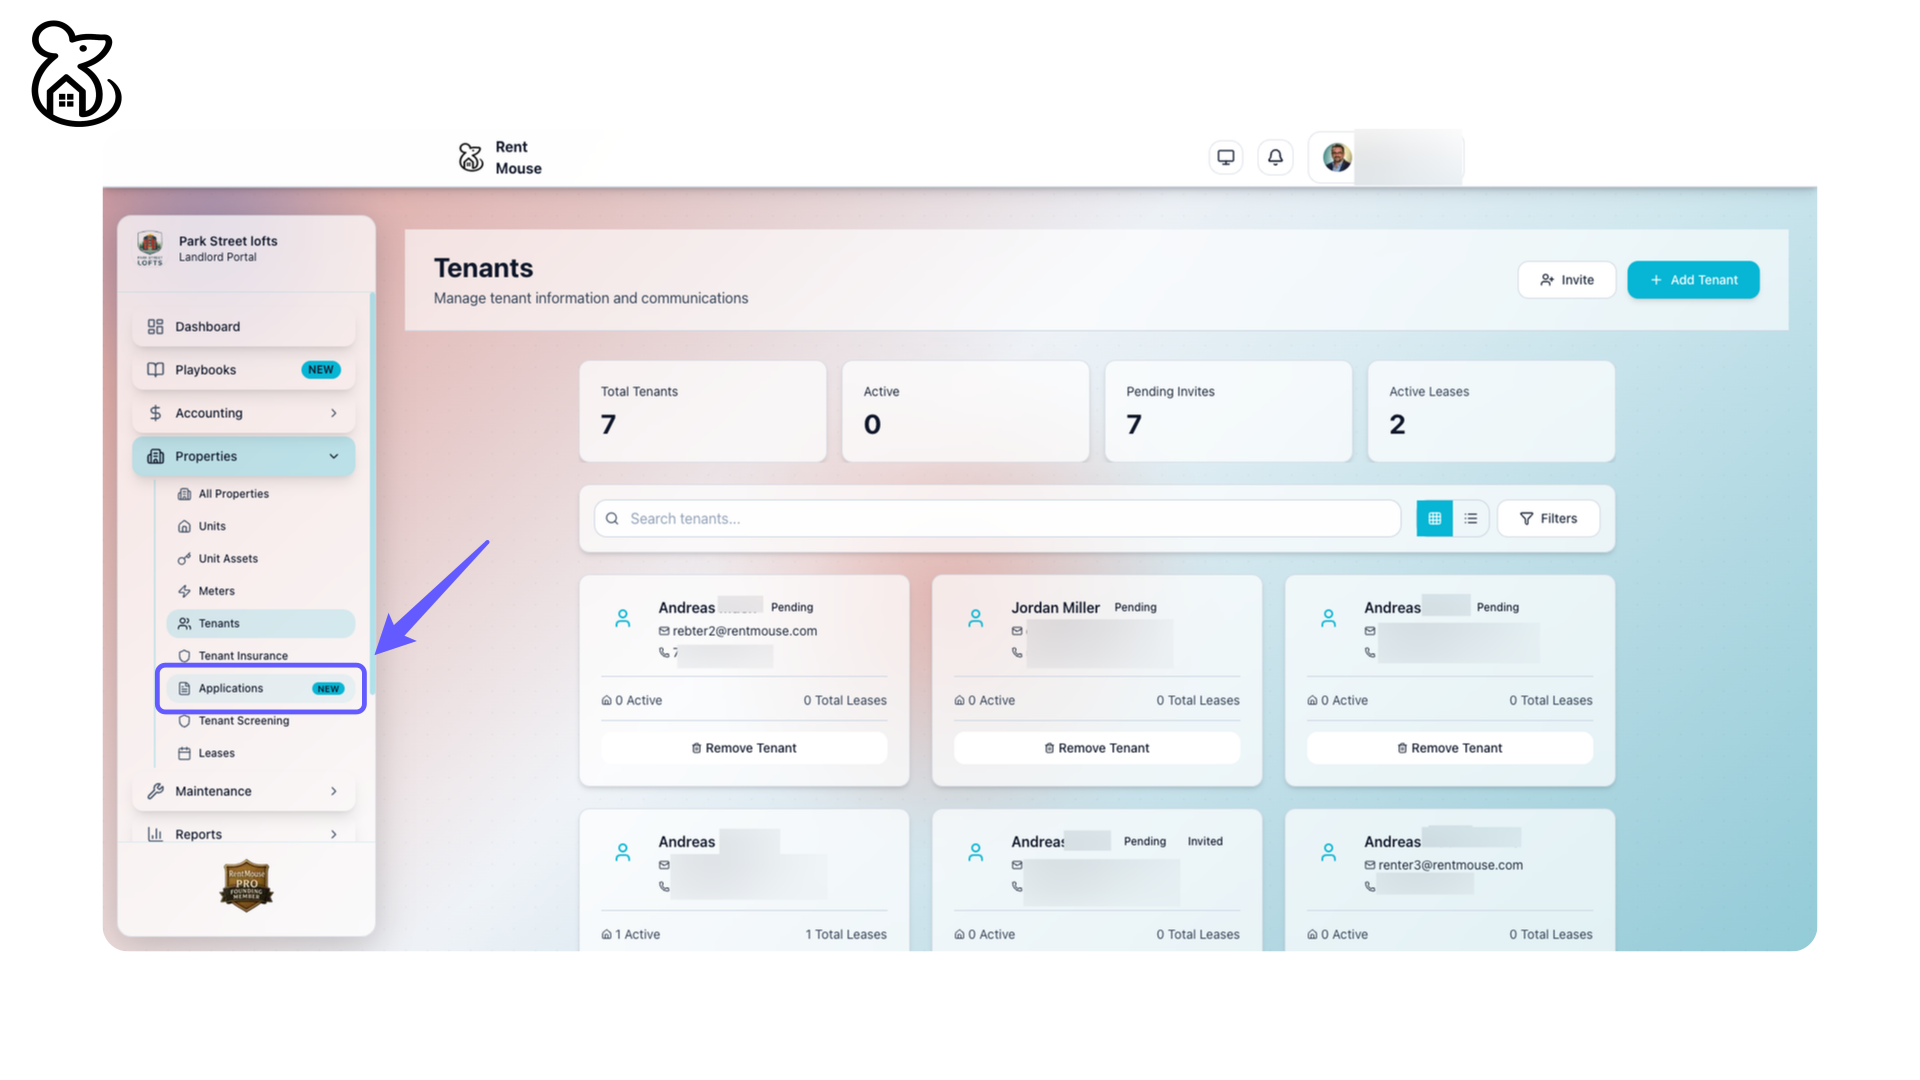
Step 2: Access Tenant Applications
Click on 'Applications' under the Properties section to manage tenant applications.
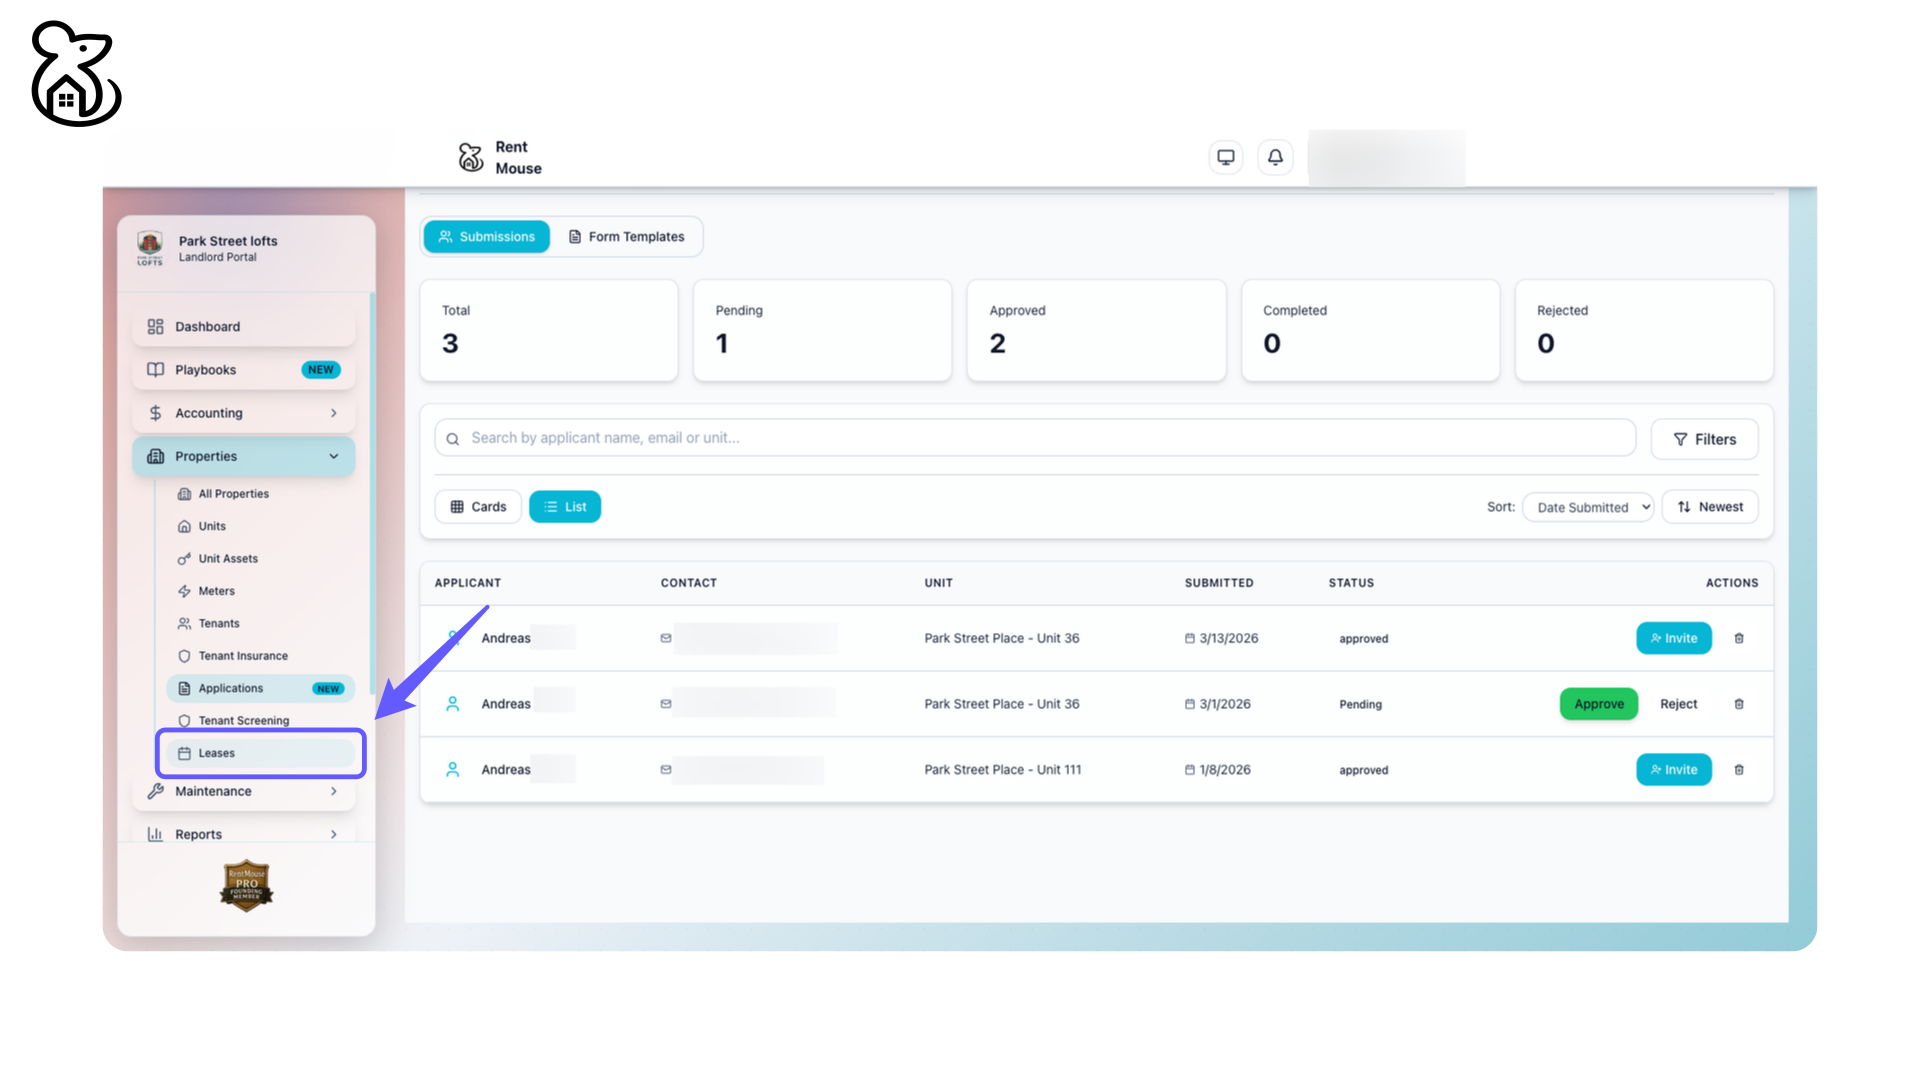
Step 3: Access Leases Section
Click on 'Leases' under the 'Properties' menu to view lease details.
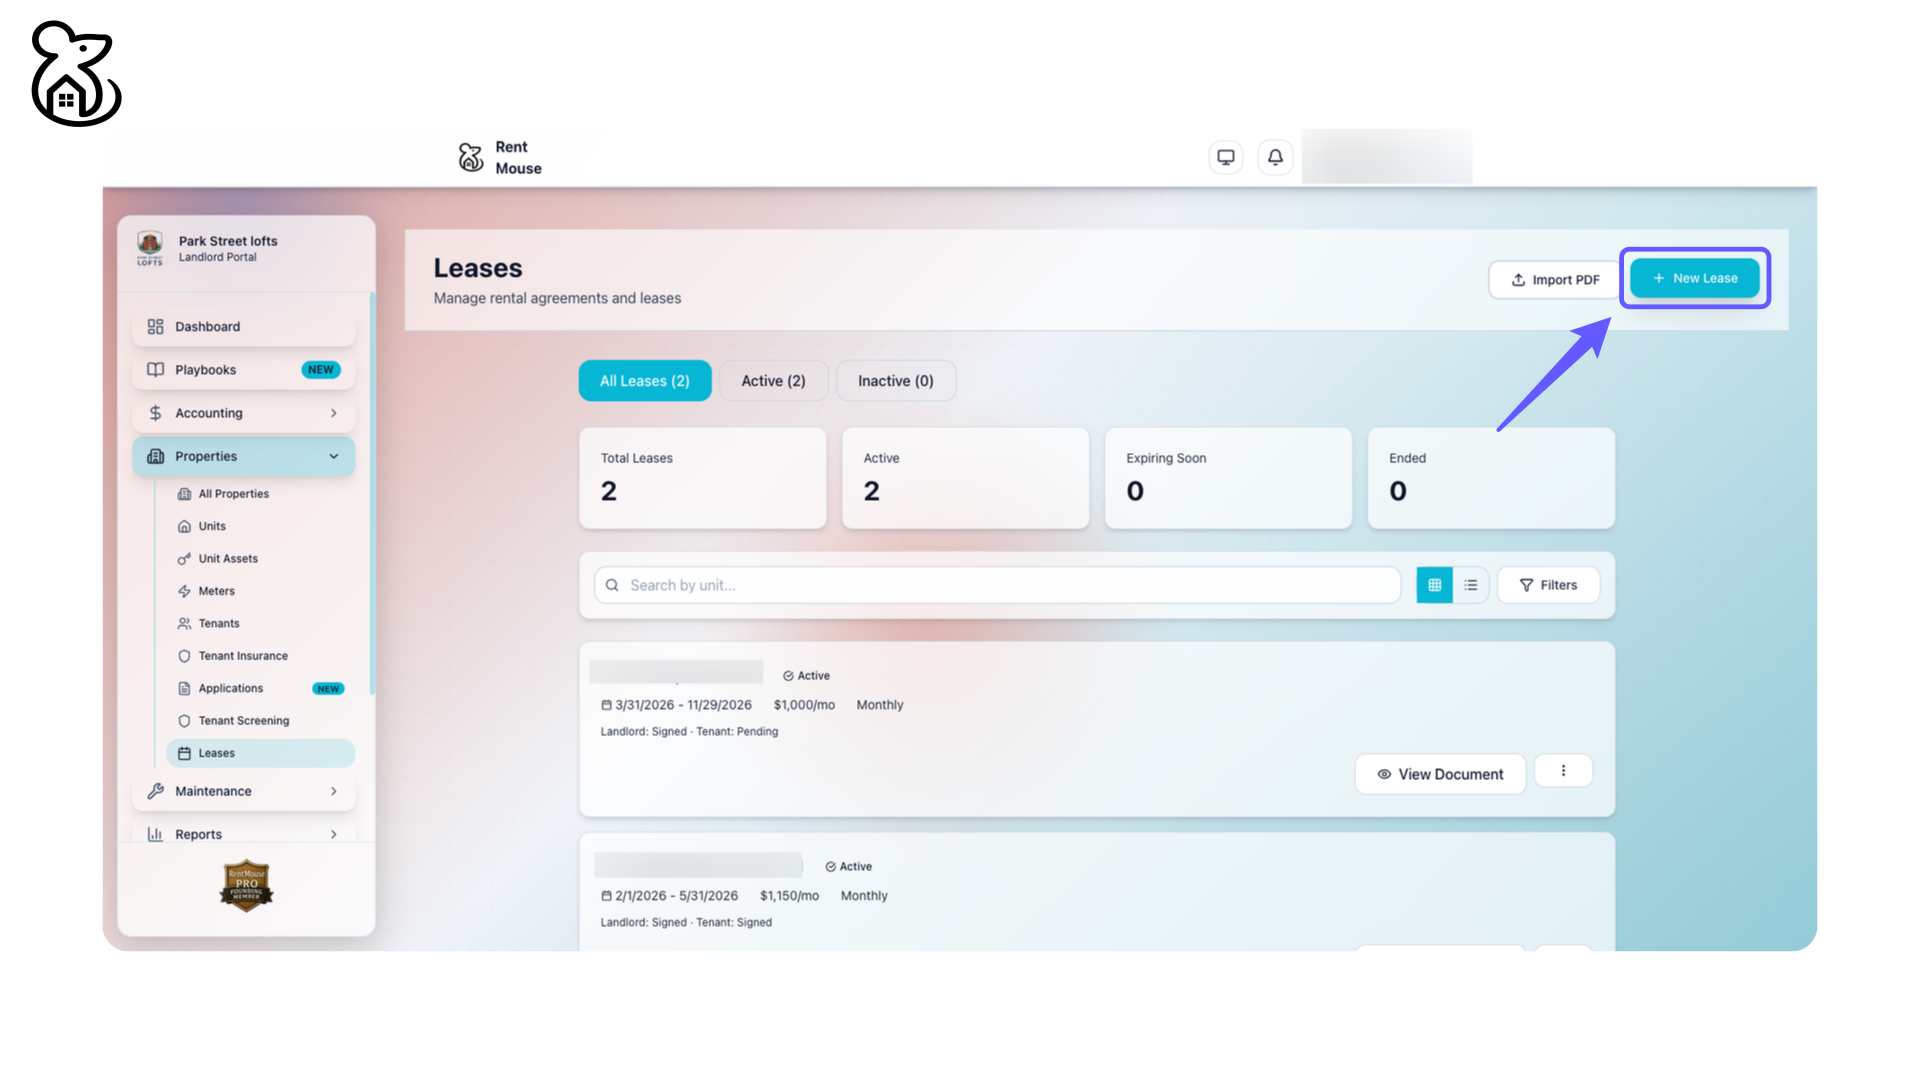
Step 4: Initiate a New Lease
Select 'New Lease' to begin the process of creating a new rental agreement.
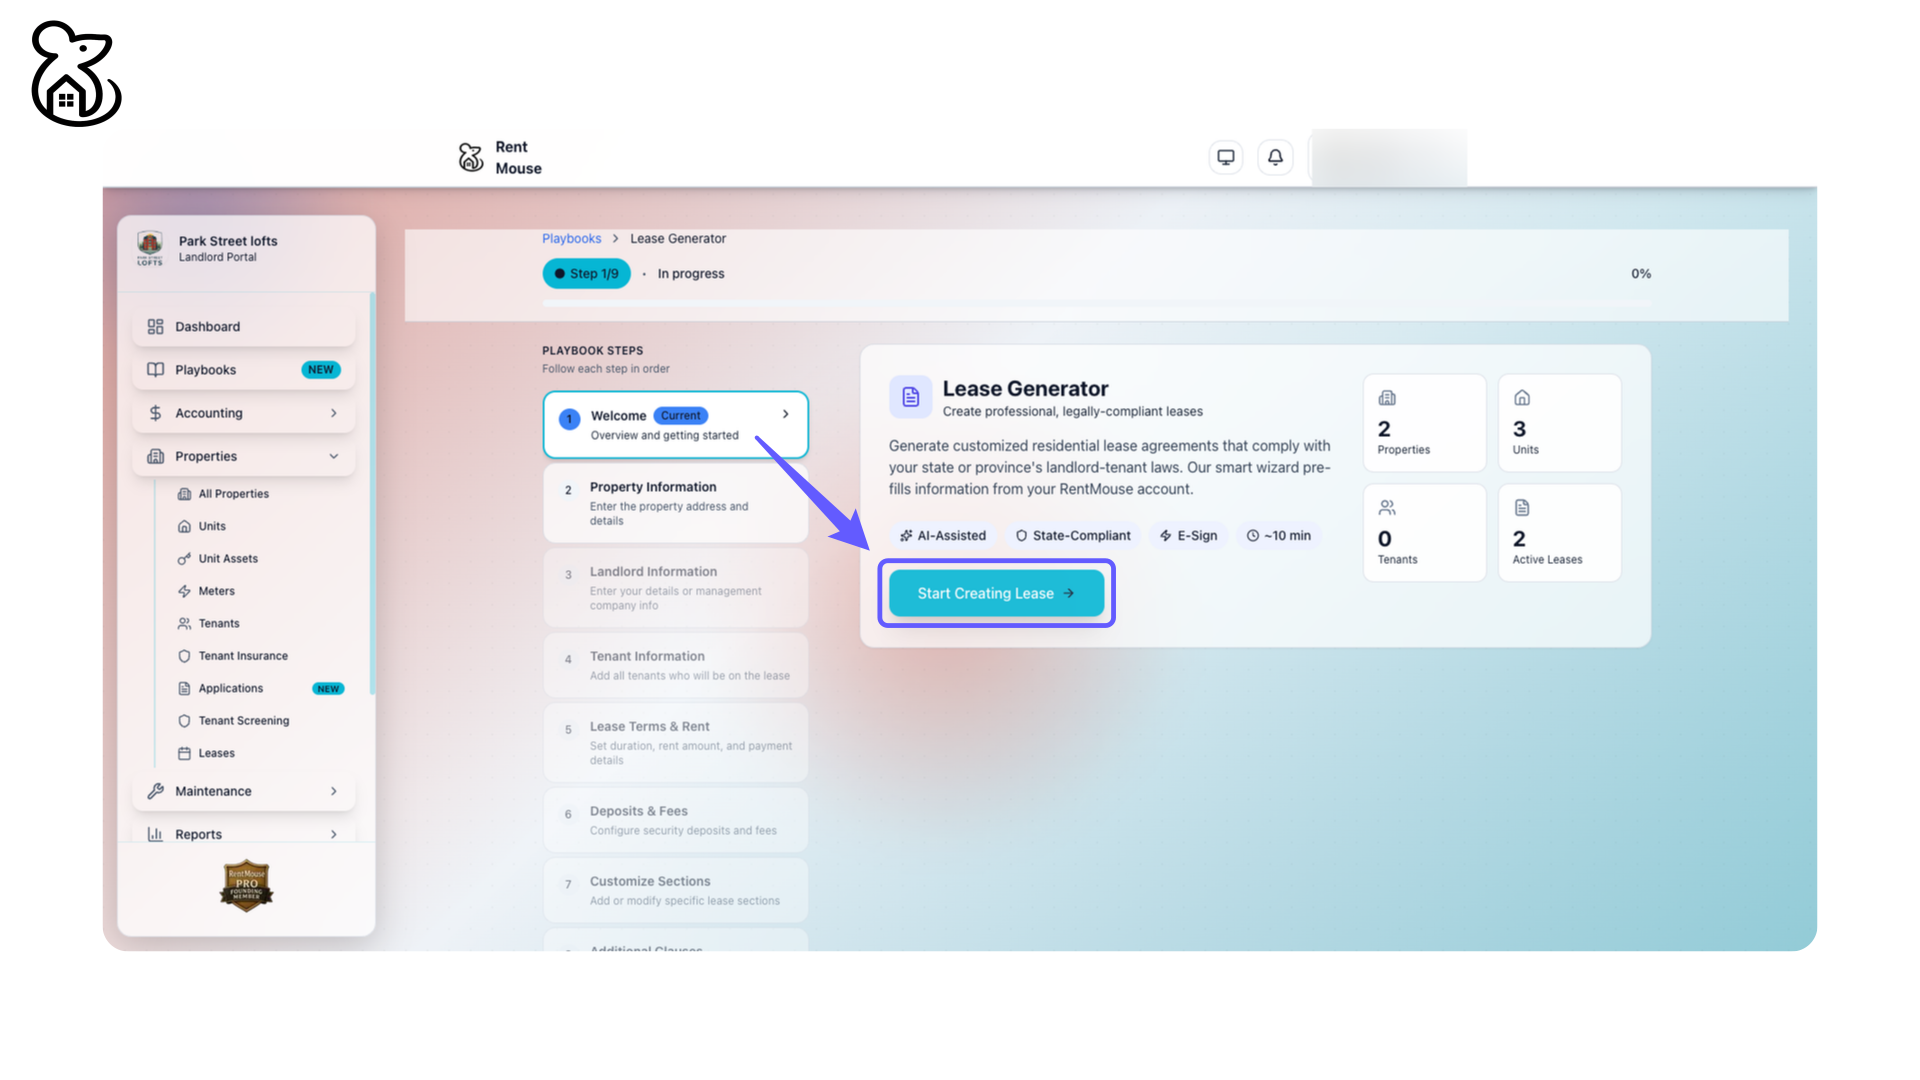
Step 5: Initiate Lease Creation
Click "Start Creating Lease" to generate a customized and legally-compliant residential lease using the Lease Generator.
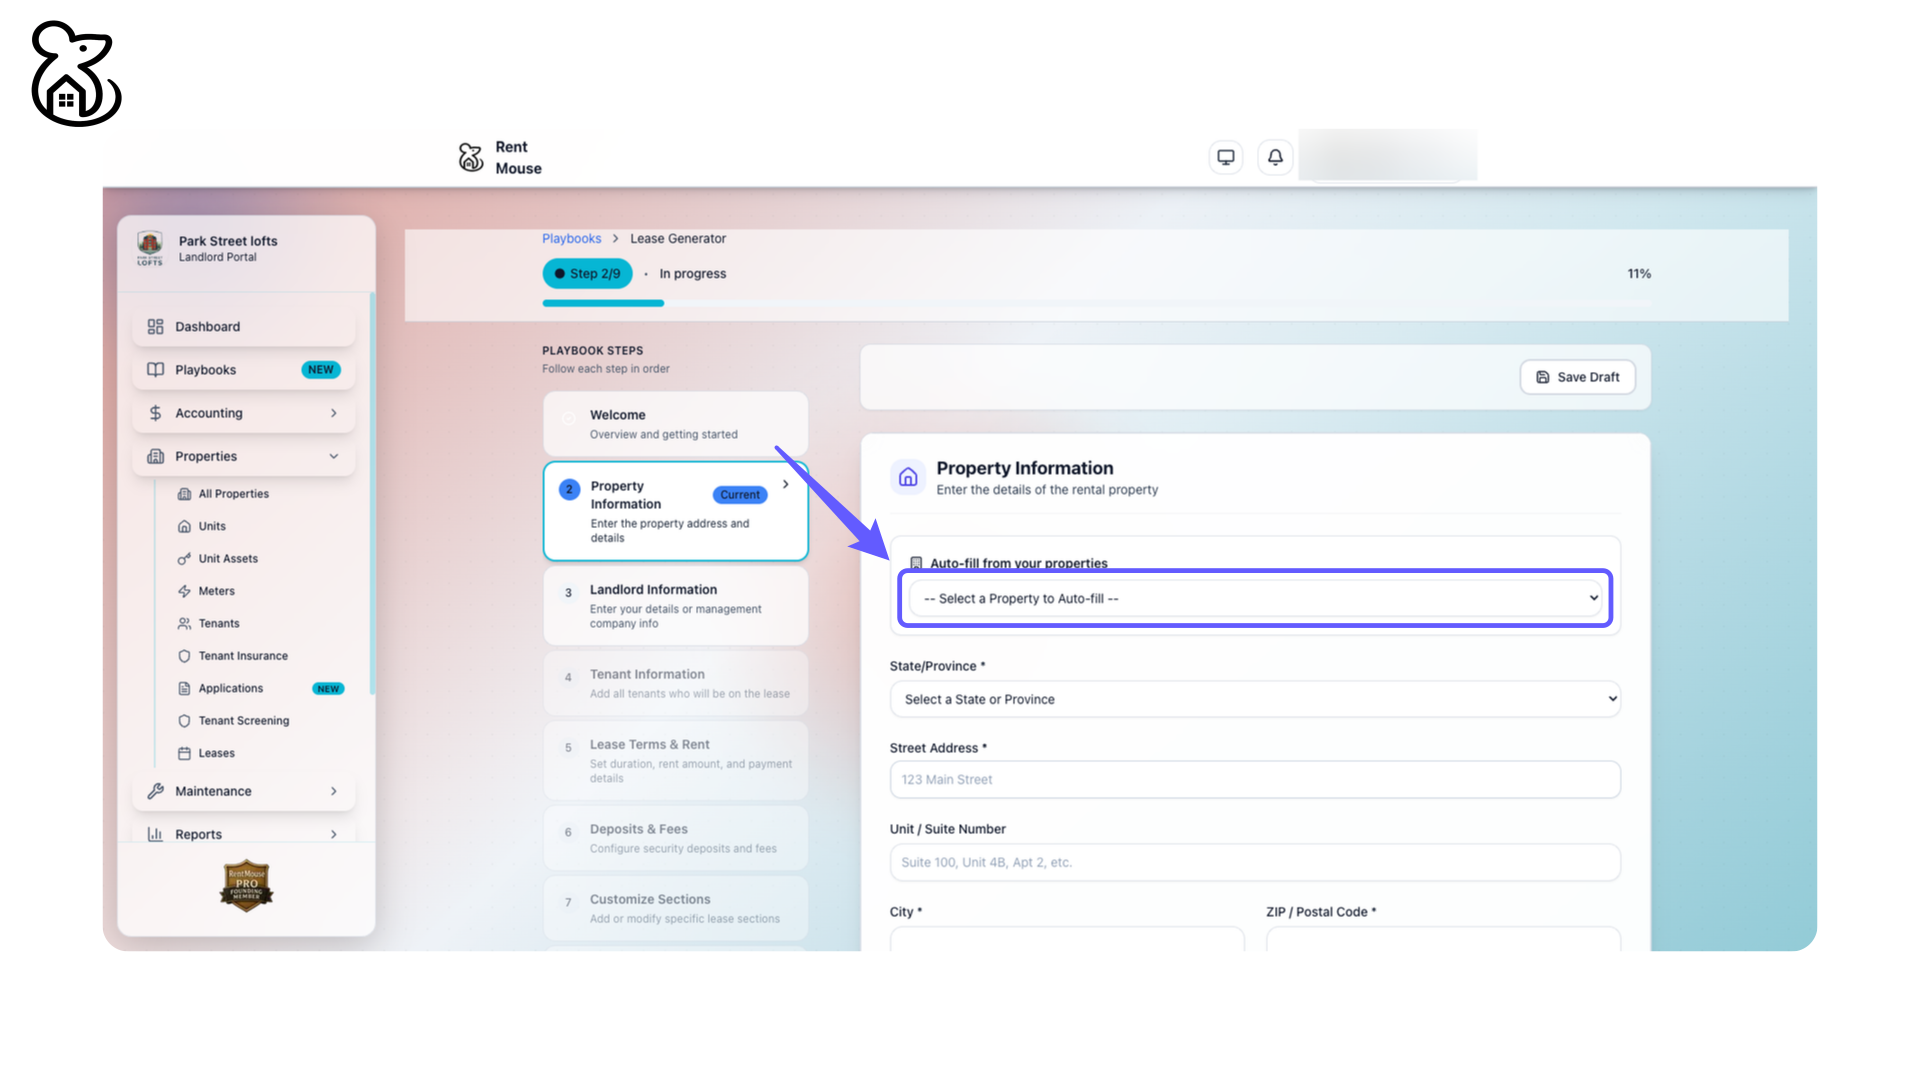
Step 6: Select Property for Auto-fill
Select a property to auto-fill the necessary information in the form.
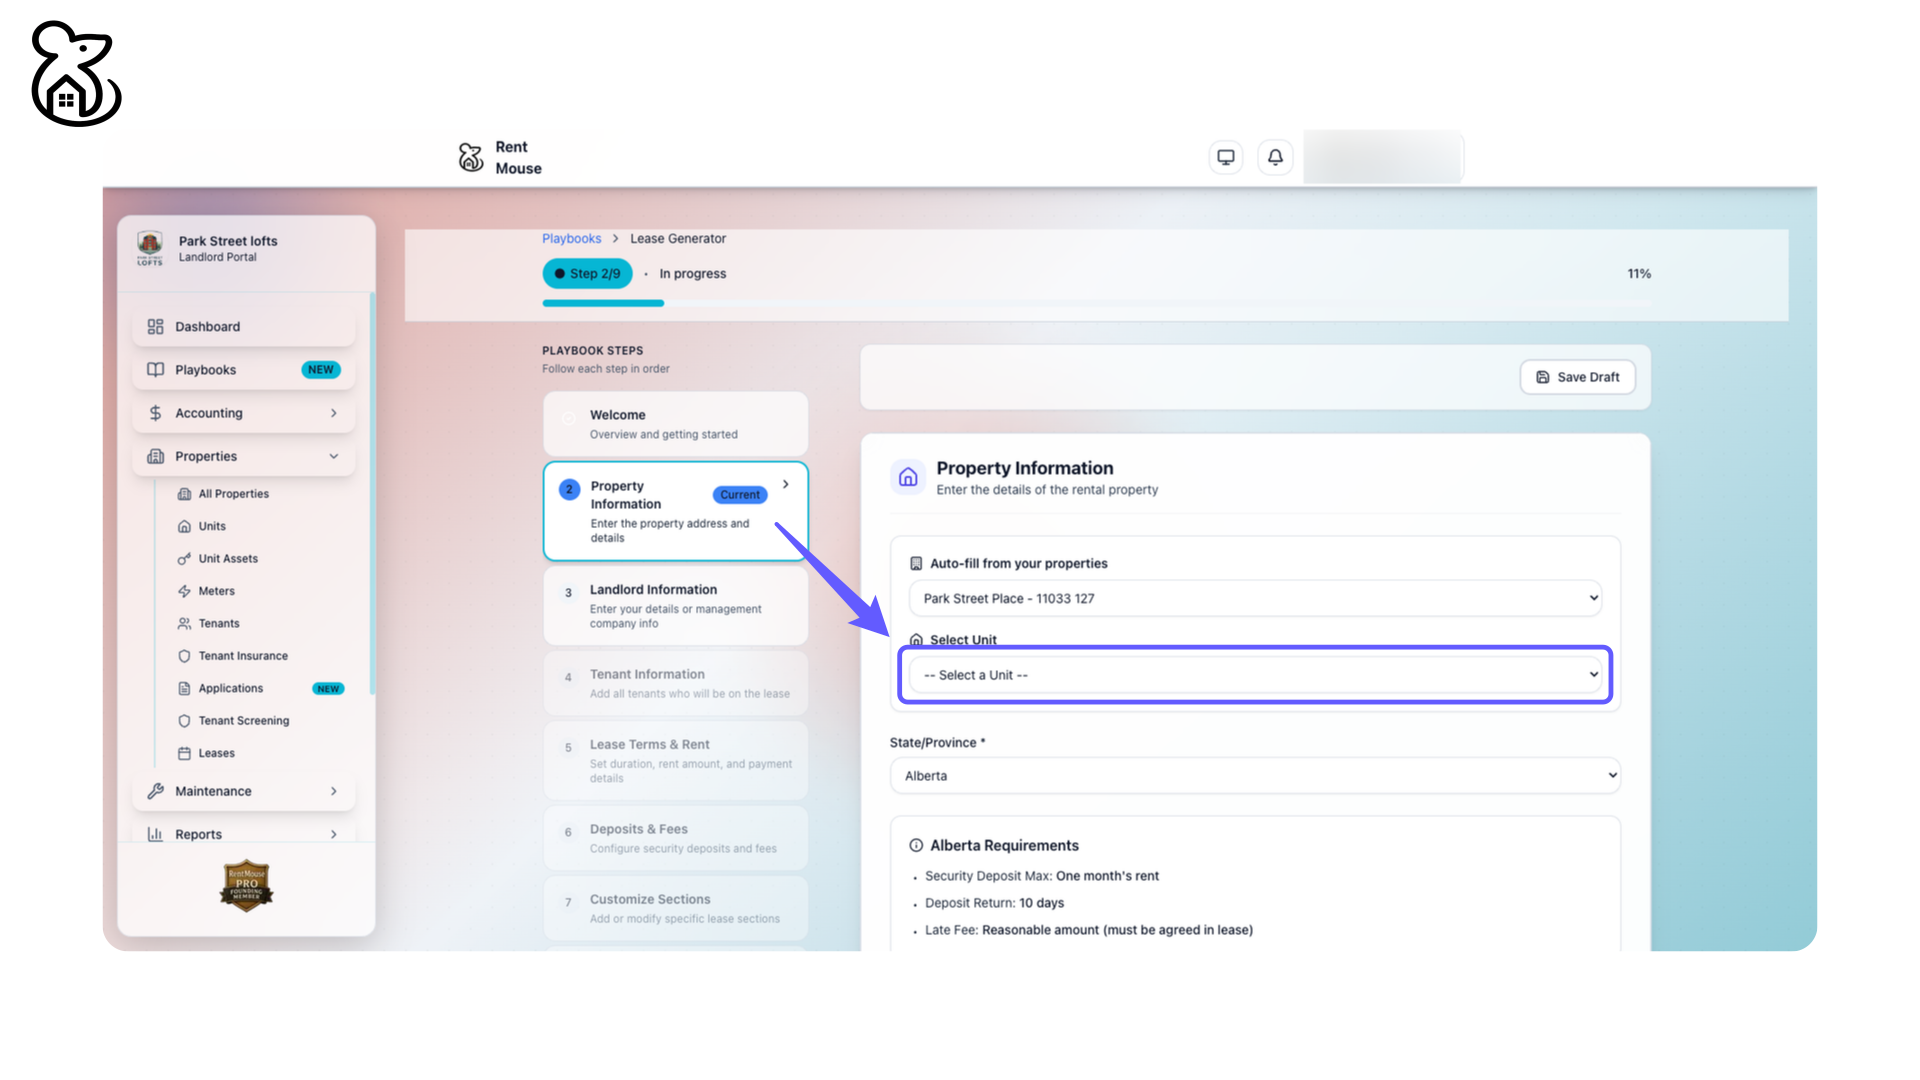
Step 7: Select a Unit
Choose a unit from the dropdown menu to proceed with adding property details.
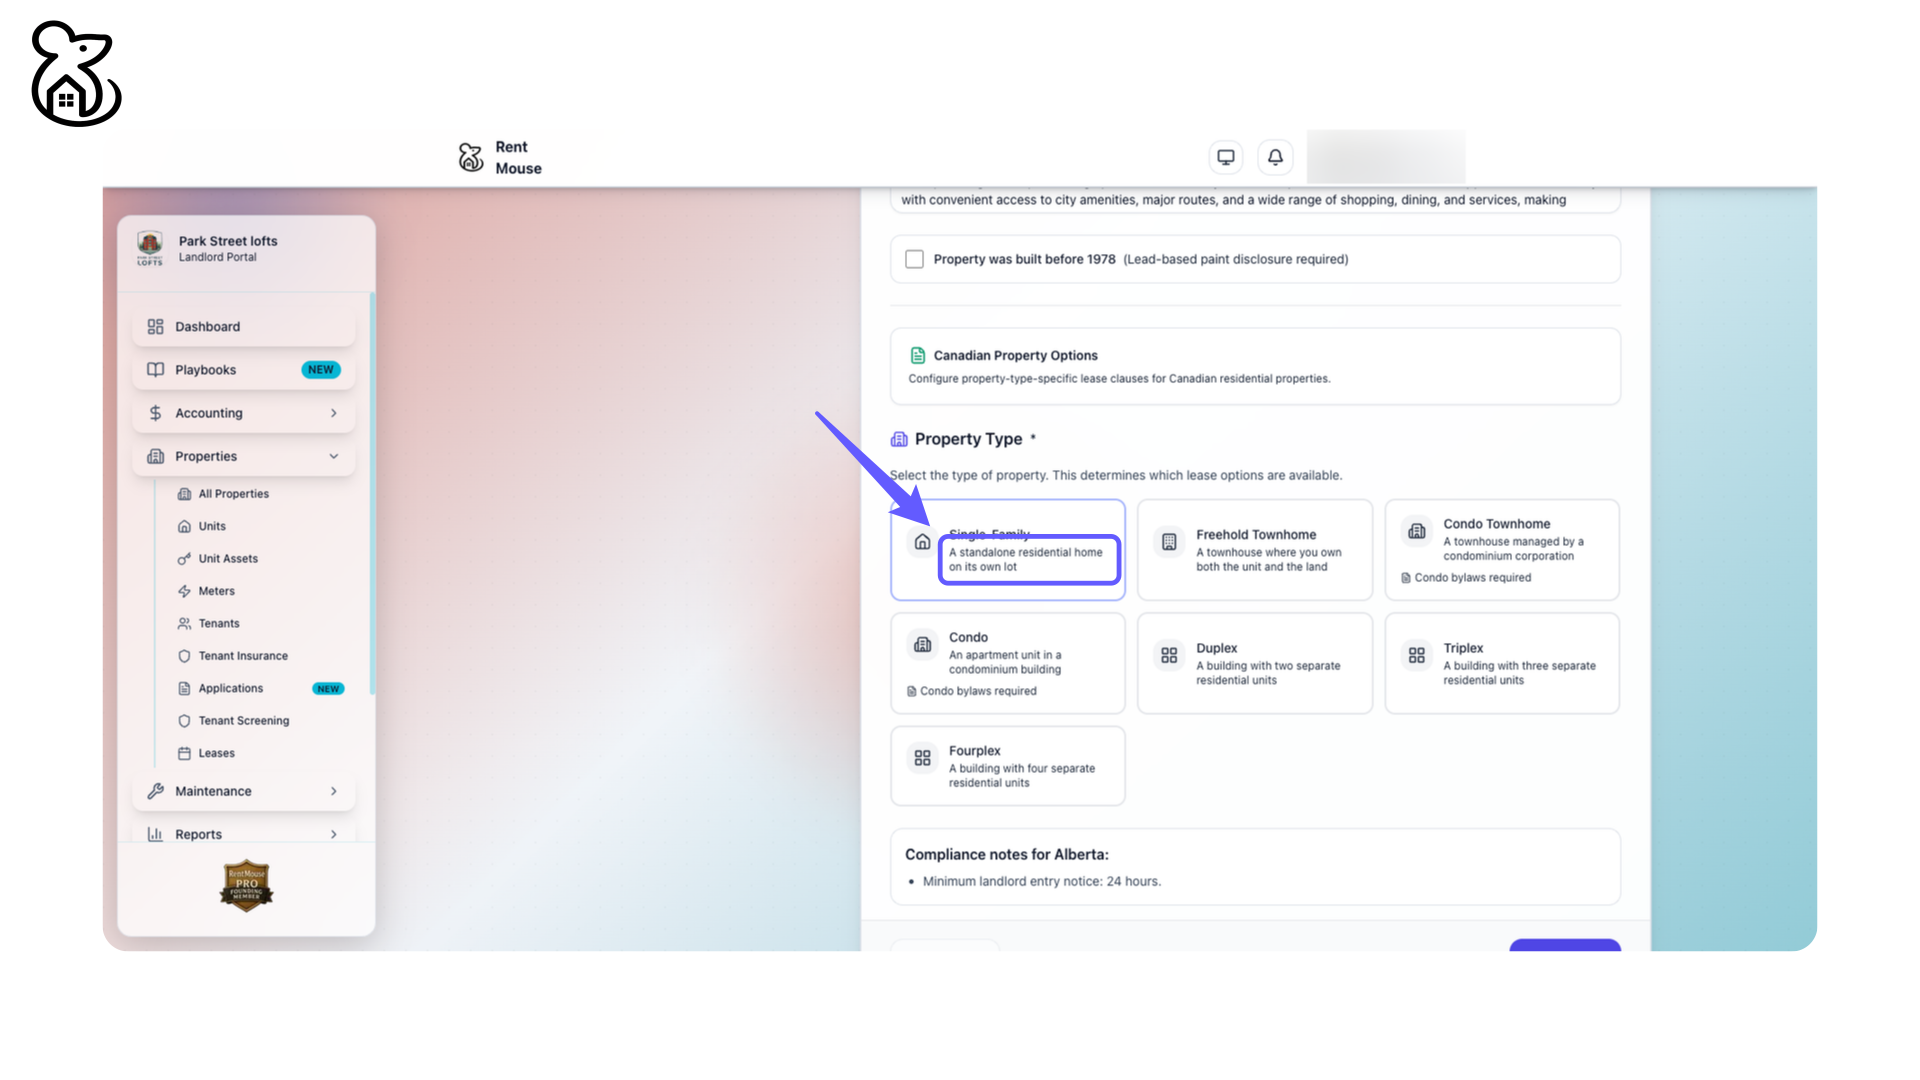
Step 8: Select Property Type
Select 'Single-Family' to designate a standalone residential home on its own lot.
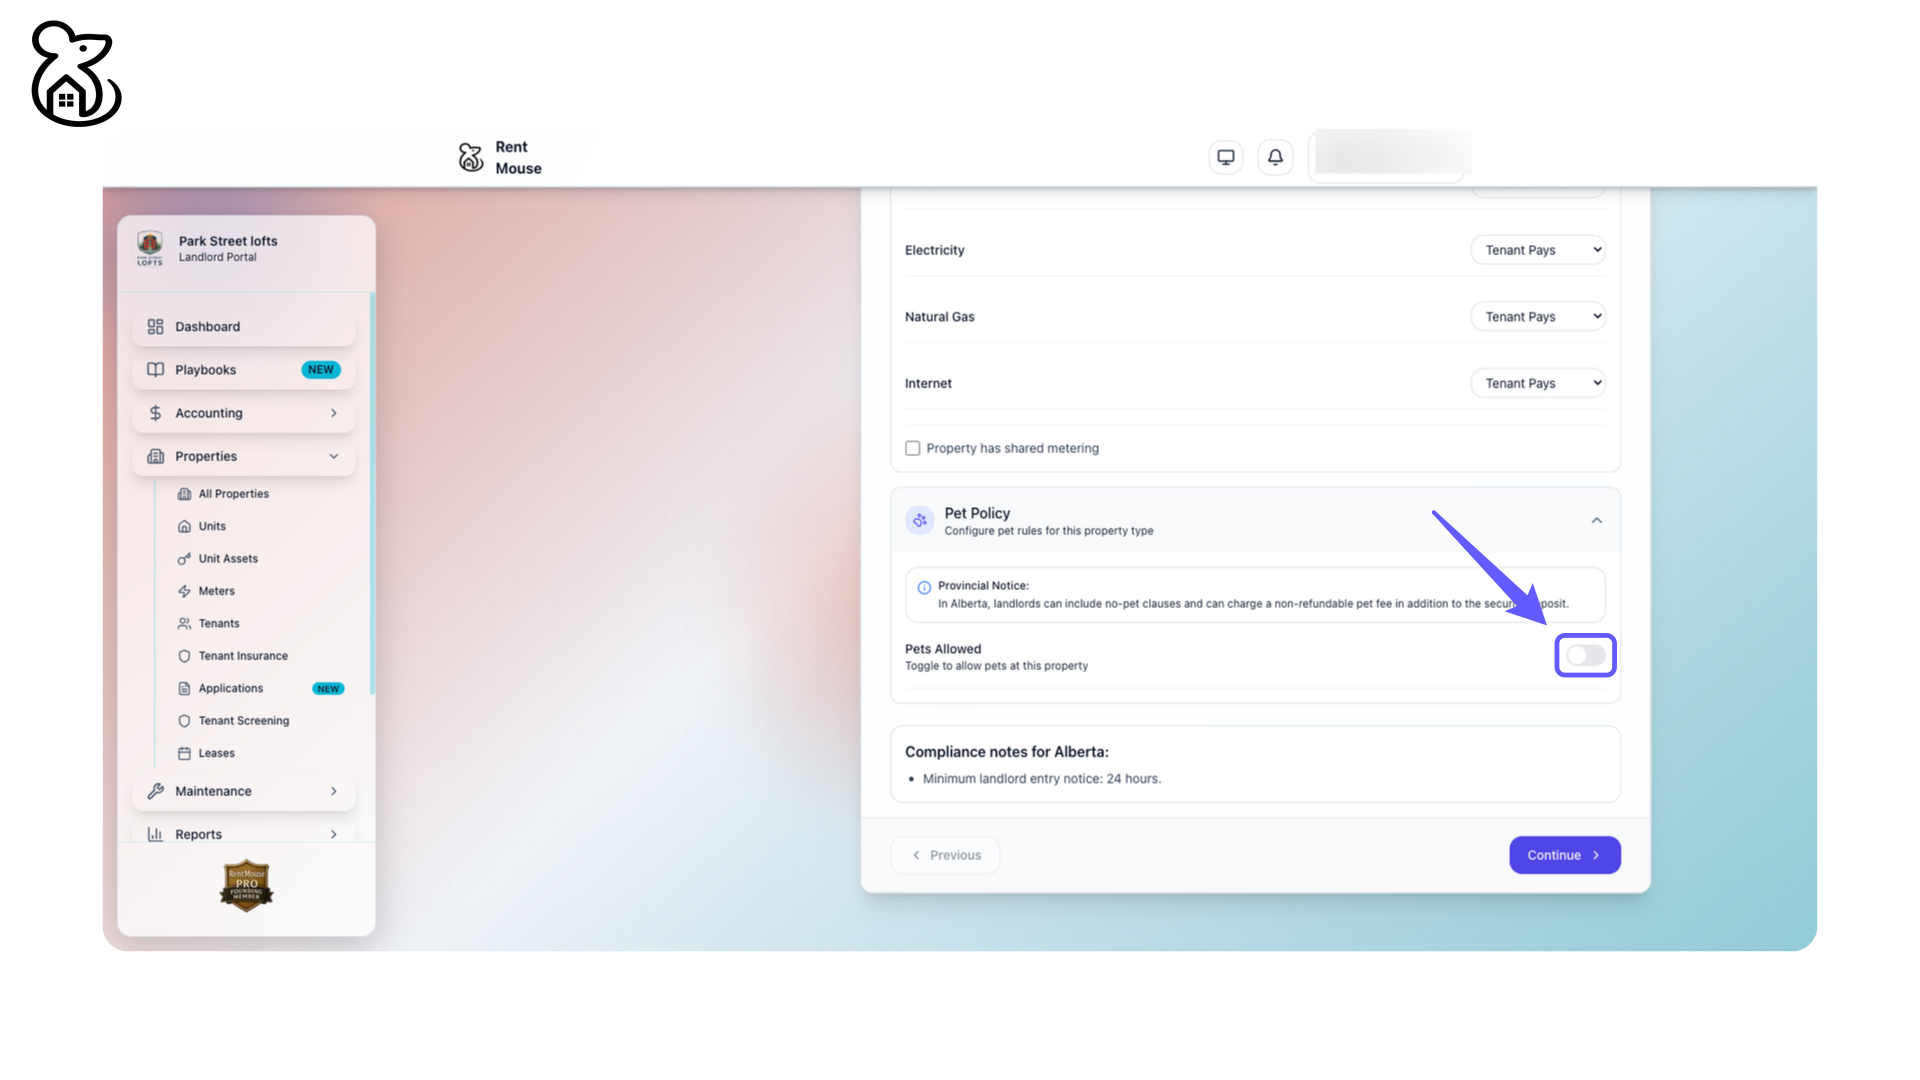
Step 9: Enable Pet Policy
Toggle to allow pets at this property.
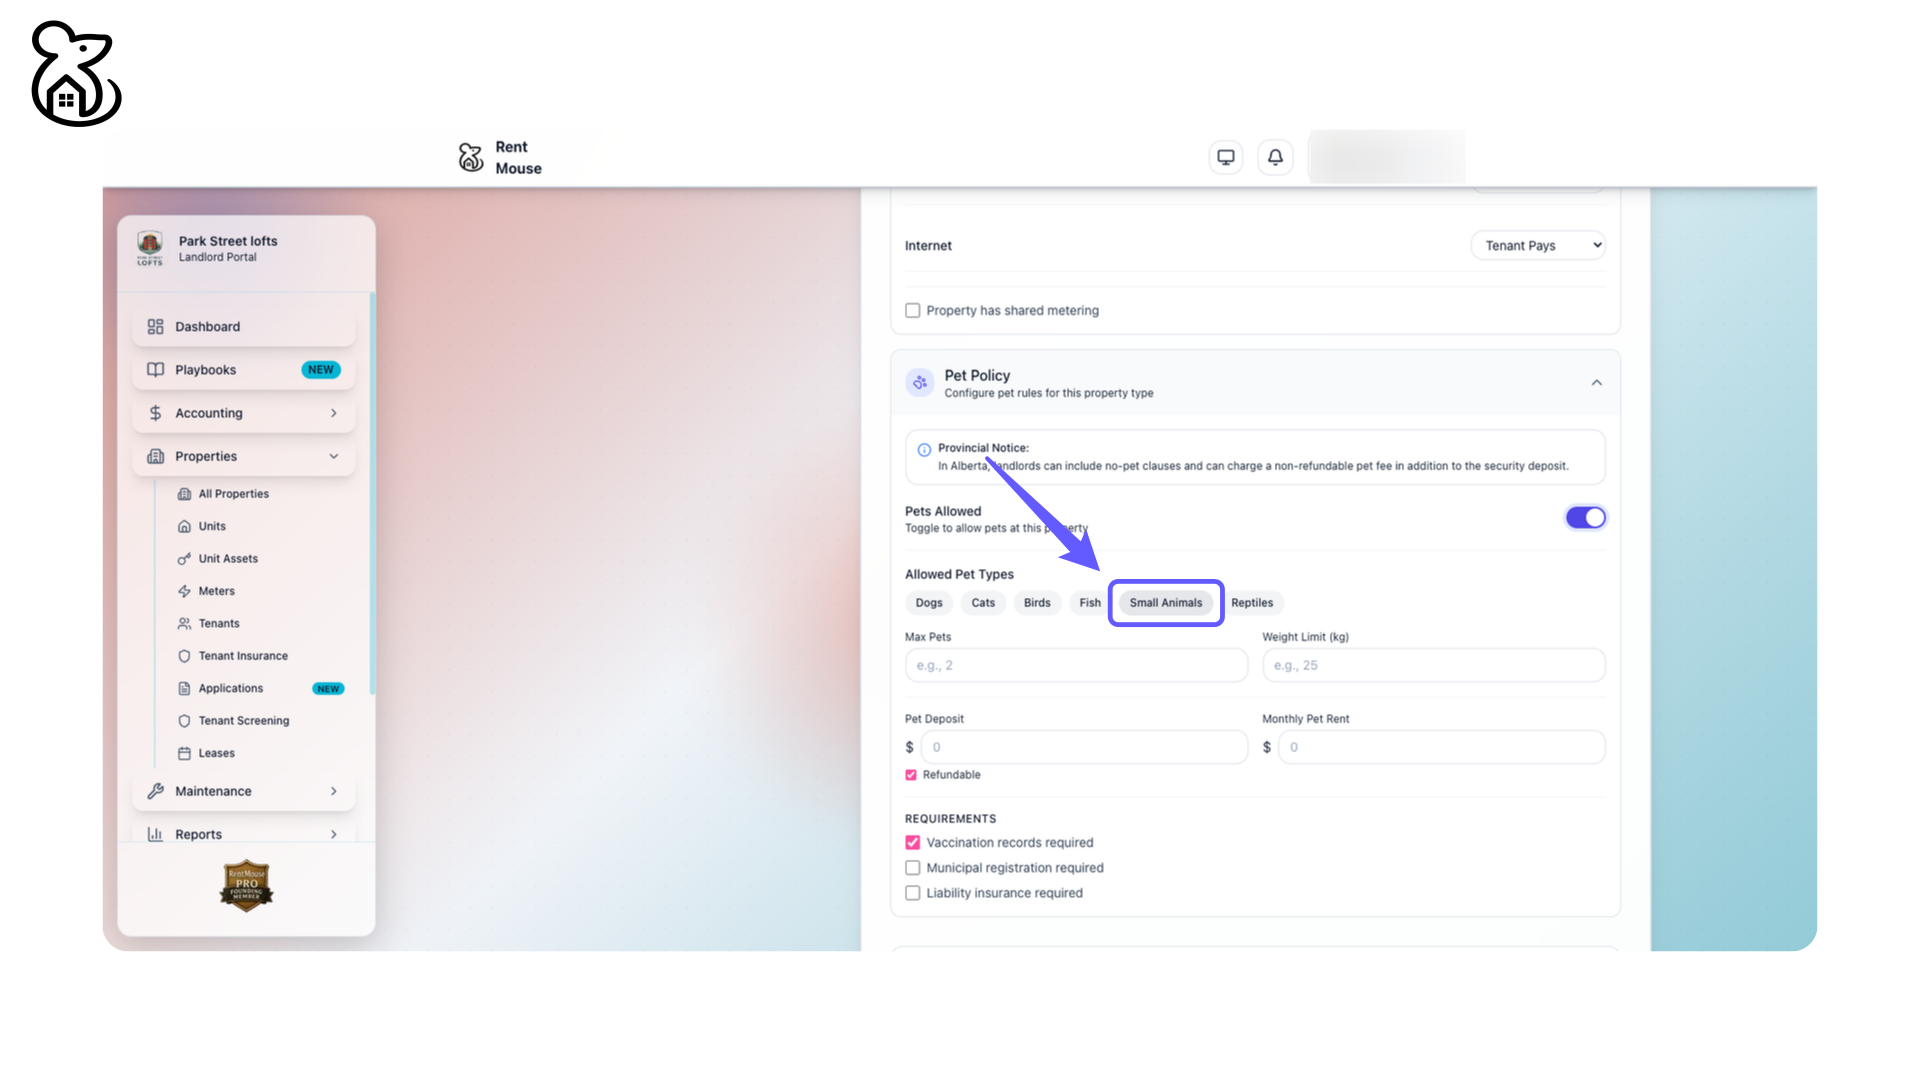
Step 10: Select Allowed Pet Type
Click 'Small Animals' to define this as an allowed pet type for the property.
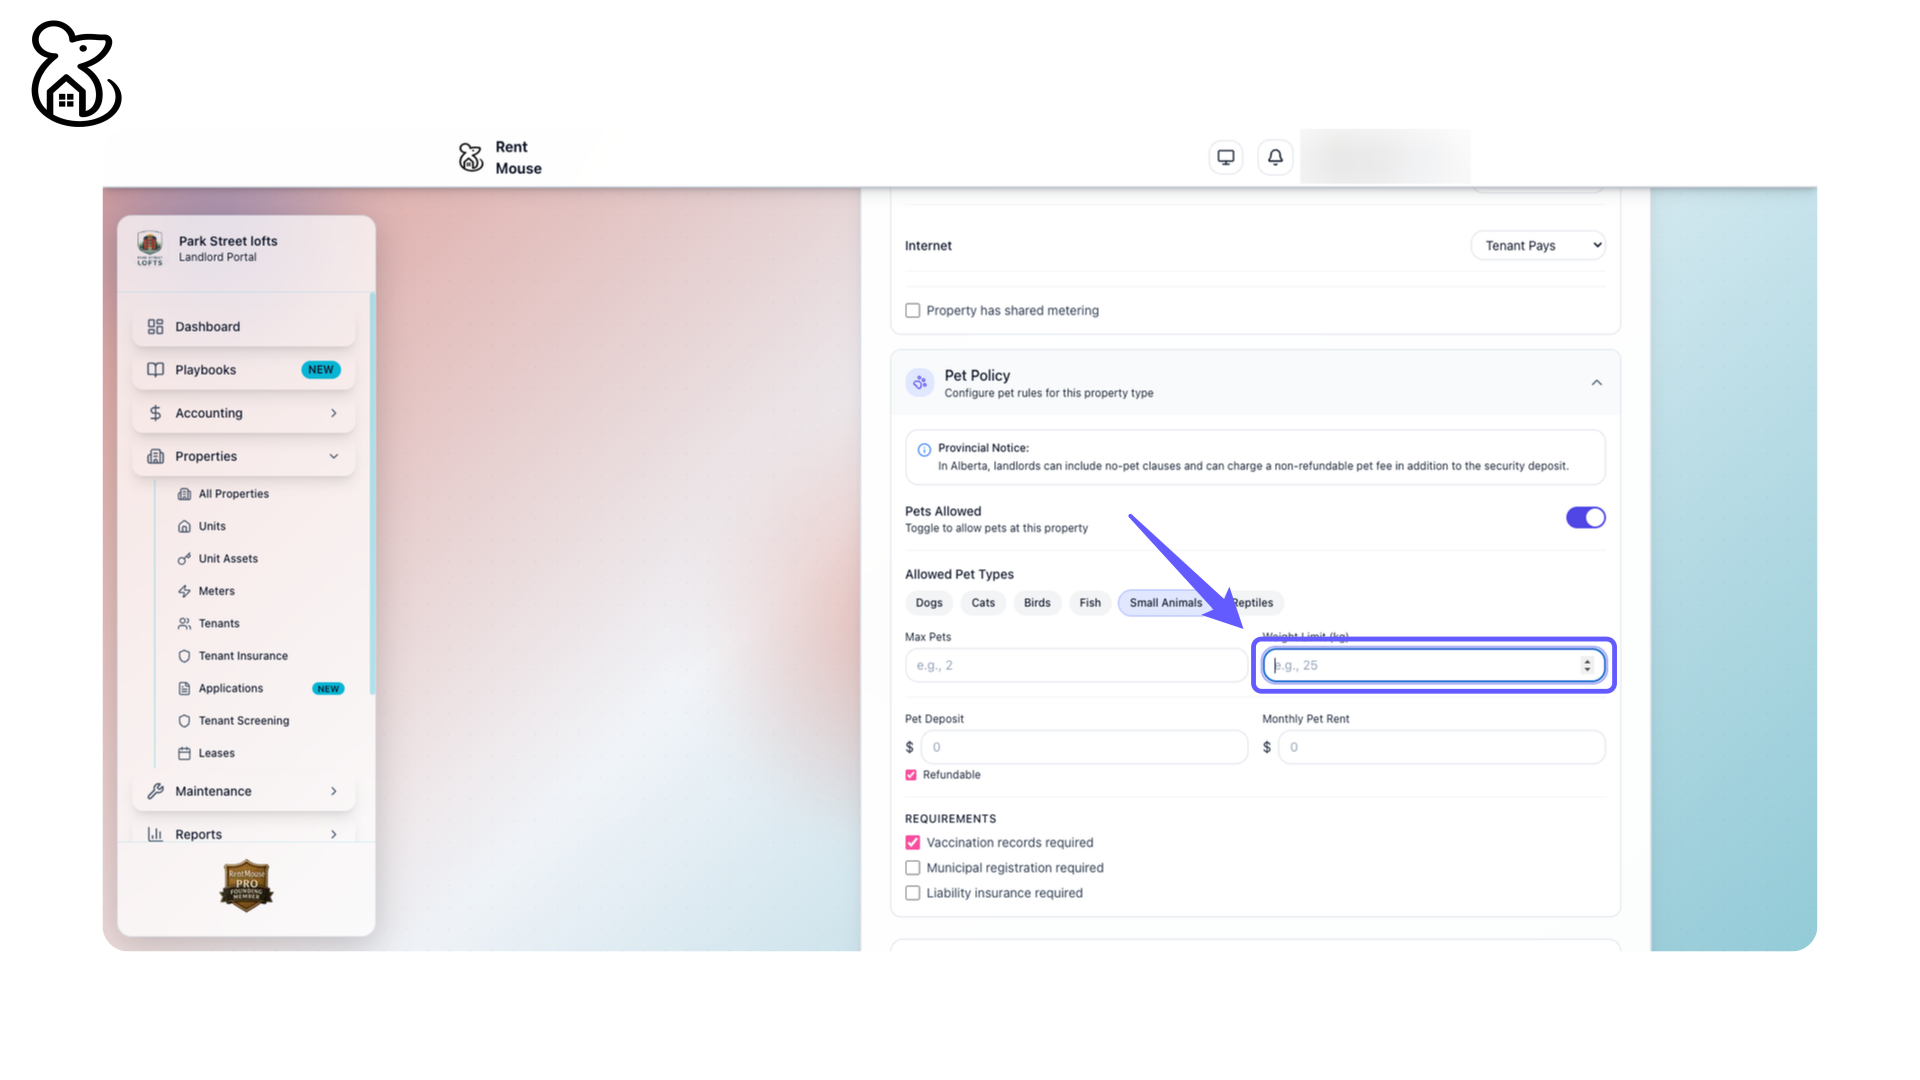
Step 11: Set Pet Weight Limit
Enter the maximum weight limit for pets in kilograms, e.g., 25.
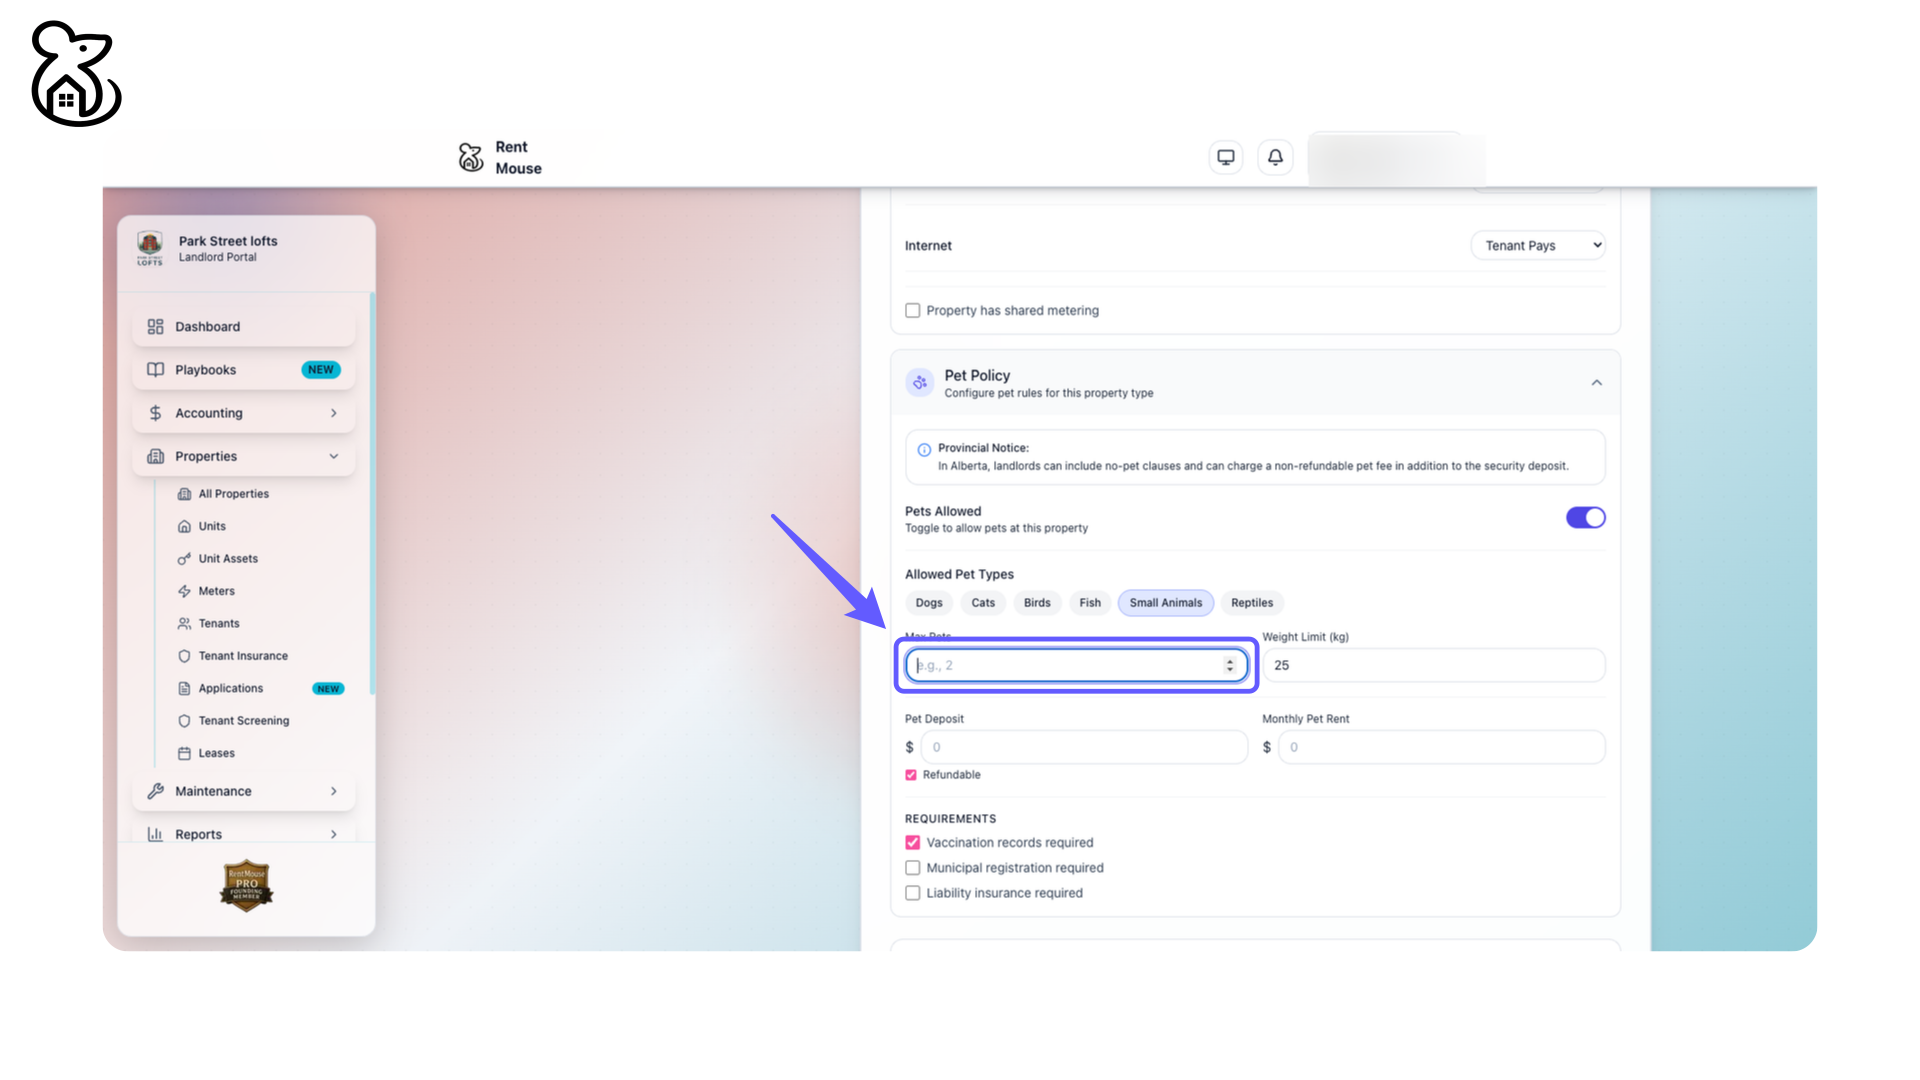
Step 12: Set Maximum Pets Allowed
Specify the maximum number of pets allowed by entering a number in the provided field.
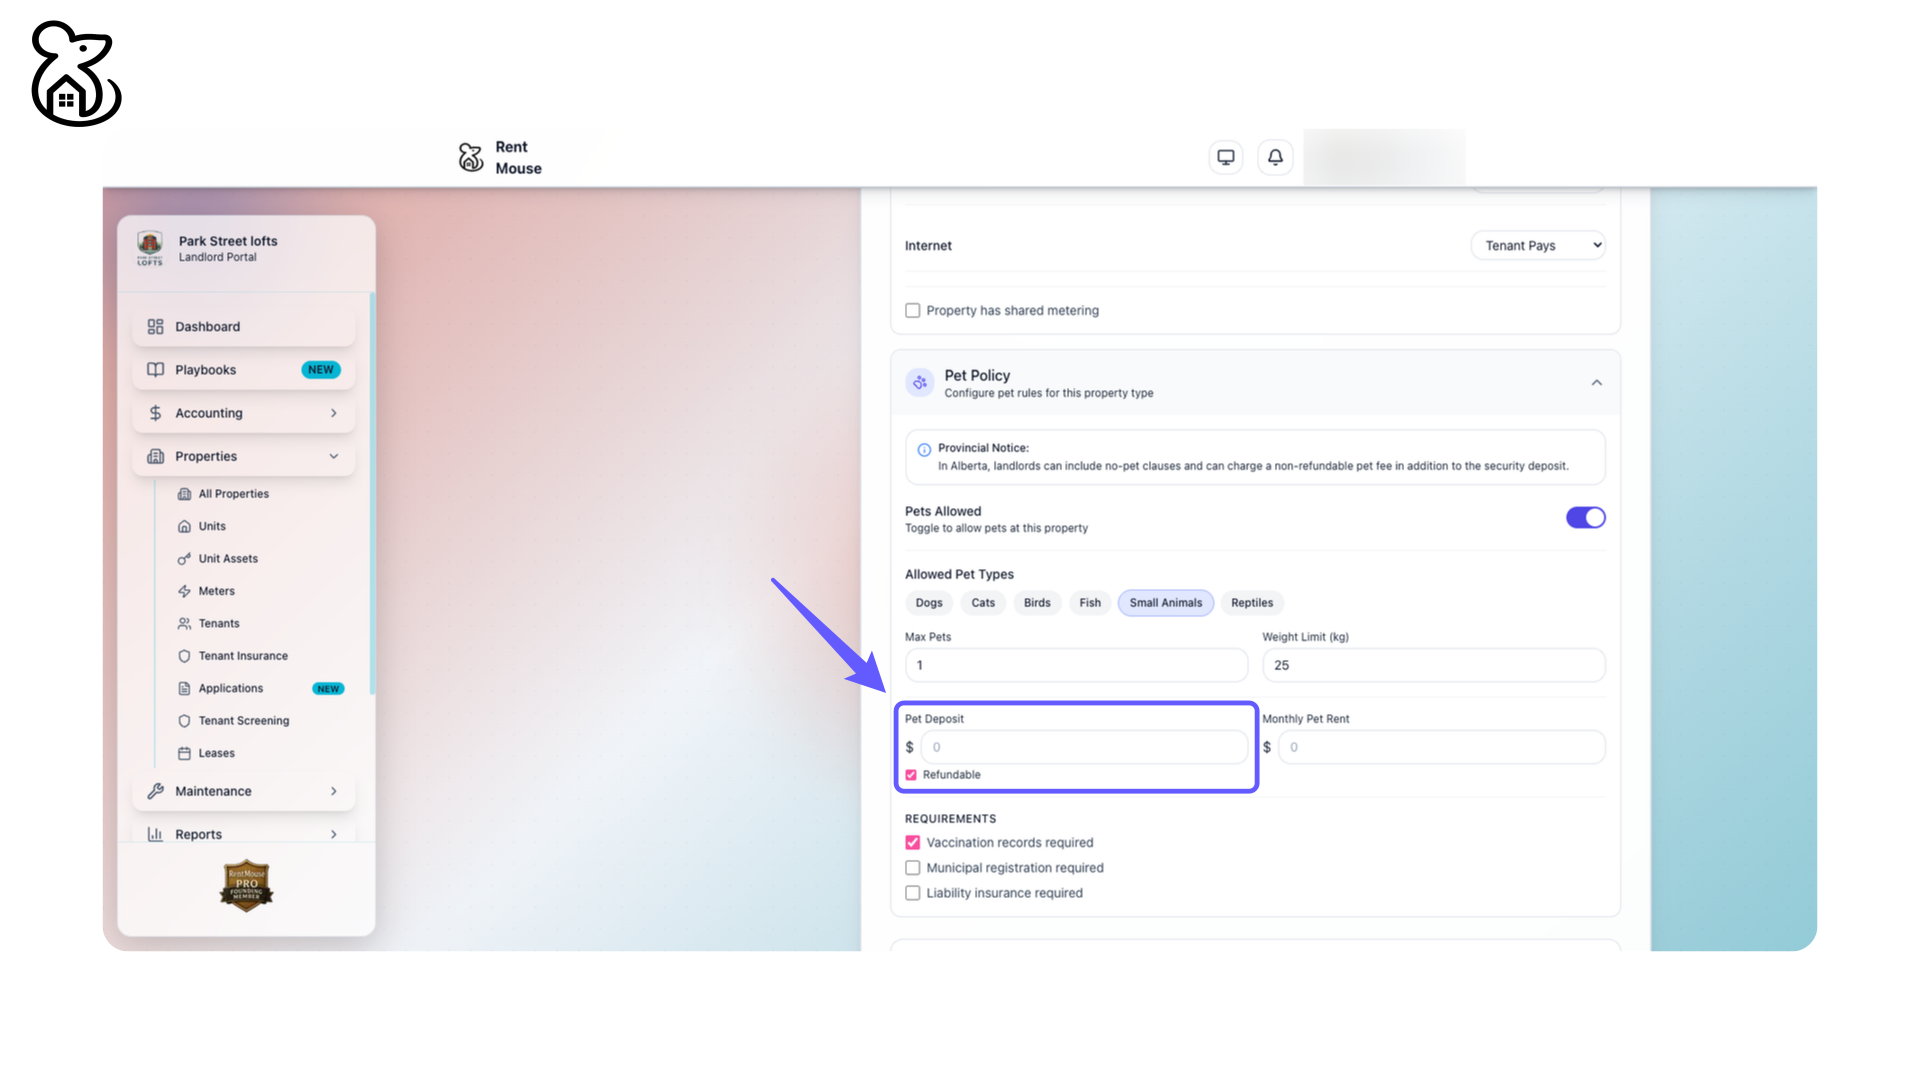
Step 13: Configure Pet Deposit
Enter the pet deposit amount and check the 'Refundable' box if applicable.
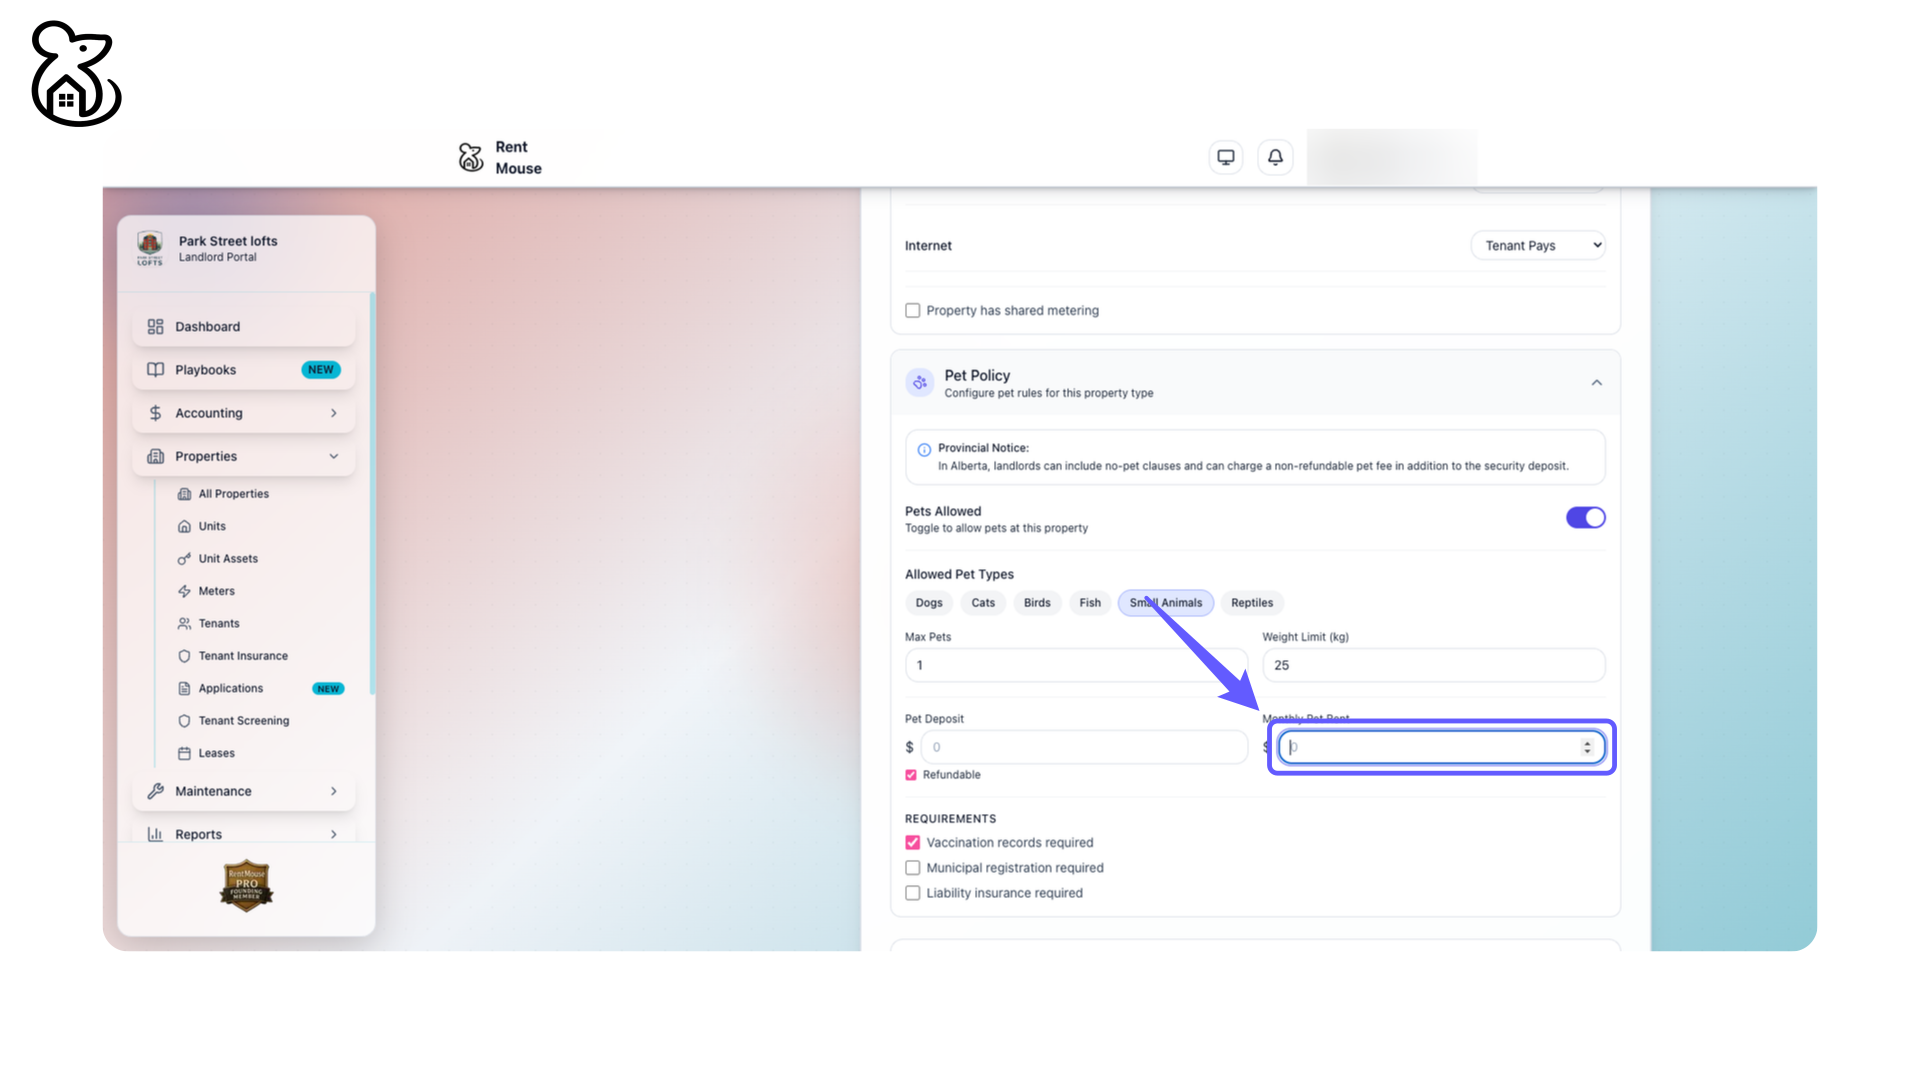
Step 14: Set Monthly Pet Rent Amount
Enter the desired amount for the monthly pet rent in the provided input field.
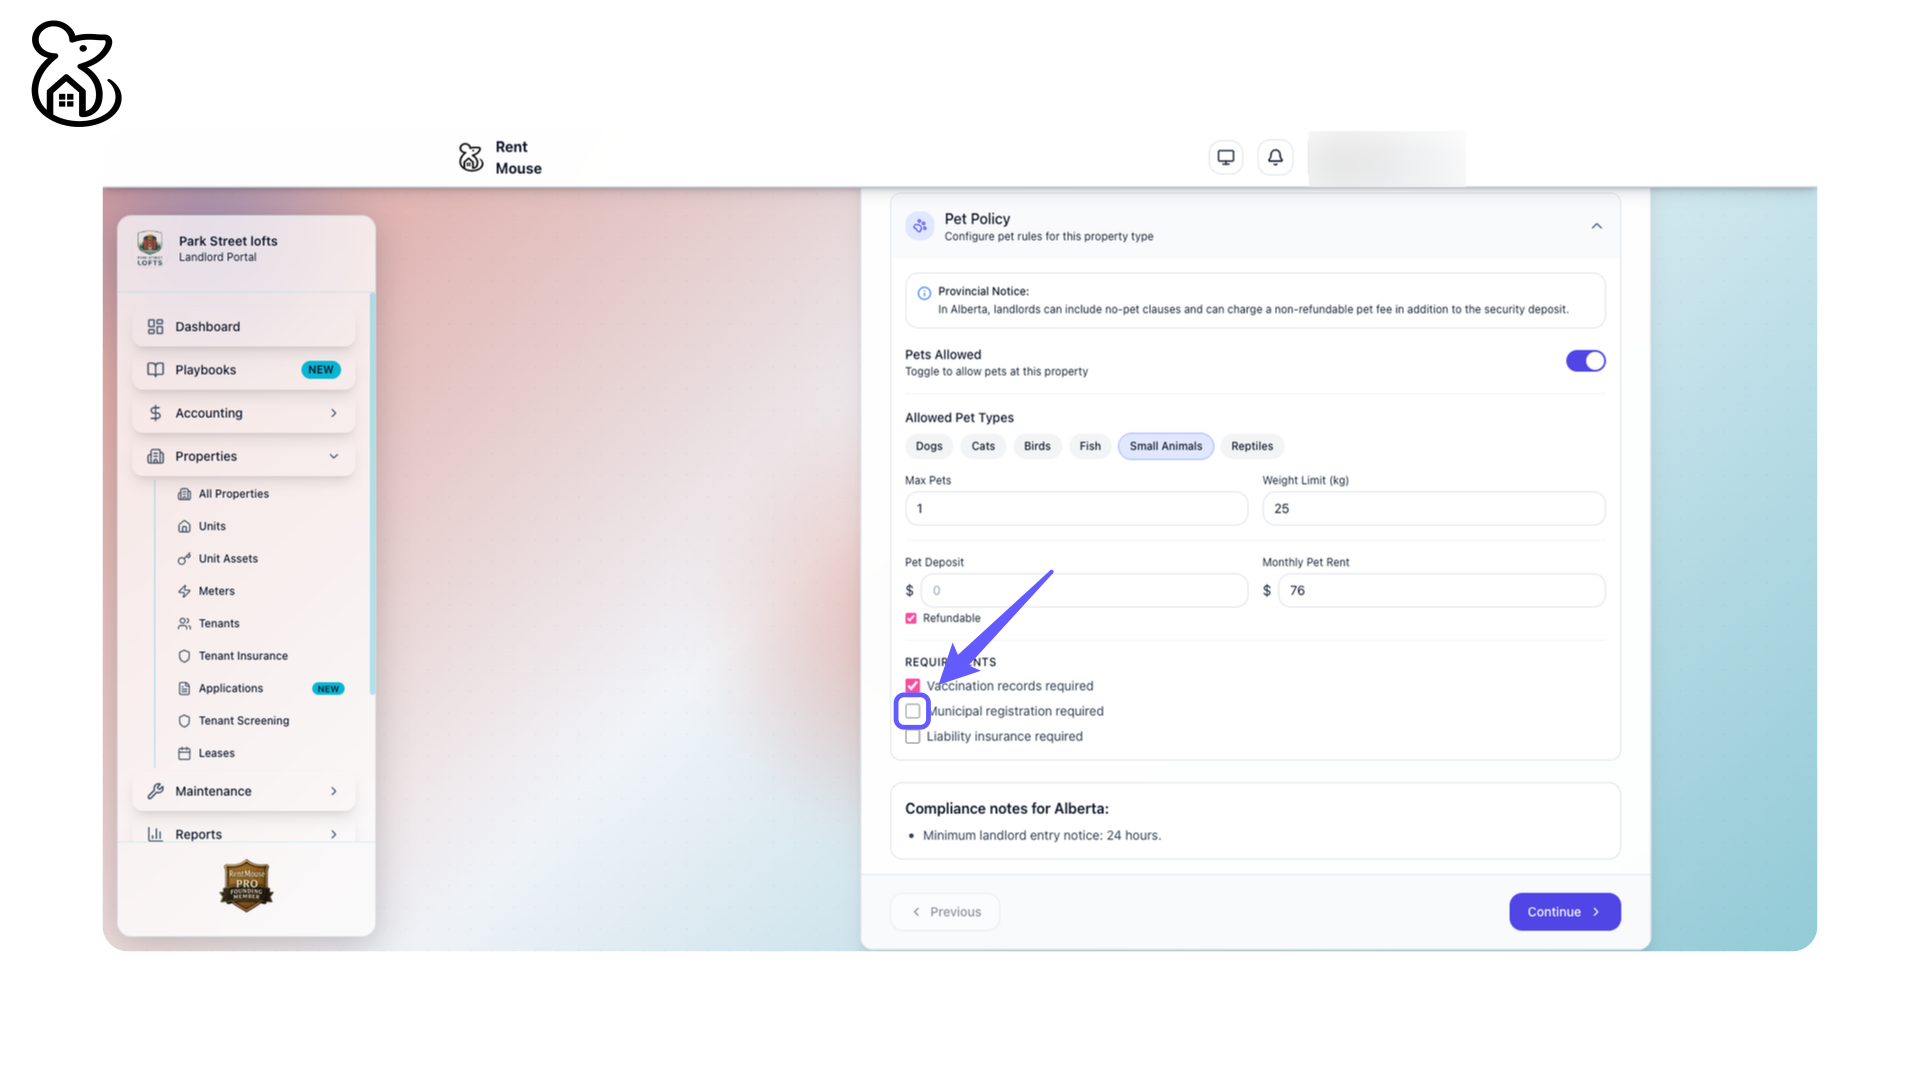
Step 15: Select Vaccination Records Option
Check the option for 'Vaccination records required' under the pet policy requirements.
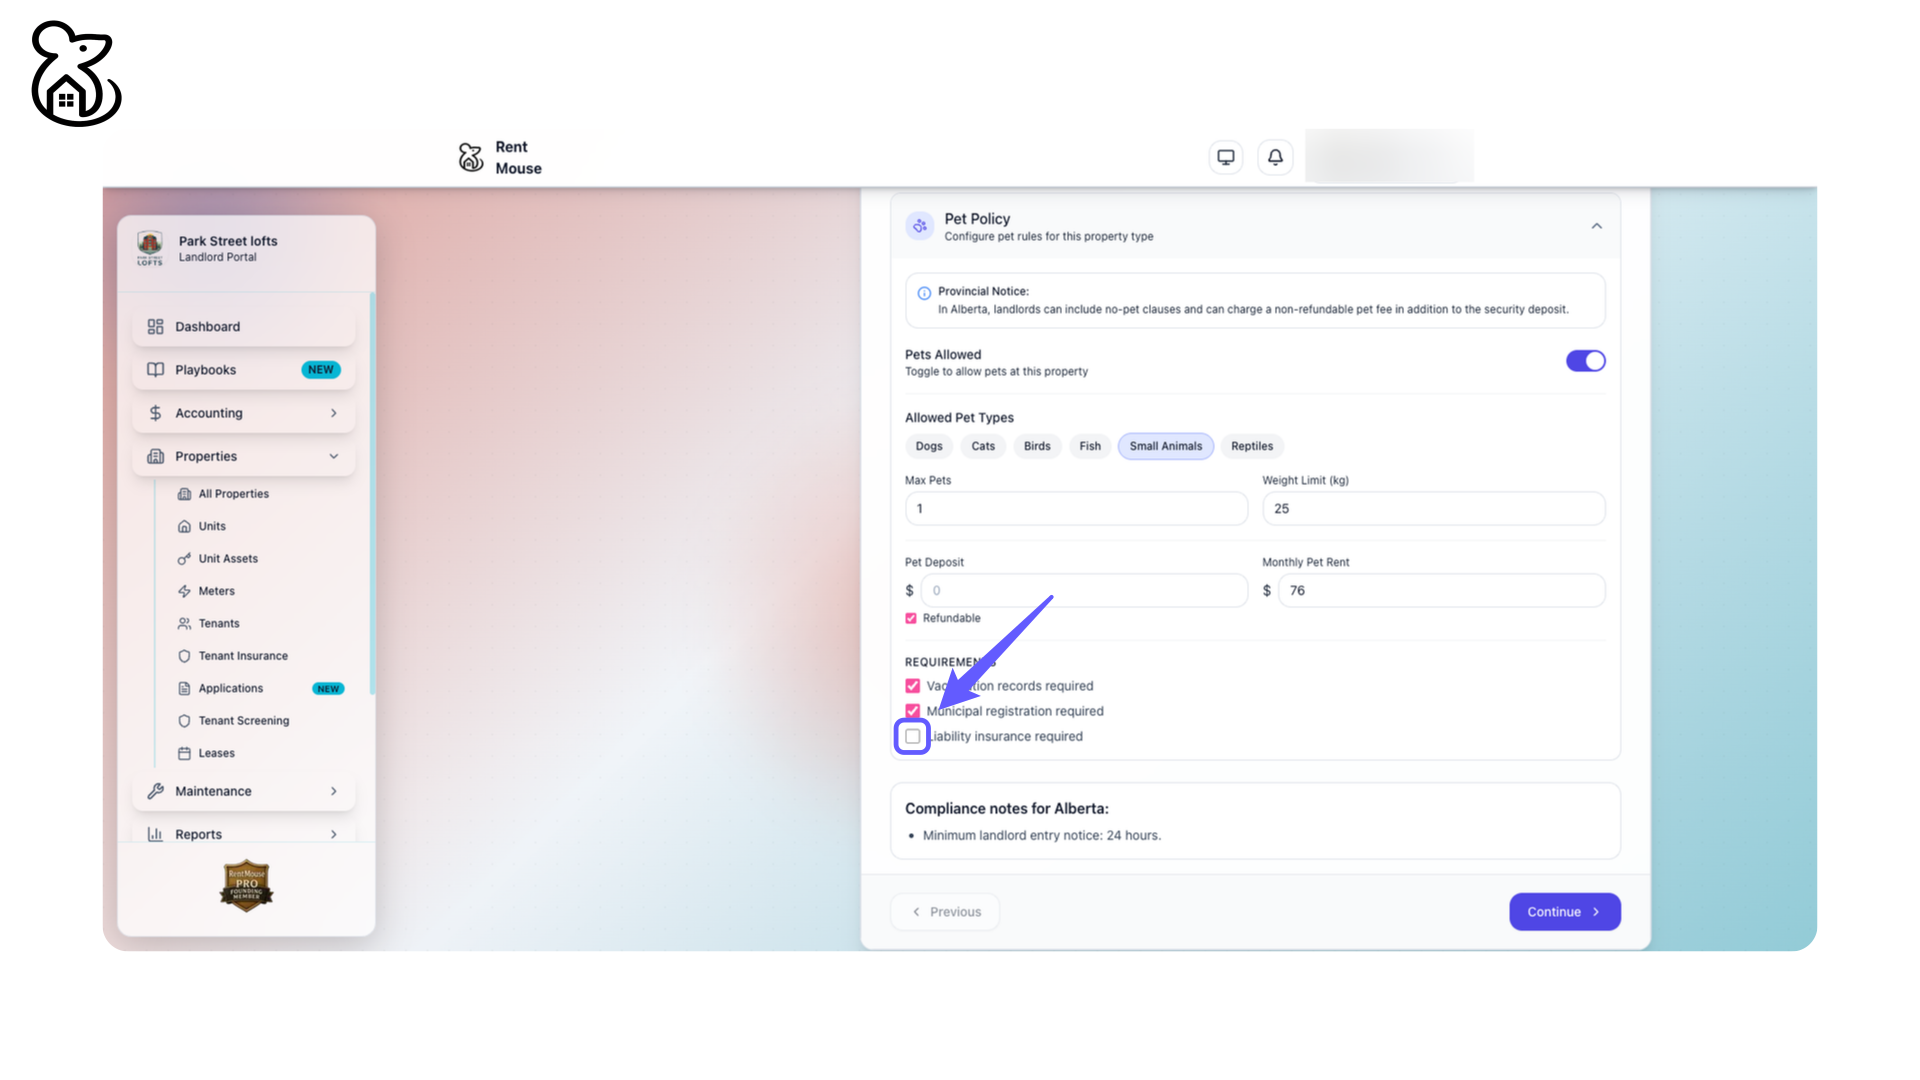
Step 16: Check Liability Insurance Requirement
Select the option to require liability insurance for pet approval.
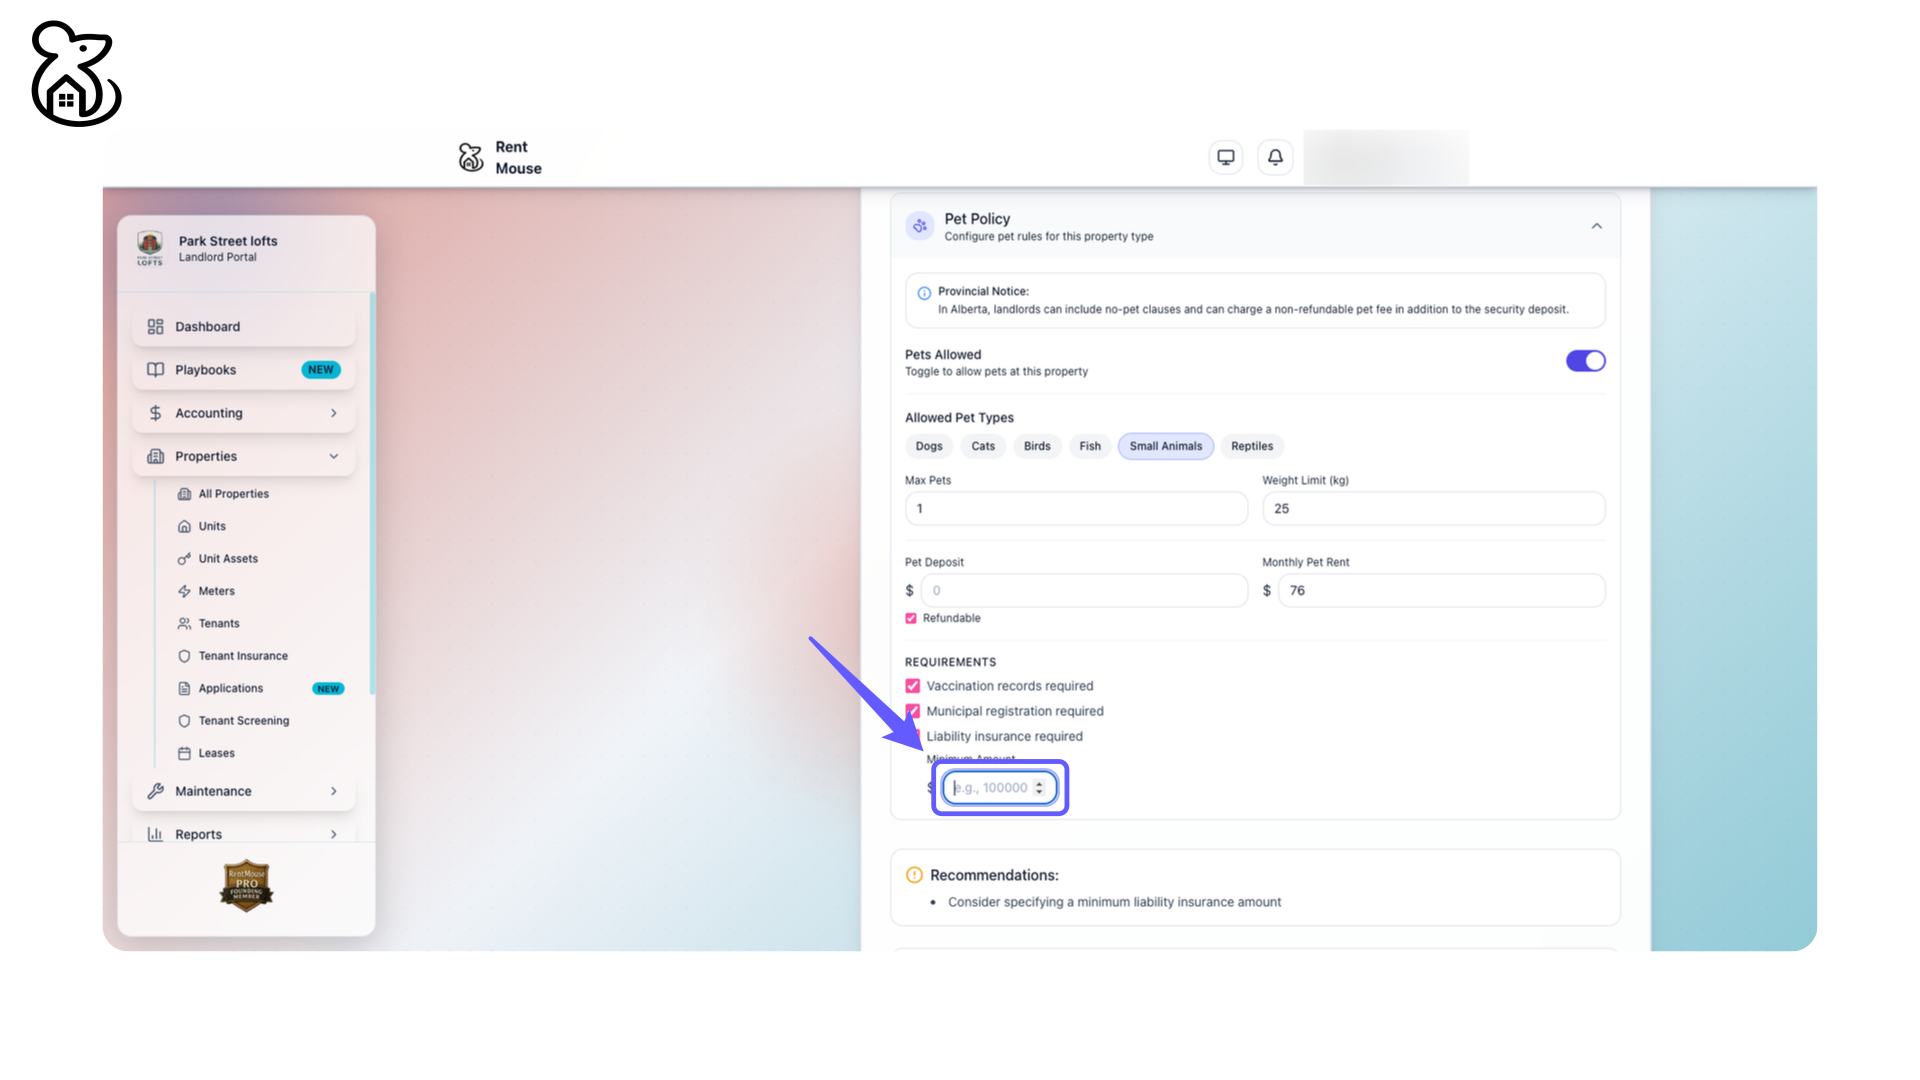
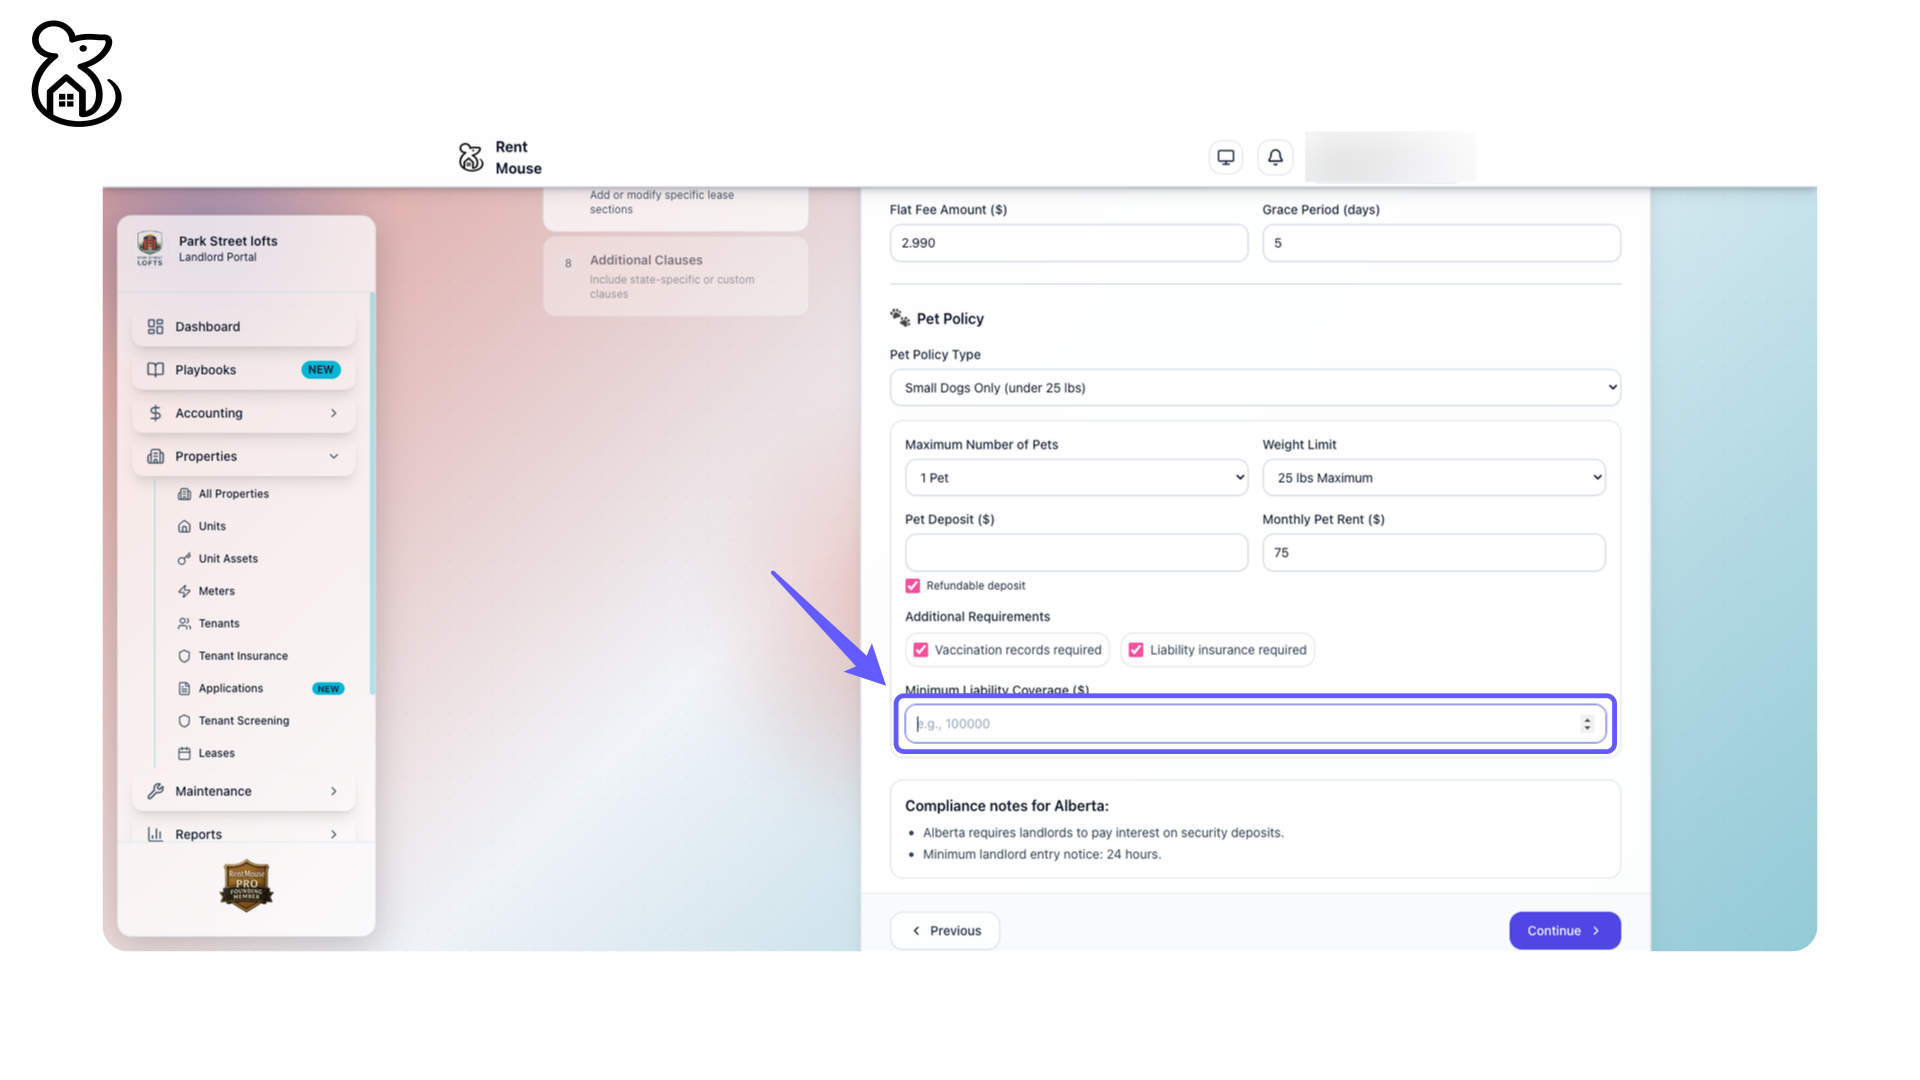
Step 17: Set Minimum Liability Insurance
Enter the minimum liability insurance amount required for renting the property.
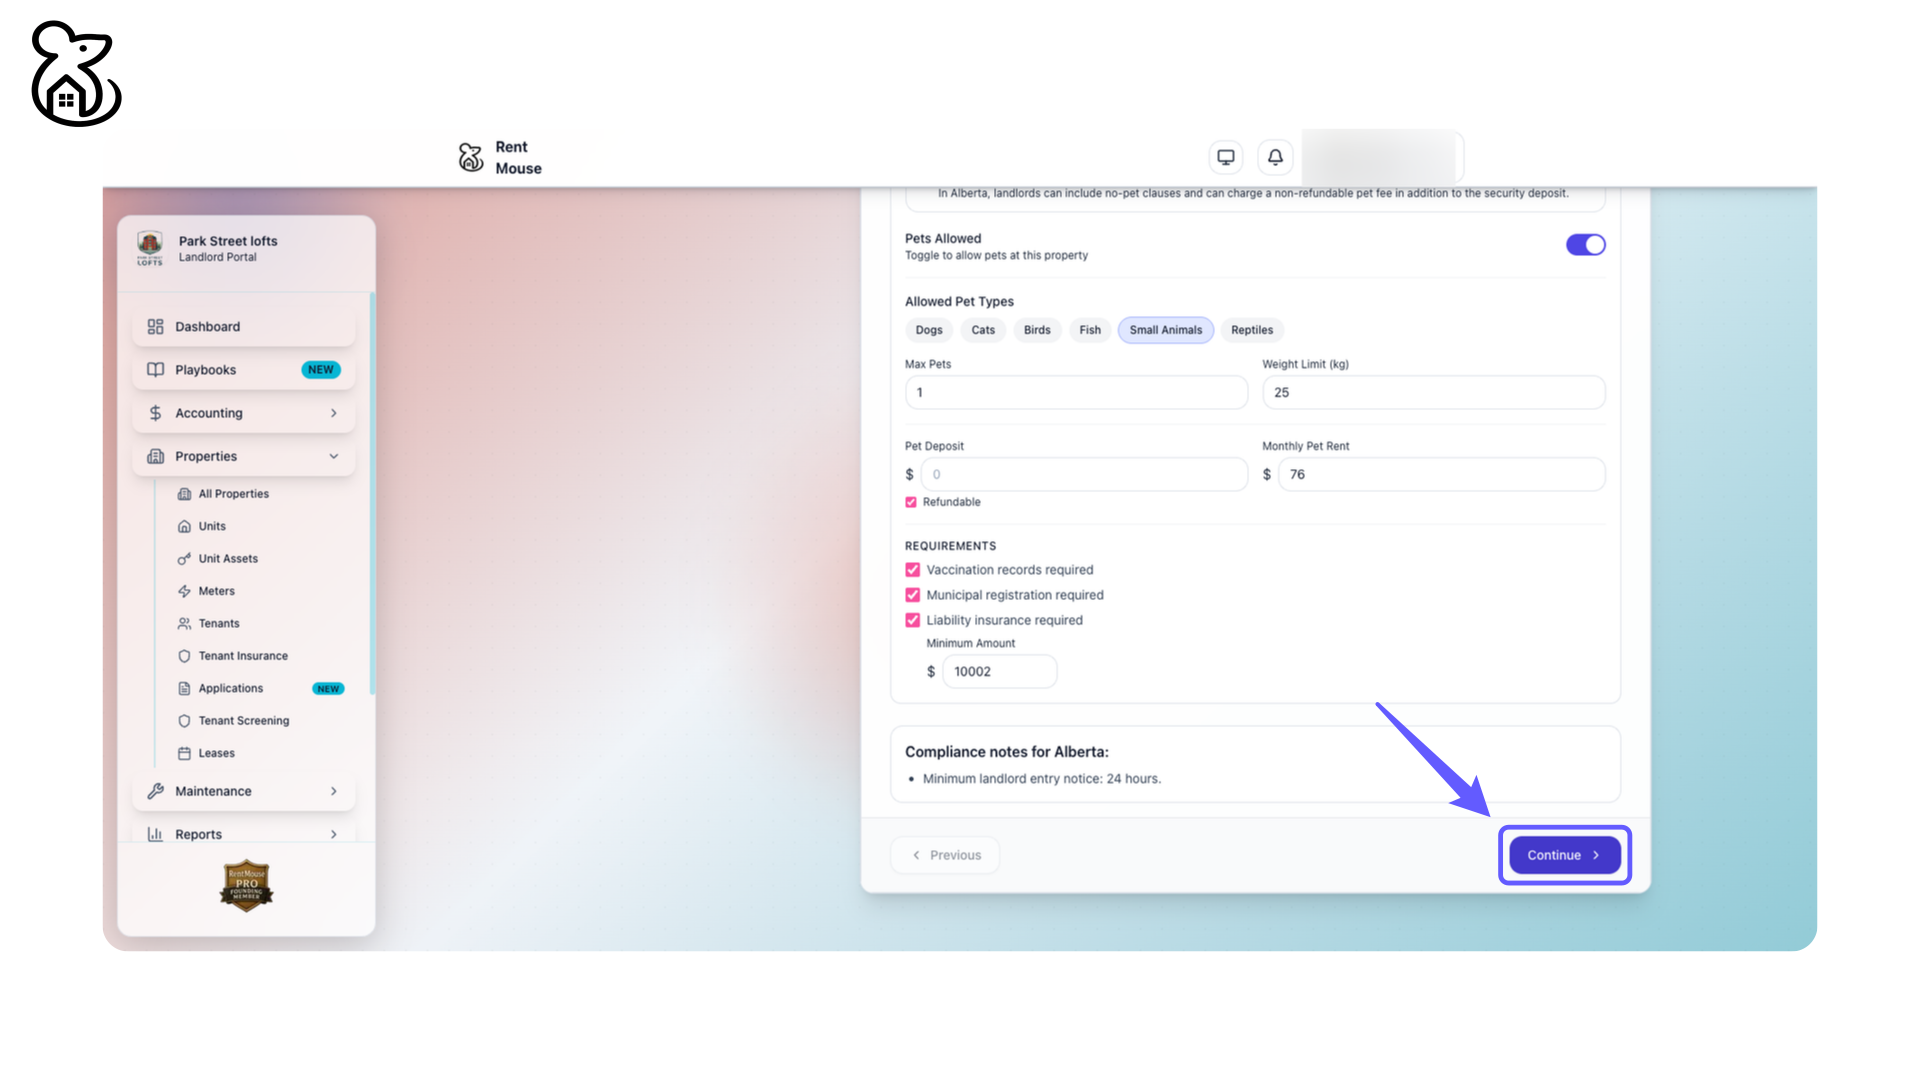
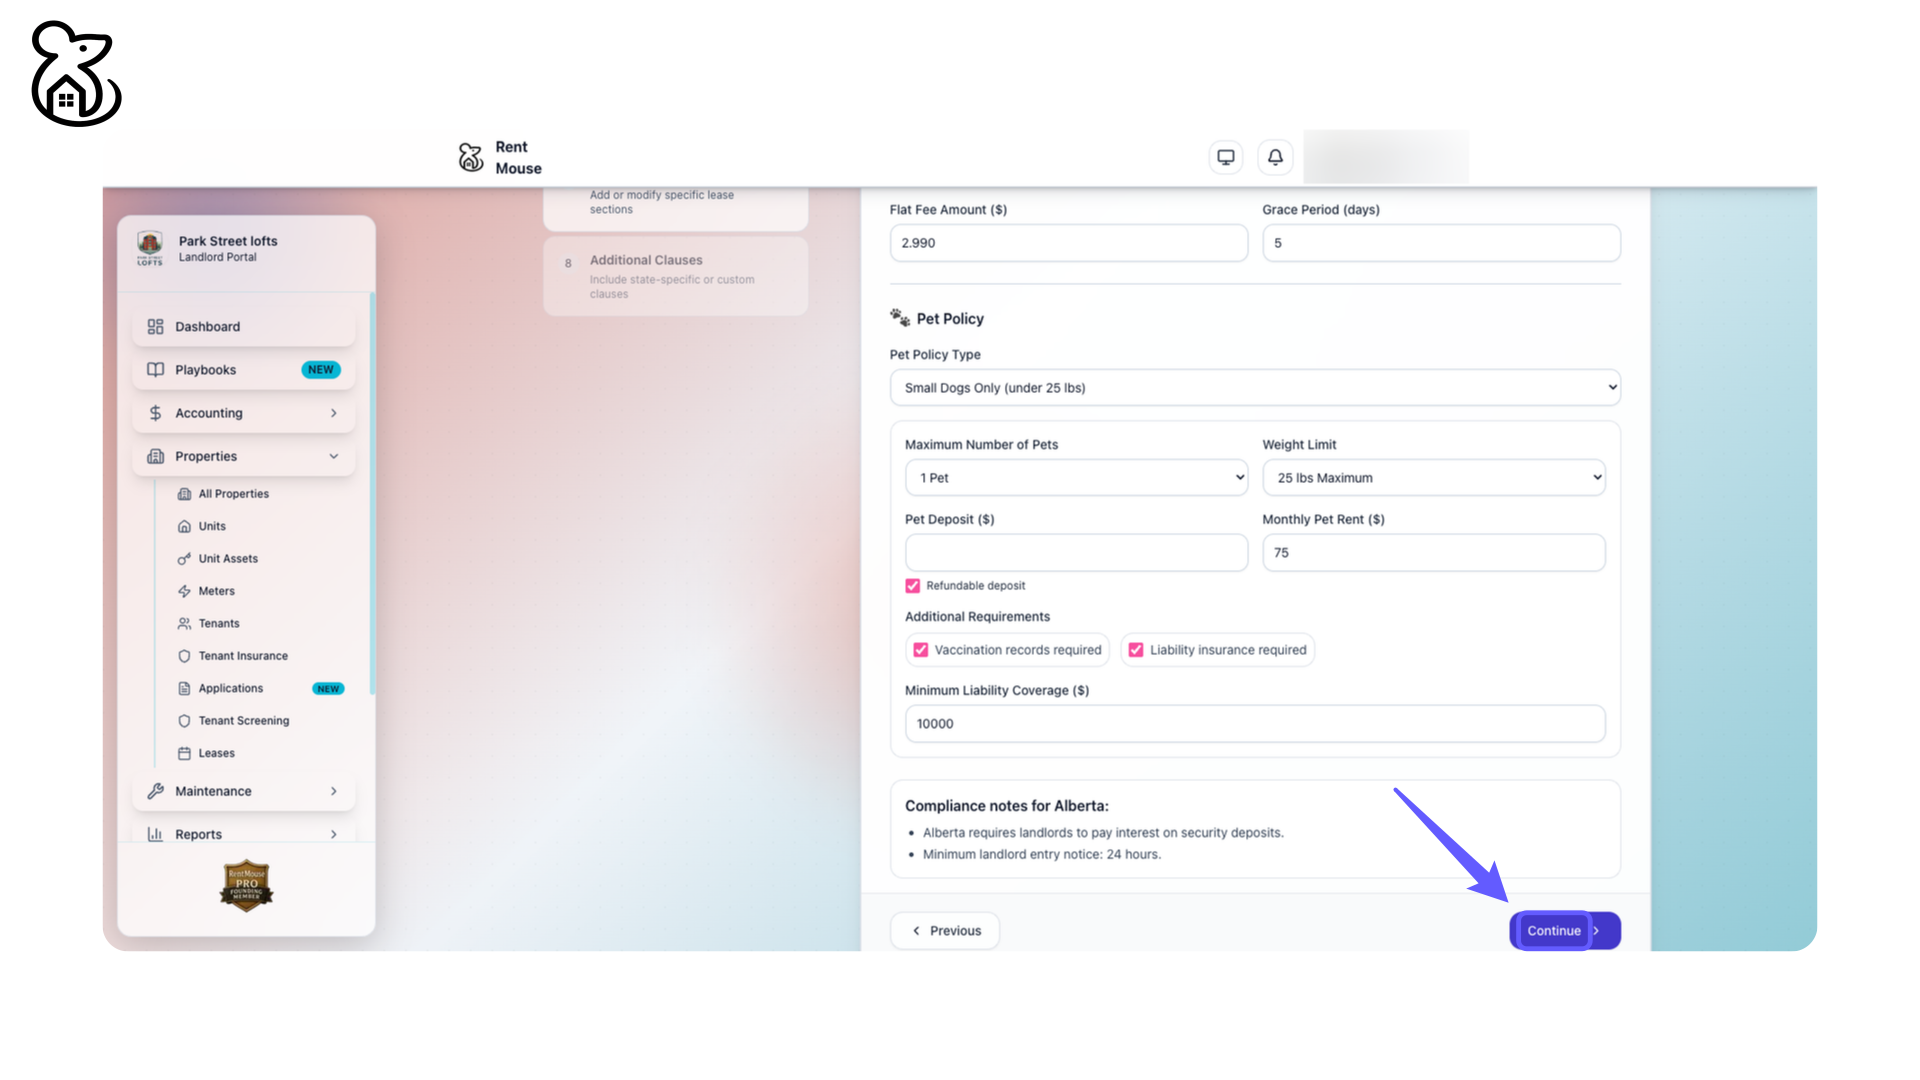
Step 18: Proceed to Next Step
Click 'Continue' to move forward in the process.
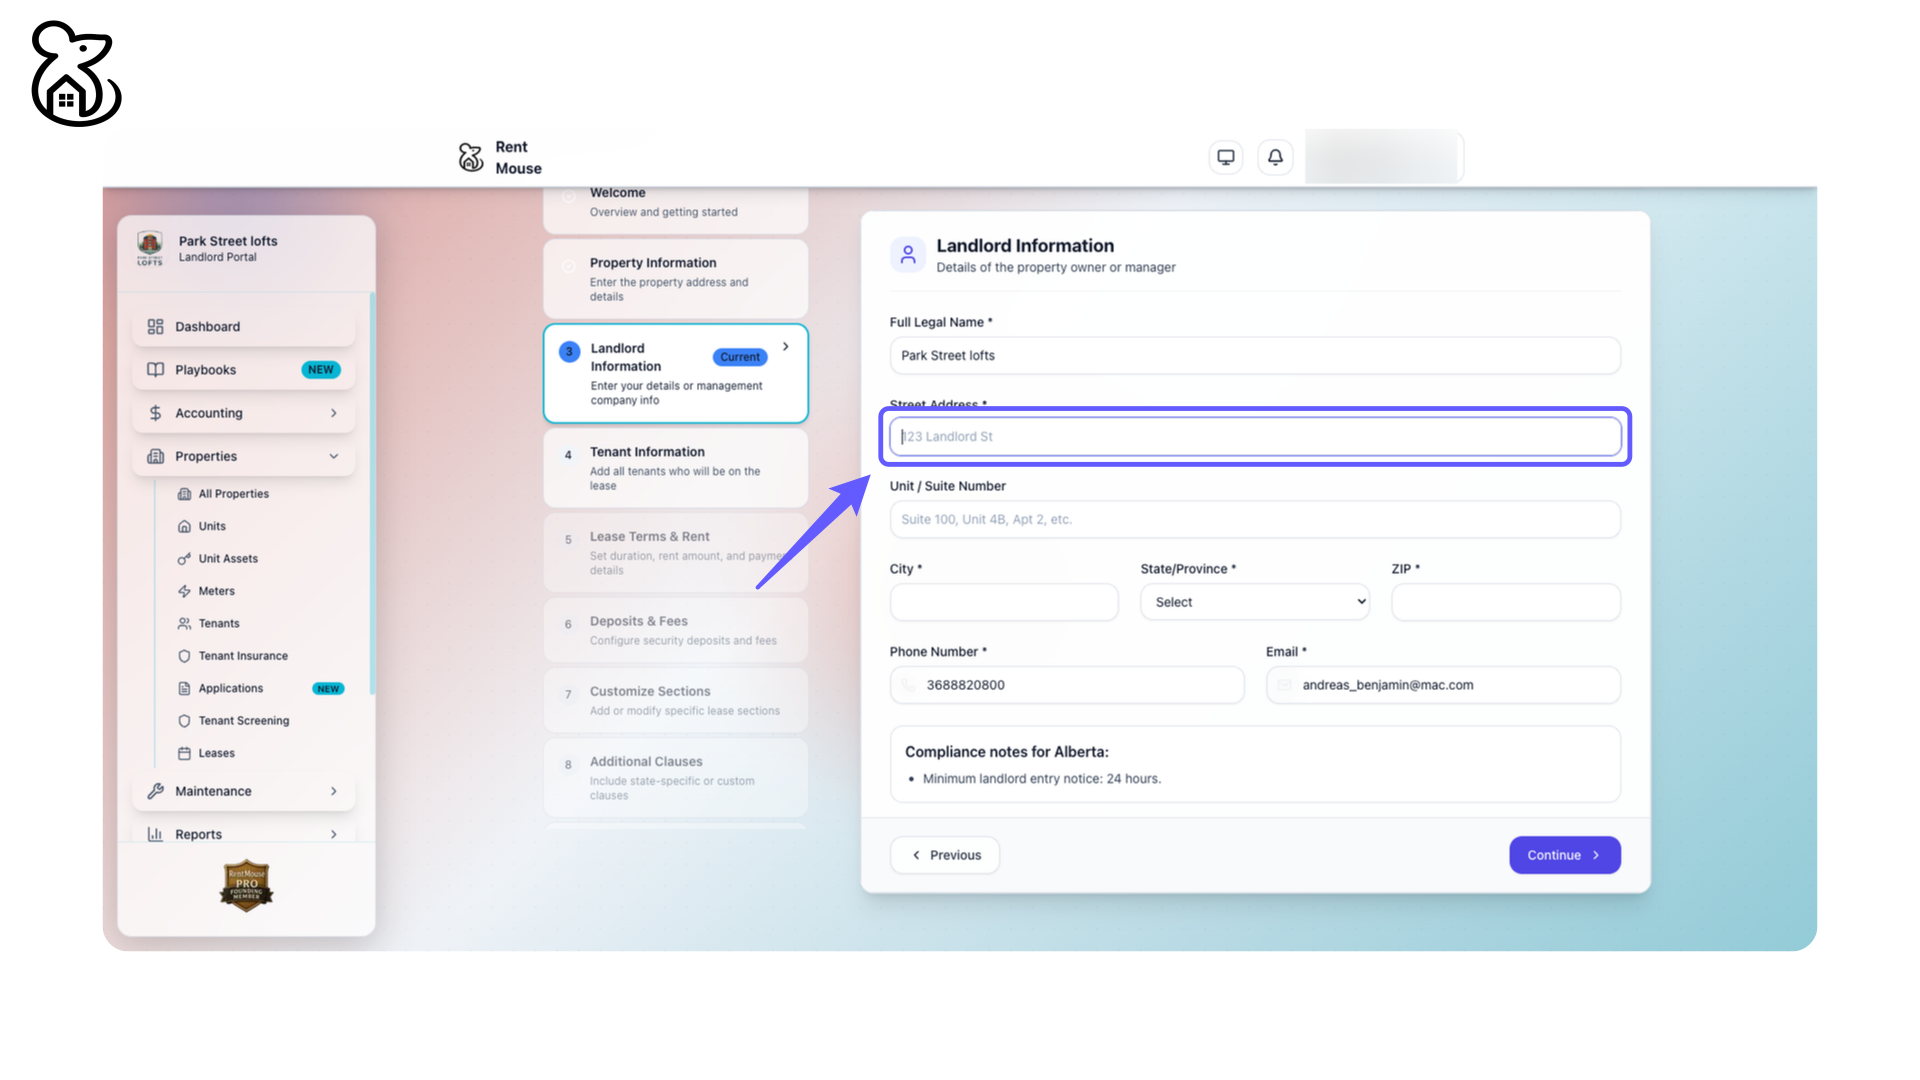
Step 19: Enter Street Address
Input your street address in the designated field to update landlord information.
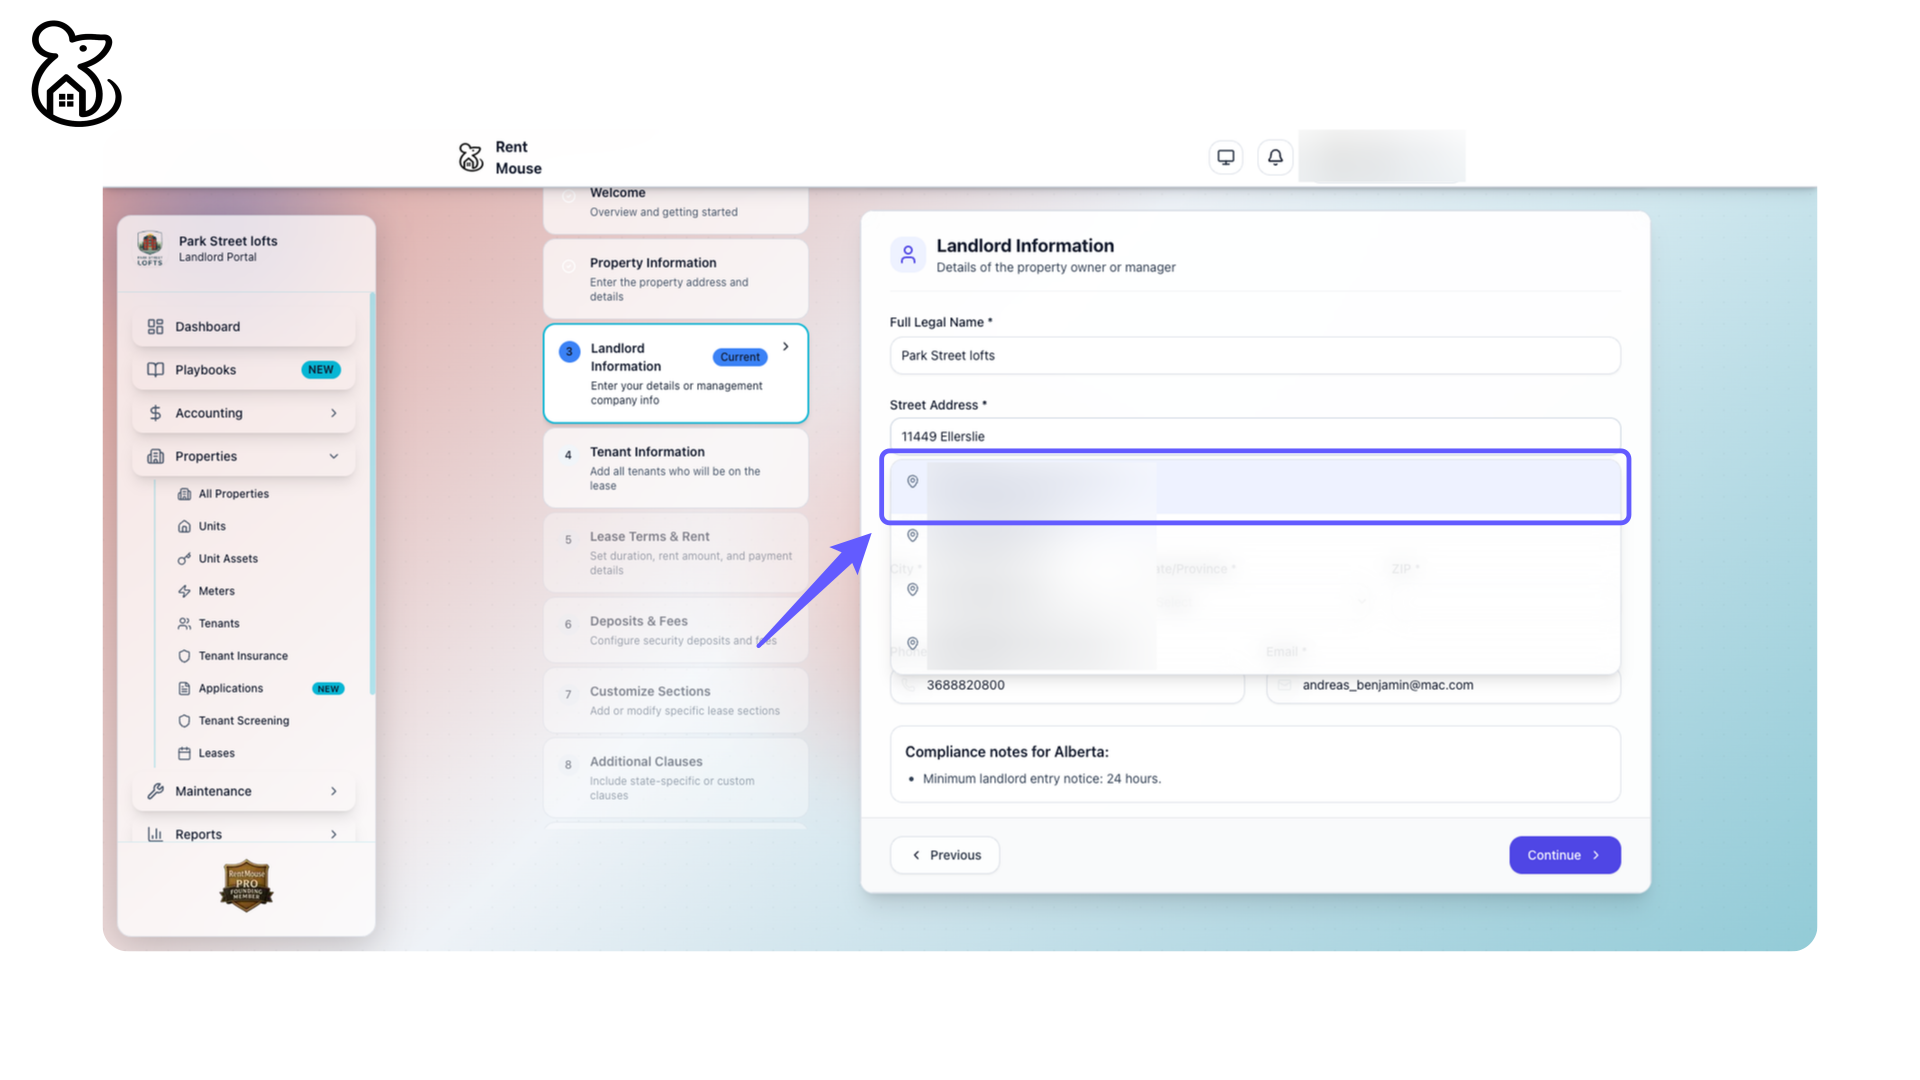
Step 20: Select Property Address
Select the correct address from the dropdown for the street address.
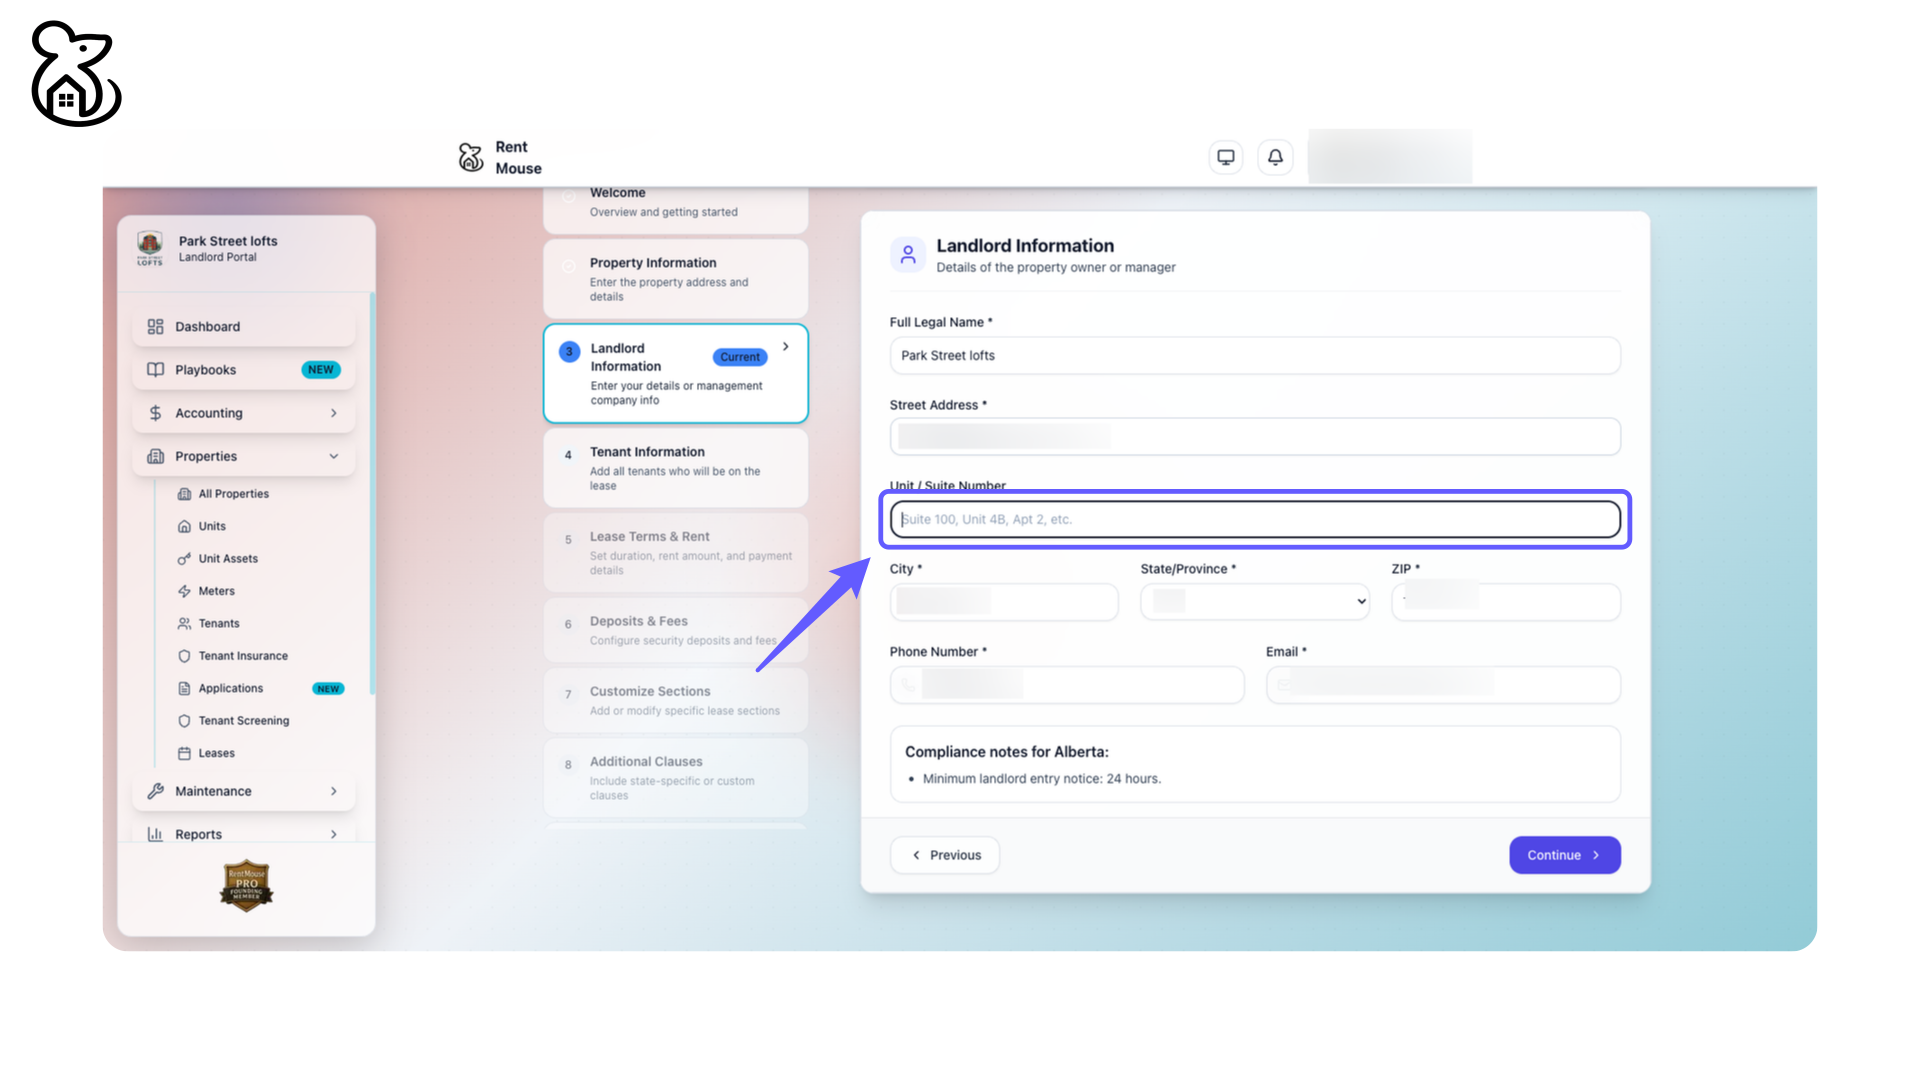
Step 21: Enter Unit or Suite Number
Input the unit or suite number in the provided field with examples such as Suite 100, Unit 4B, Apt 2.
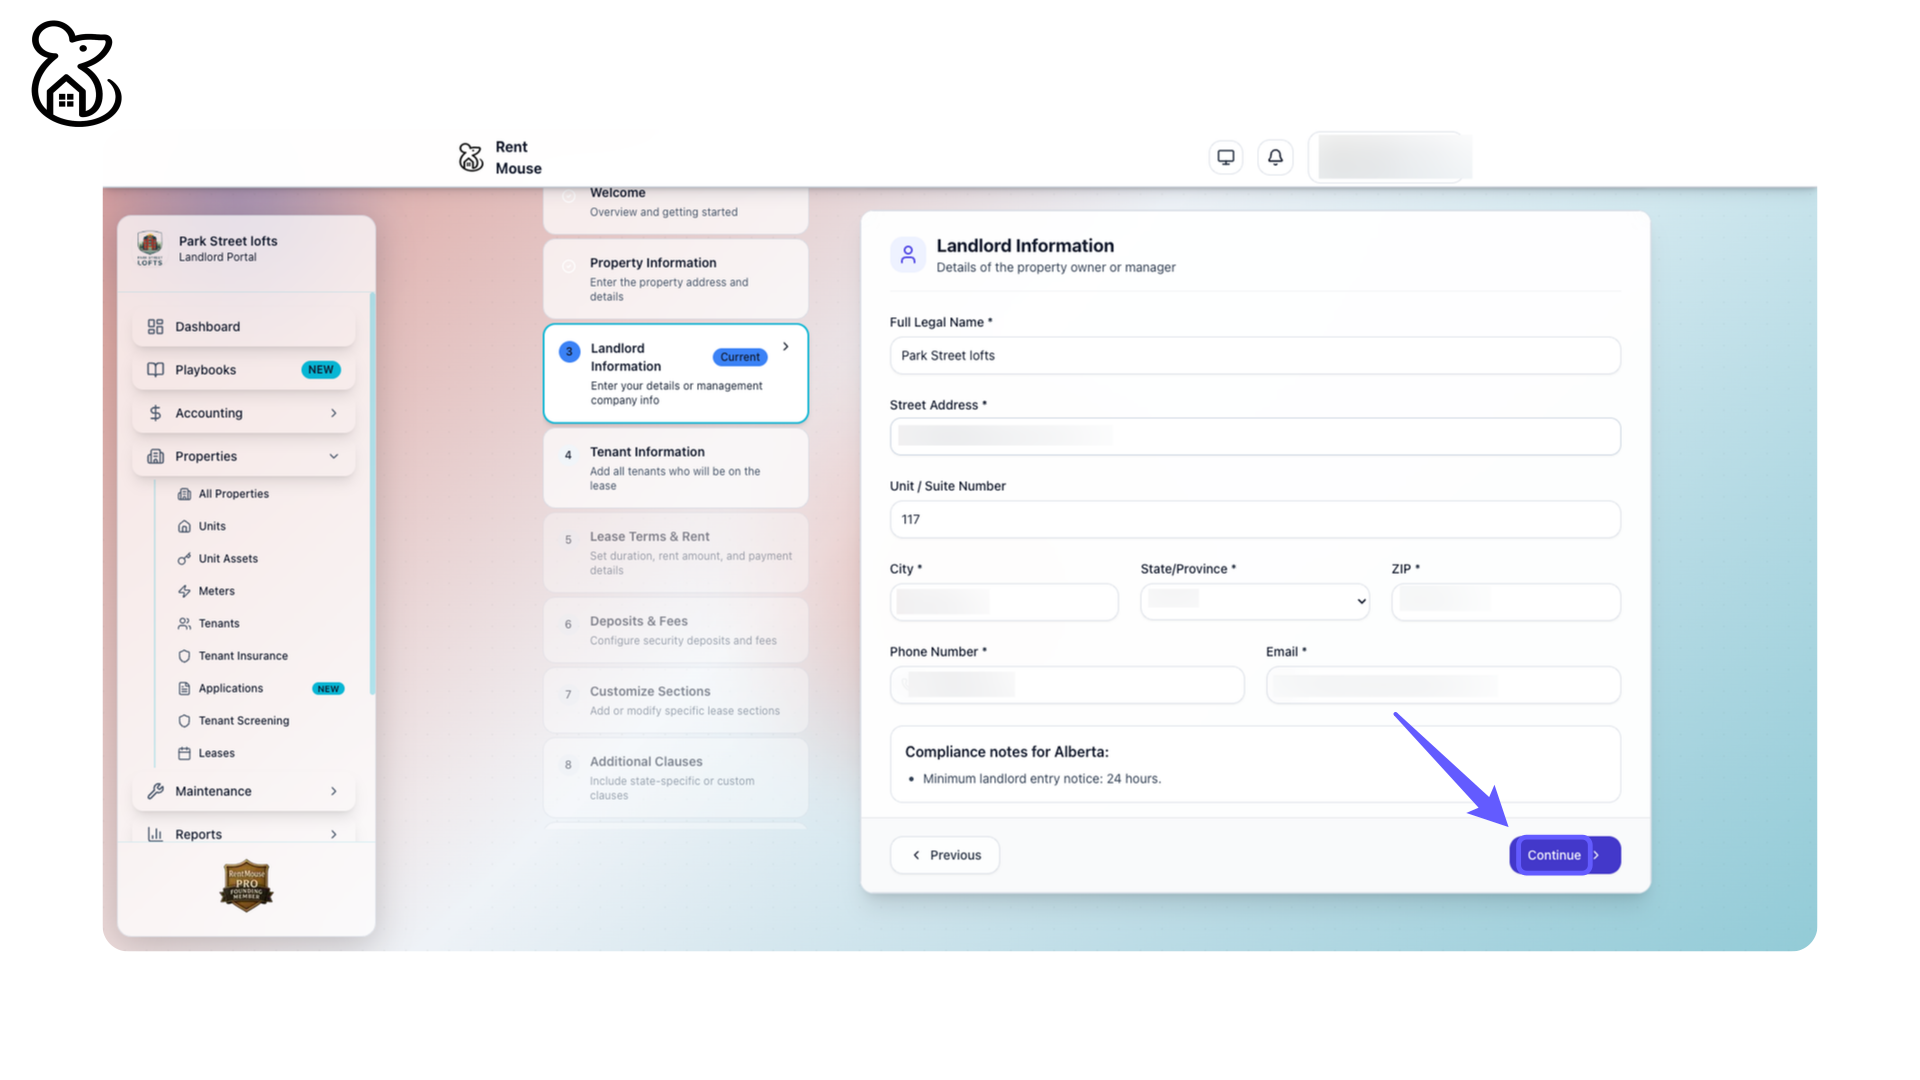
Step 22: Proceed to Next Step
Click the 'Continue' button to proceed.
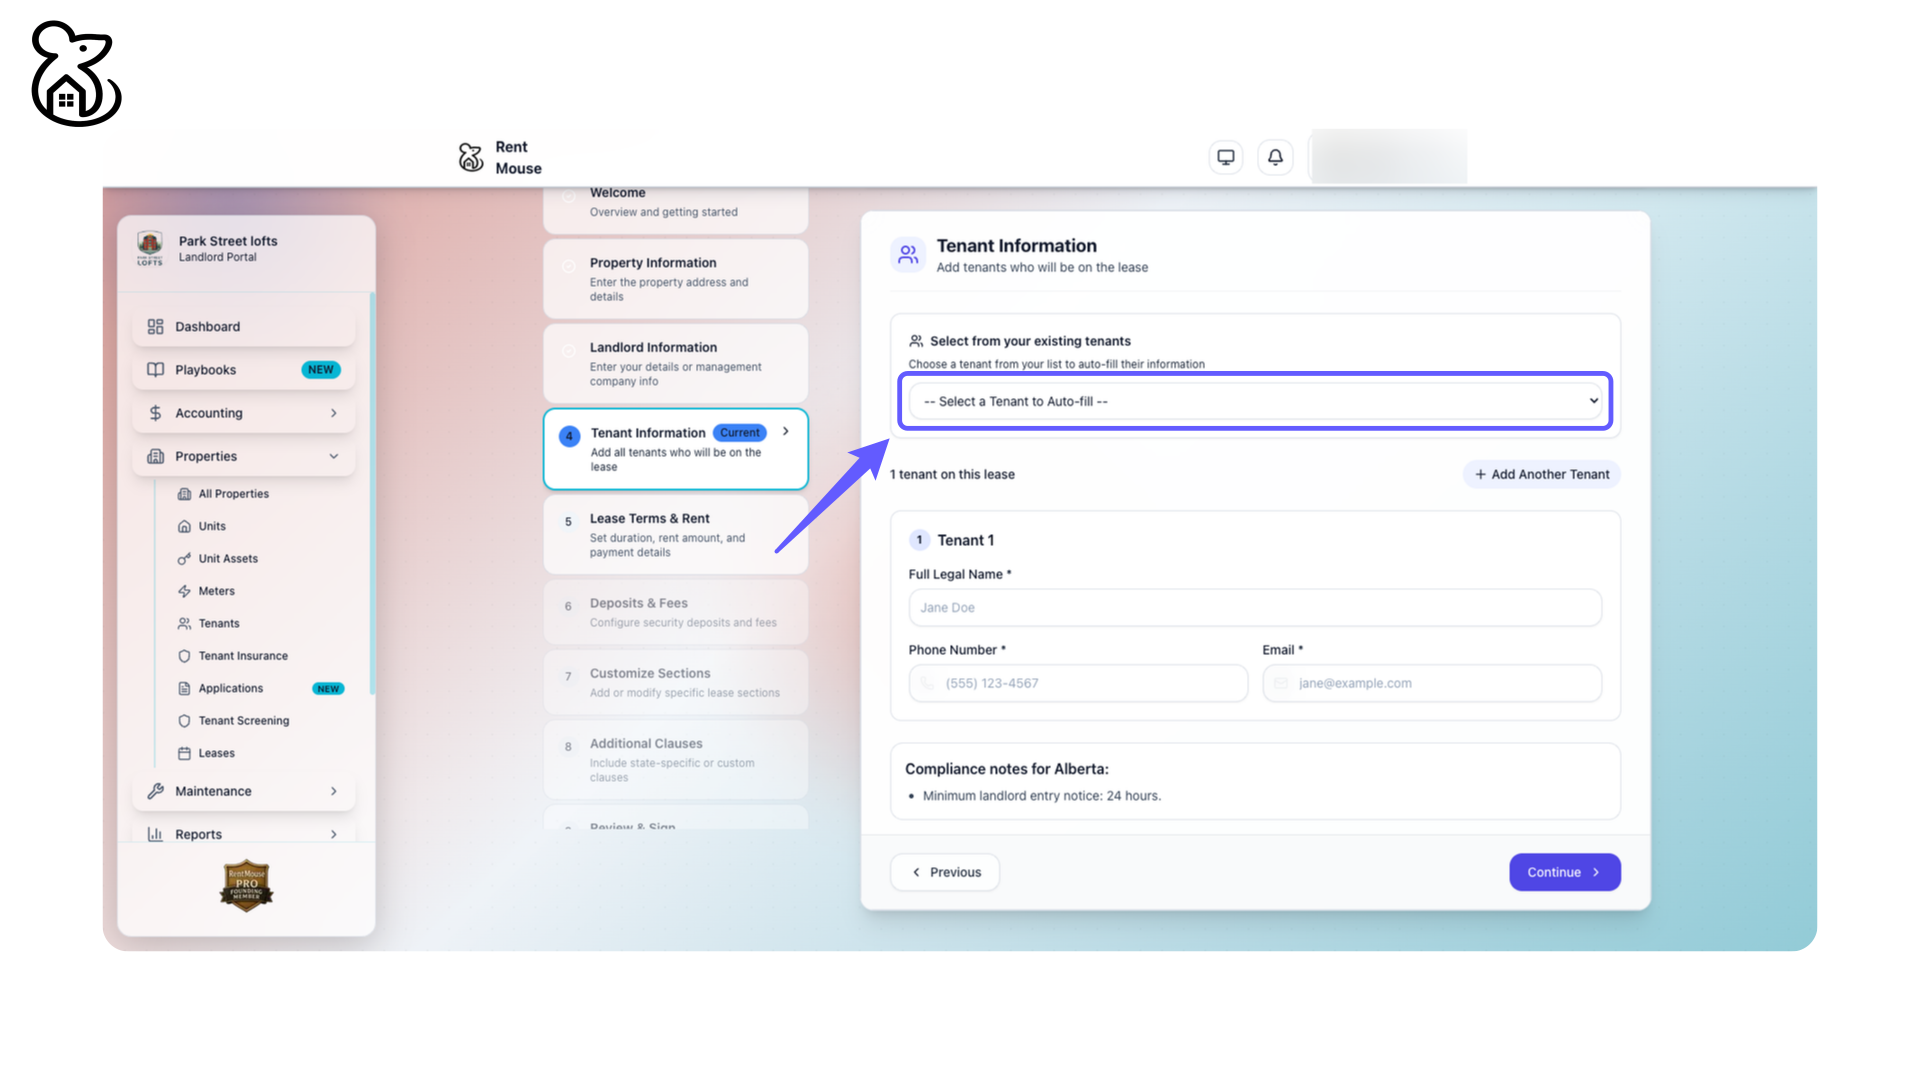
Step 23: Select Tenant to Auto-fill
Choose a tenant from the dropdown menu to automatically fill their details into the form.
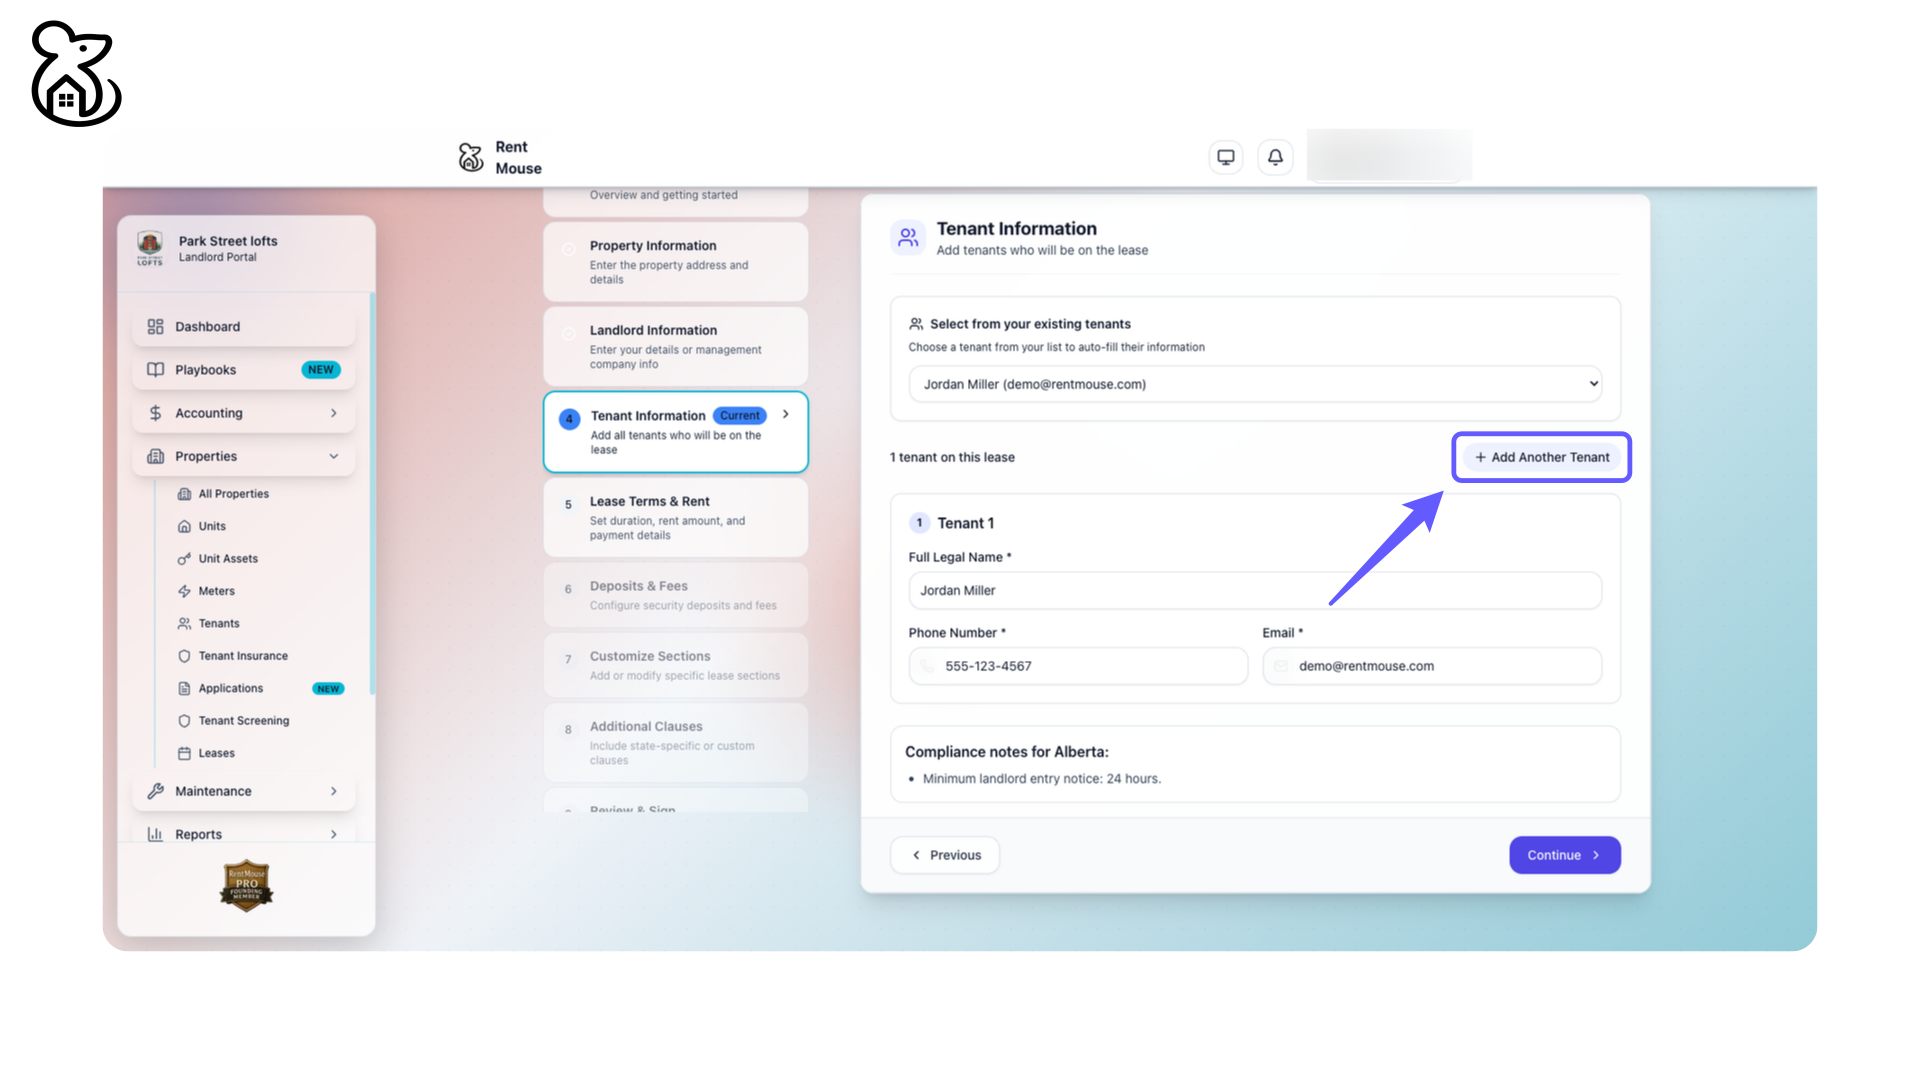
Step 24: Add a New Tenant
Click to add another tenant to the current lease.
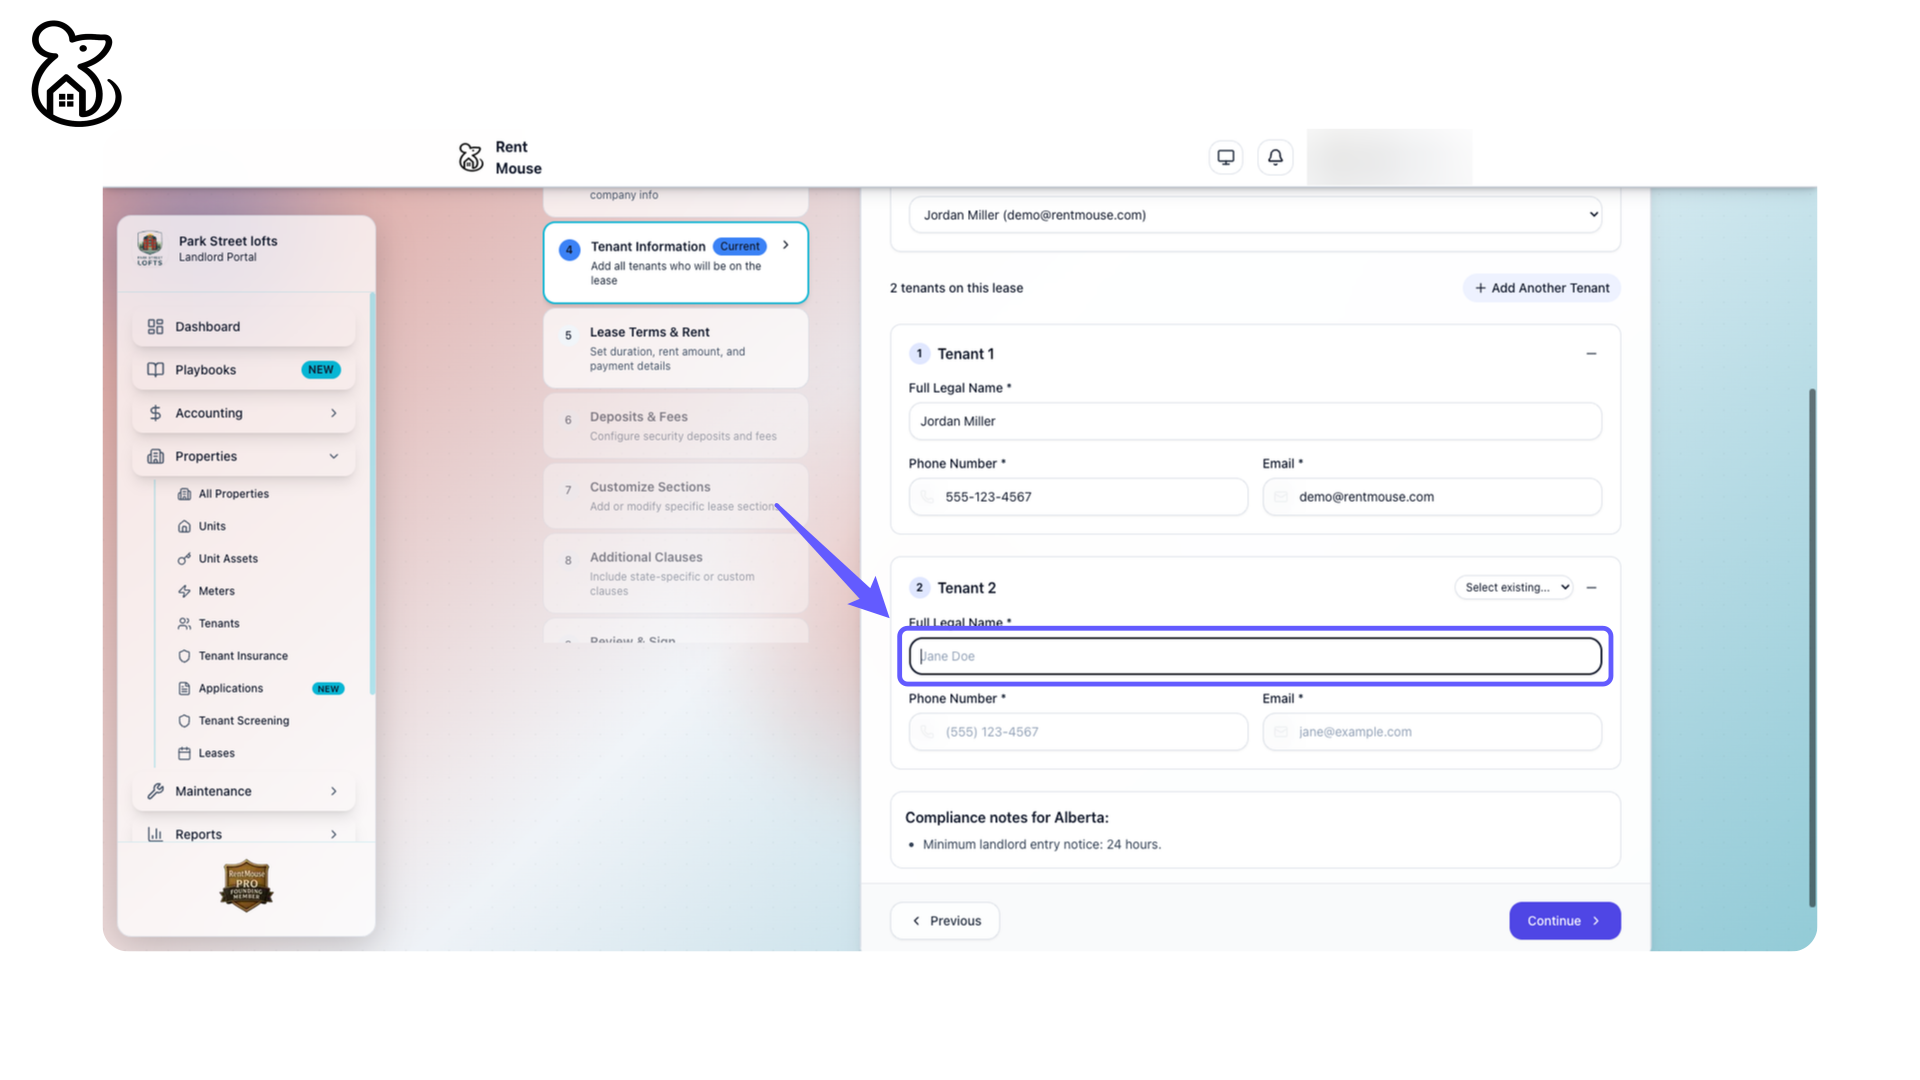
Step 25: Enter Tenant Name
Input the full legal name of Tenant 2 in the provided field.
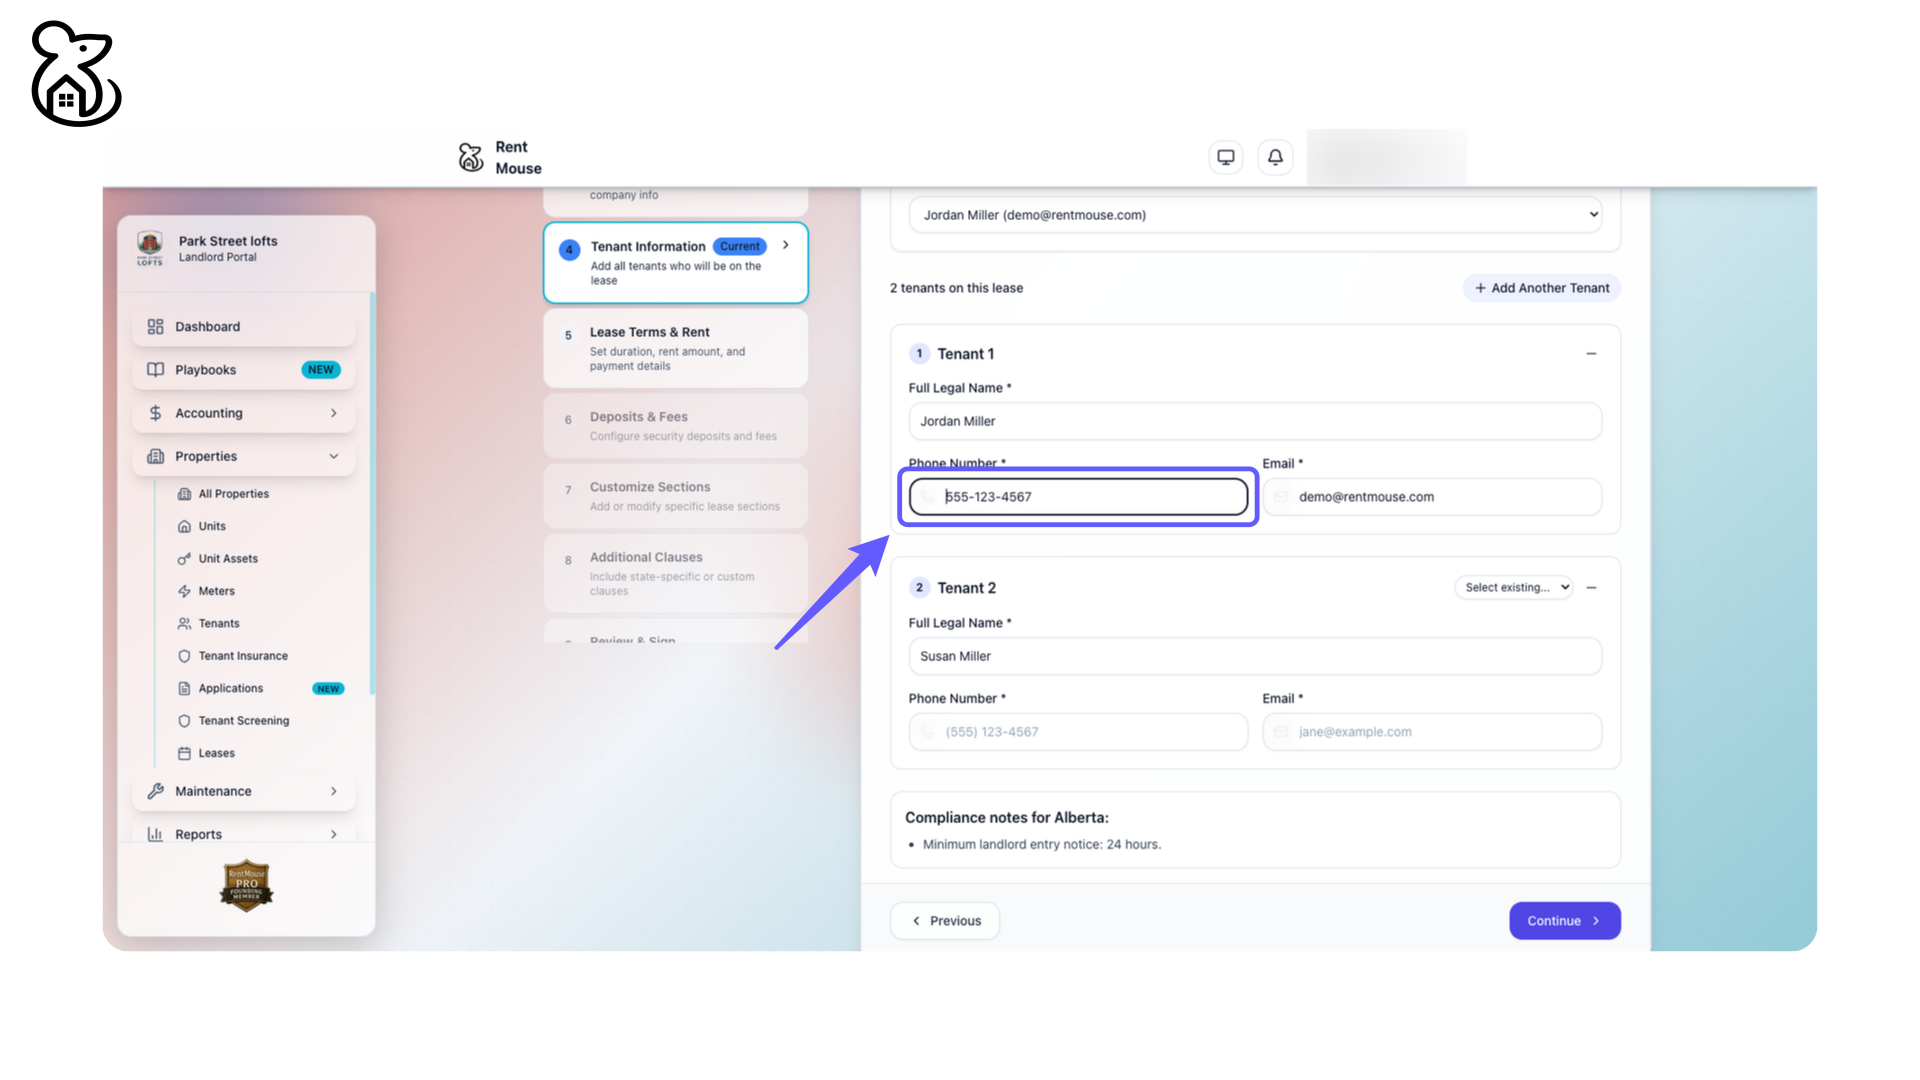
Step 26: Enter Tenant's Phone Number
Input the tenant's phone number into the designated field.
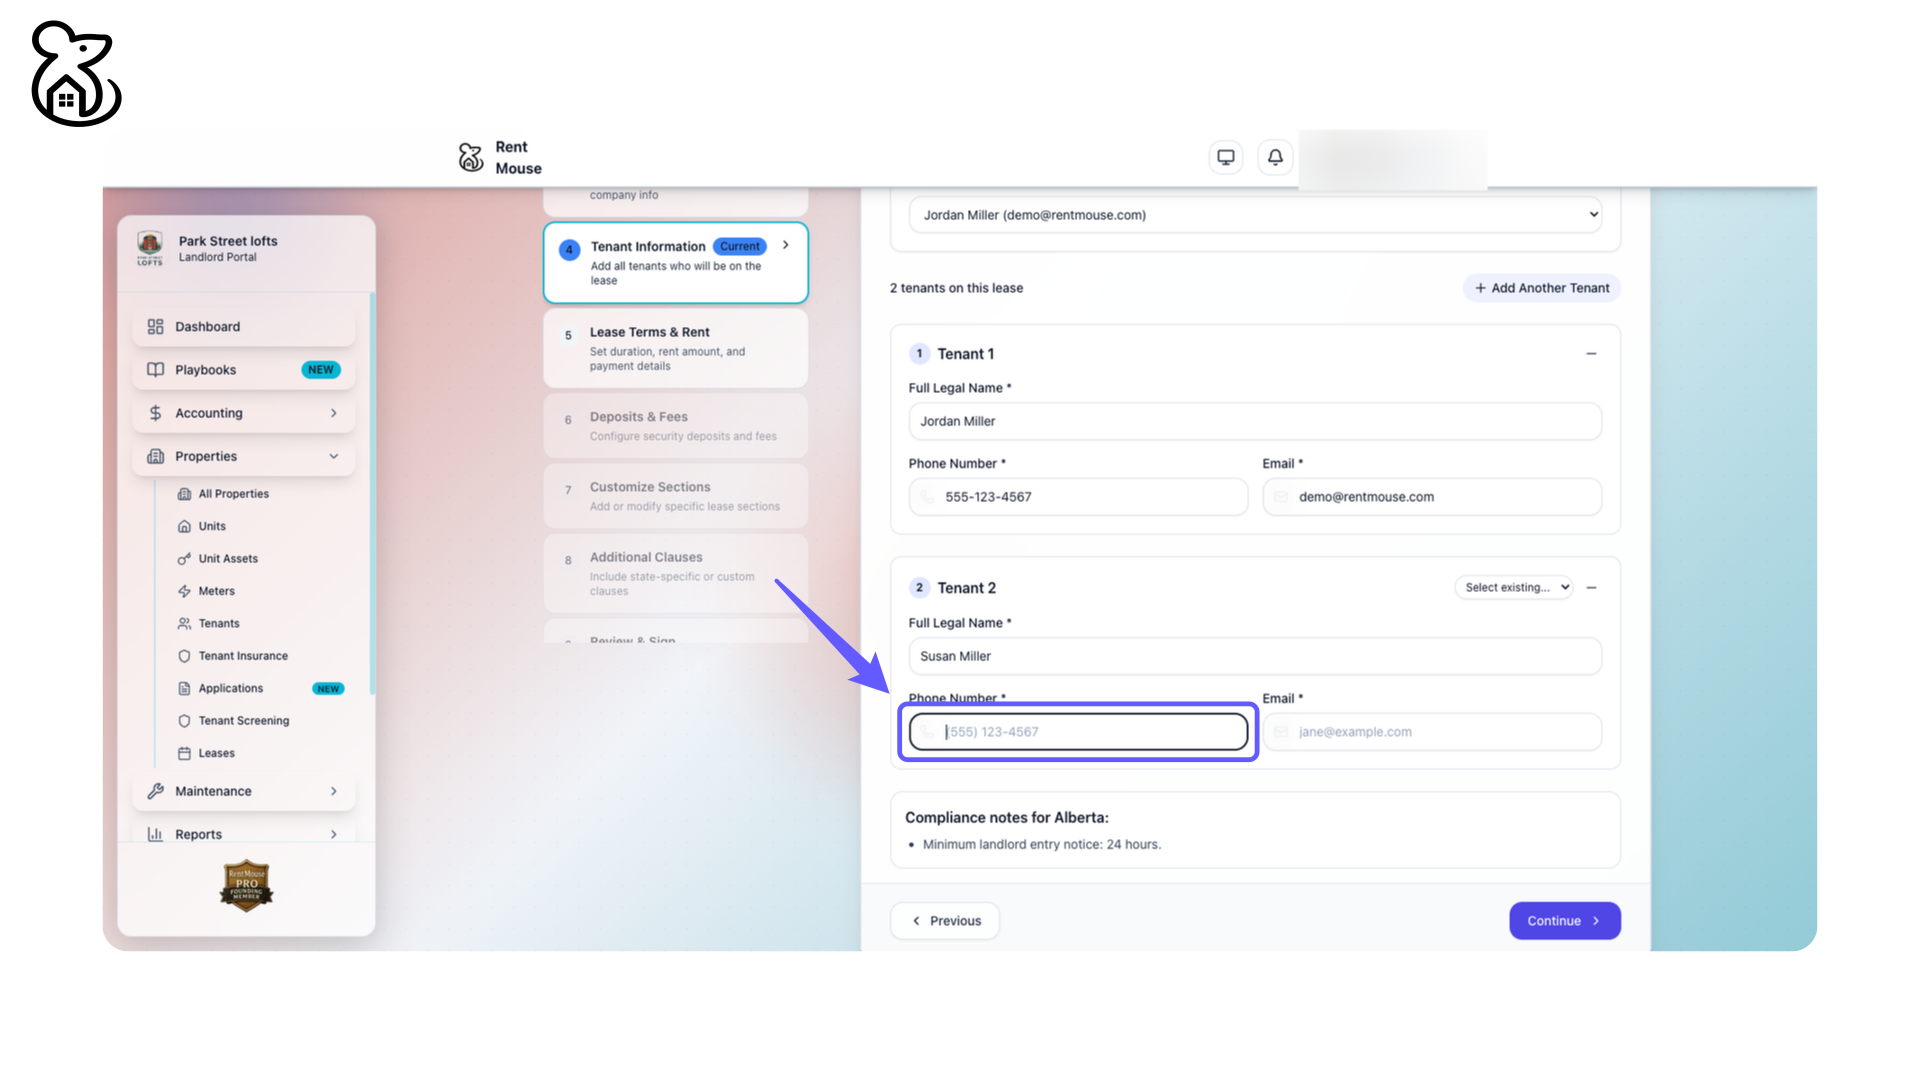
Step 27: Add Tenant's Phone Number
Enter the tenant's phone number in the designated input field to ensure contact details are complete.
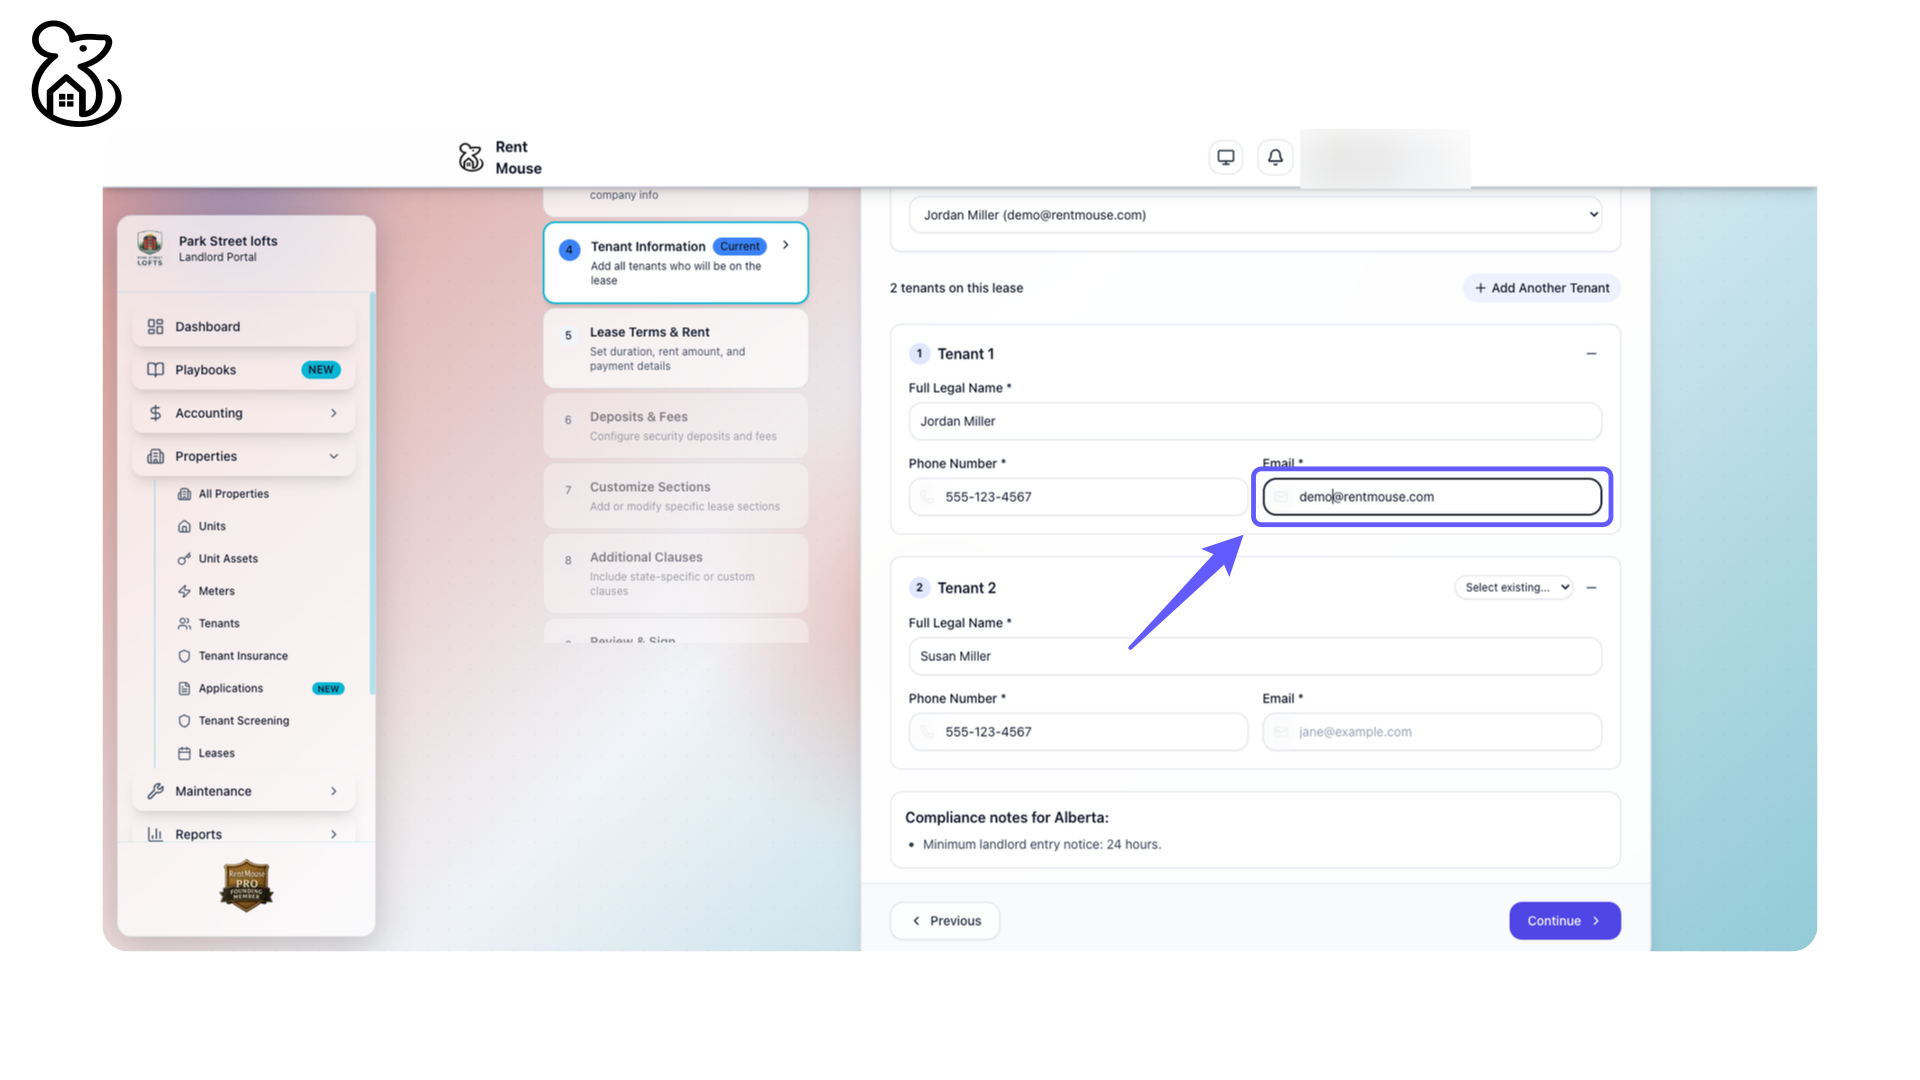
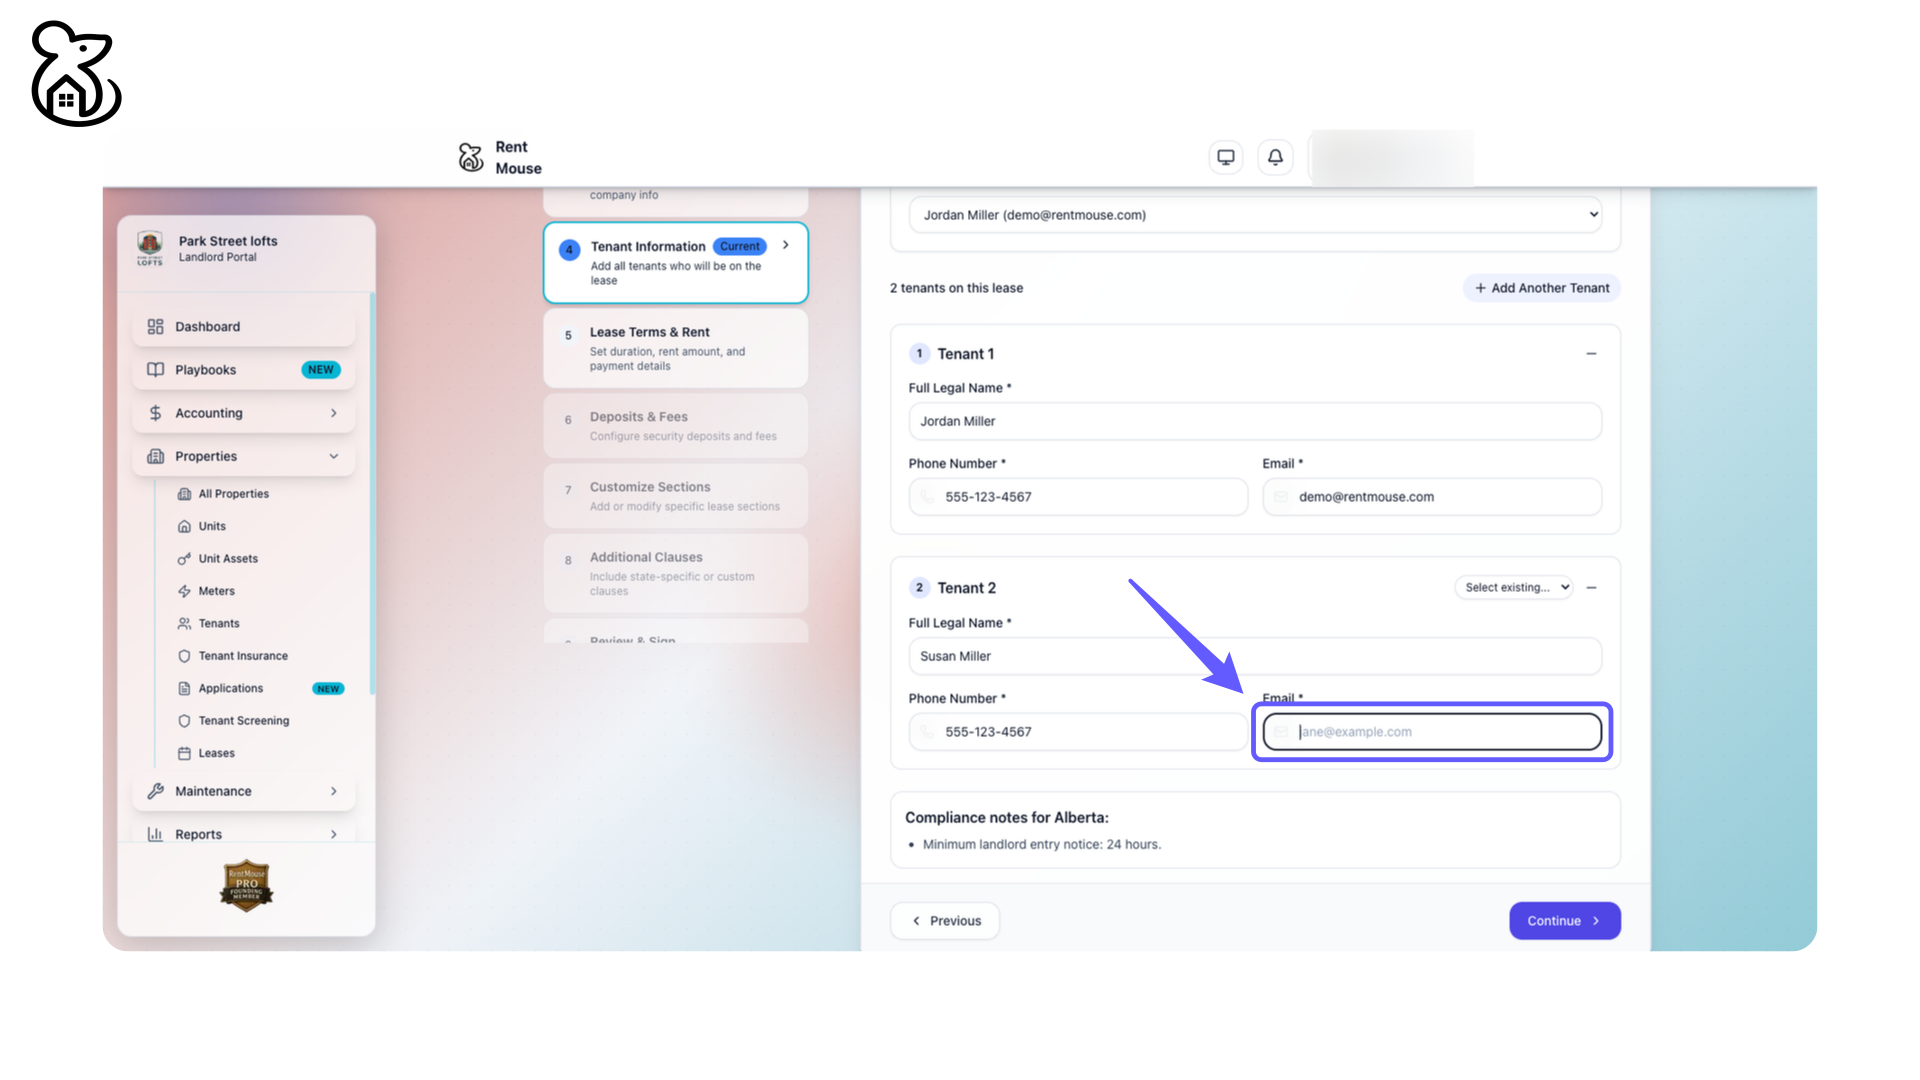
Step 28: Input Tenant's Email
Enter the tenant's email address in the provided field to update their contact information.
Step 29: Enter Email Address
Enter the email address for Tenant 2 in the provided field.
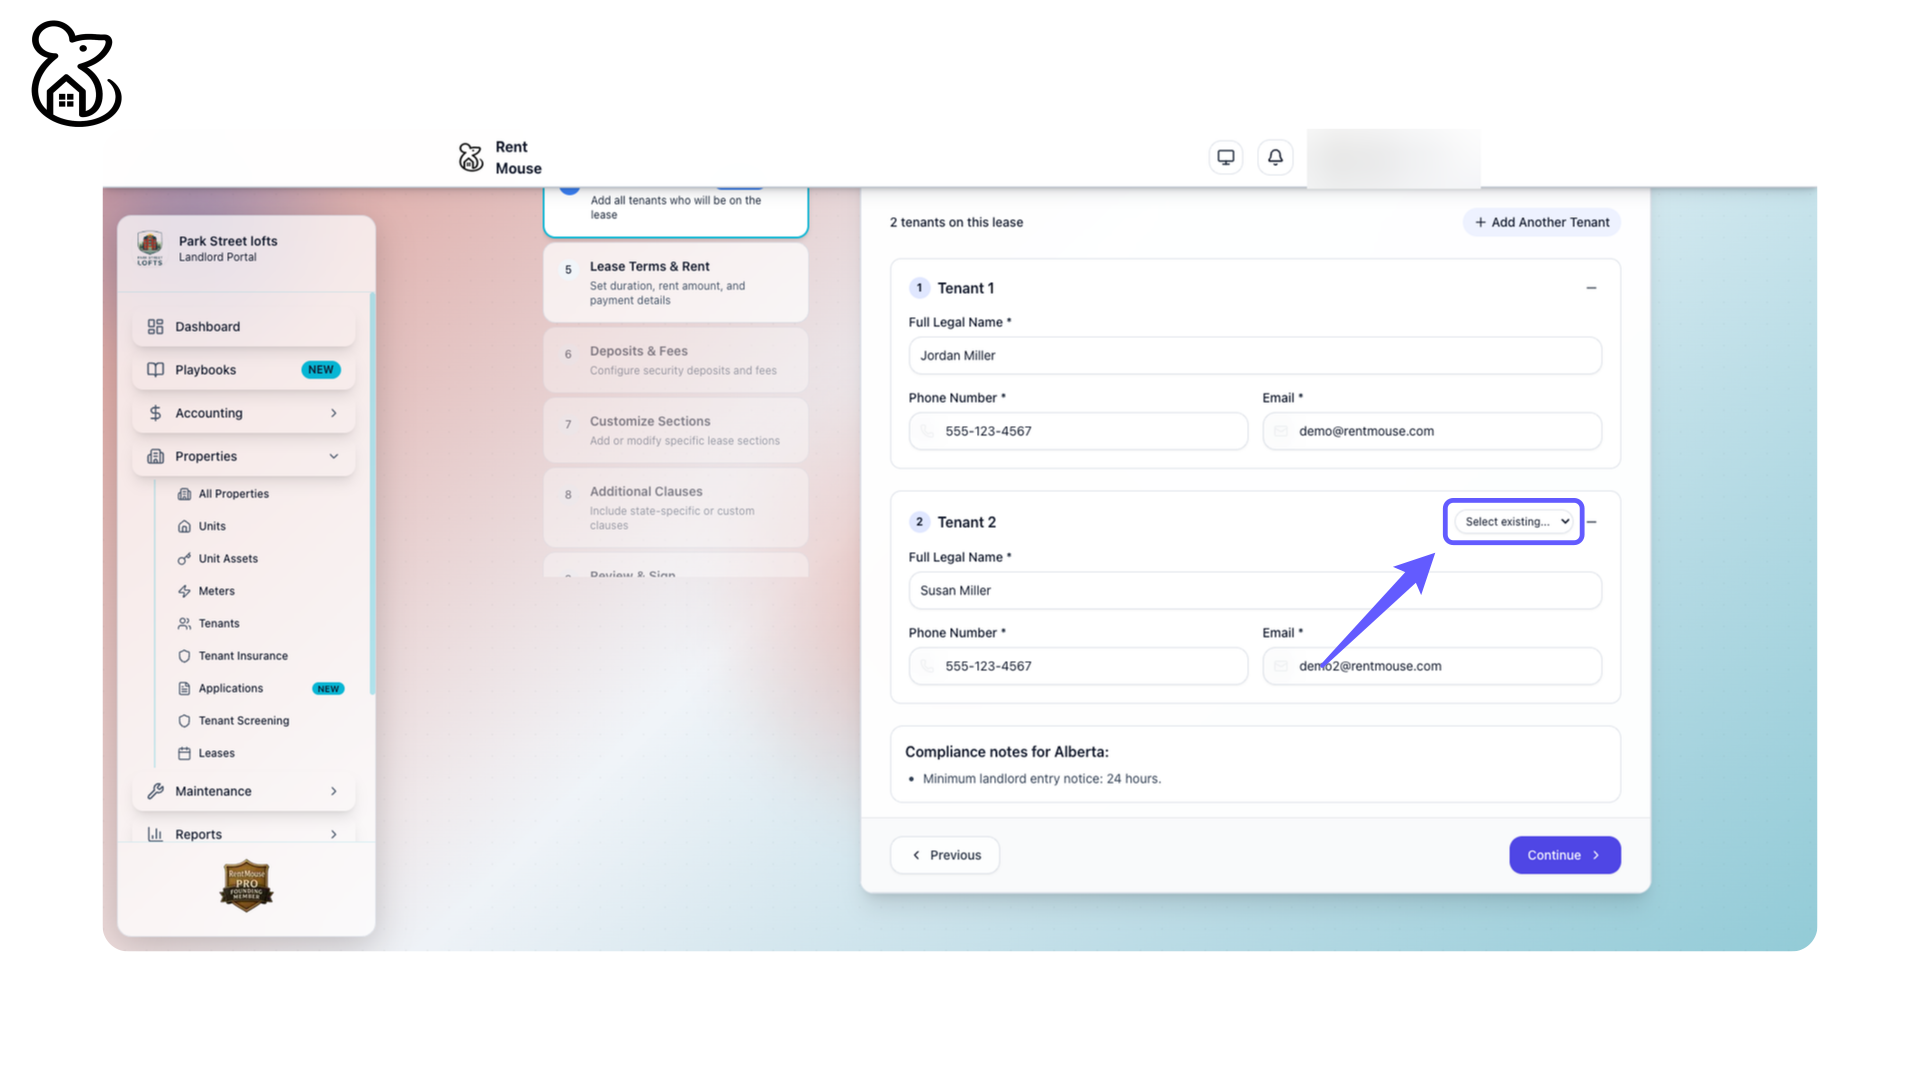
Step 30: Choose Existing Tenant
Select a tenant from the existing list by clicking the dropdown menu labeled 'Select existing...' to add them to this lease.
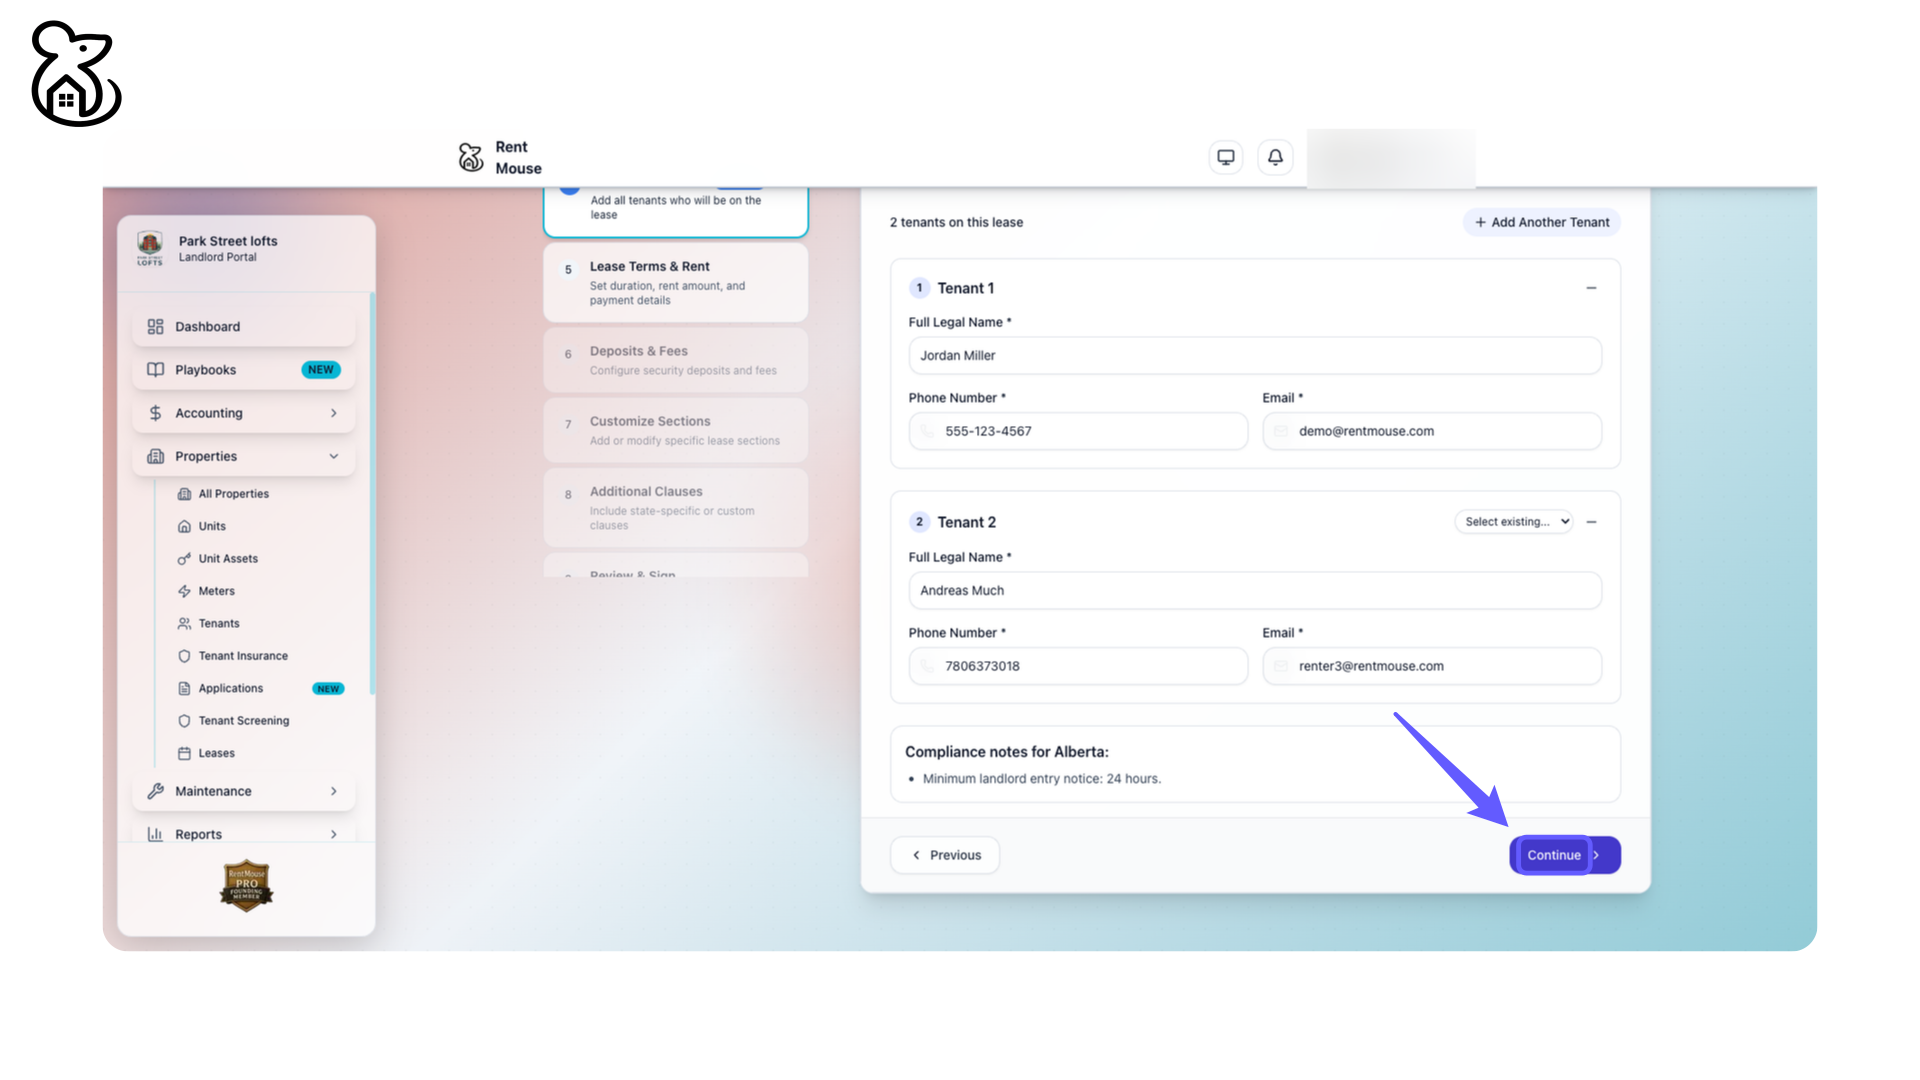
Step 31: Proceed Lease Process
Click 'Continue' to proceed with the lease process after reviewing tenant details.
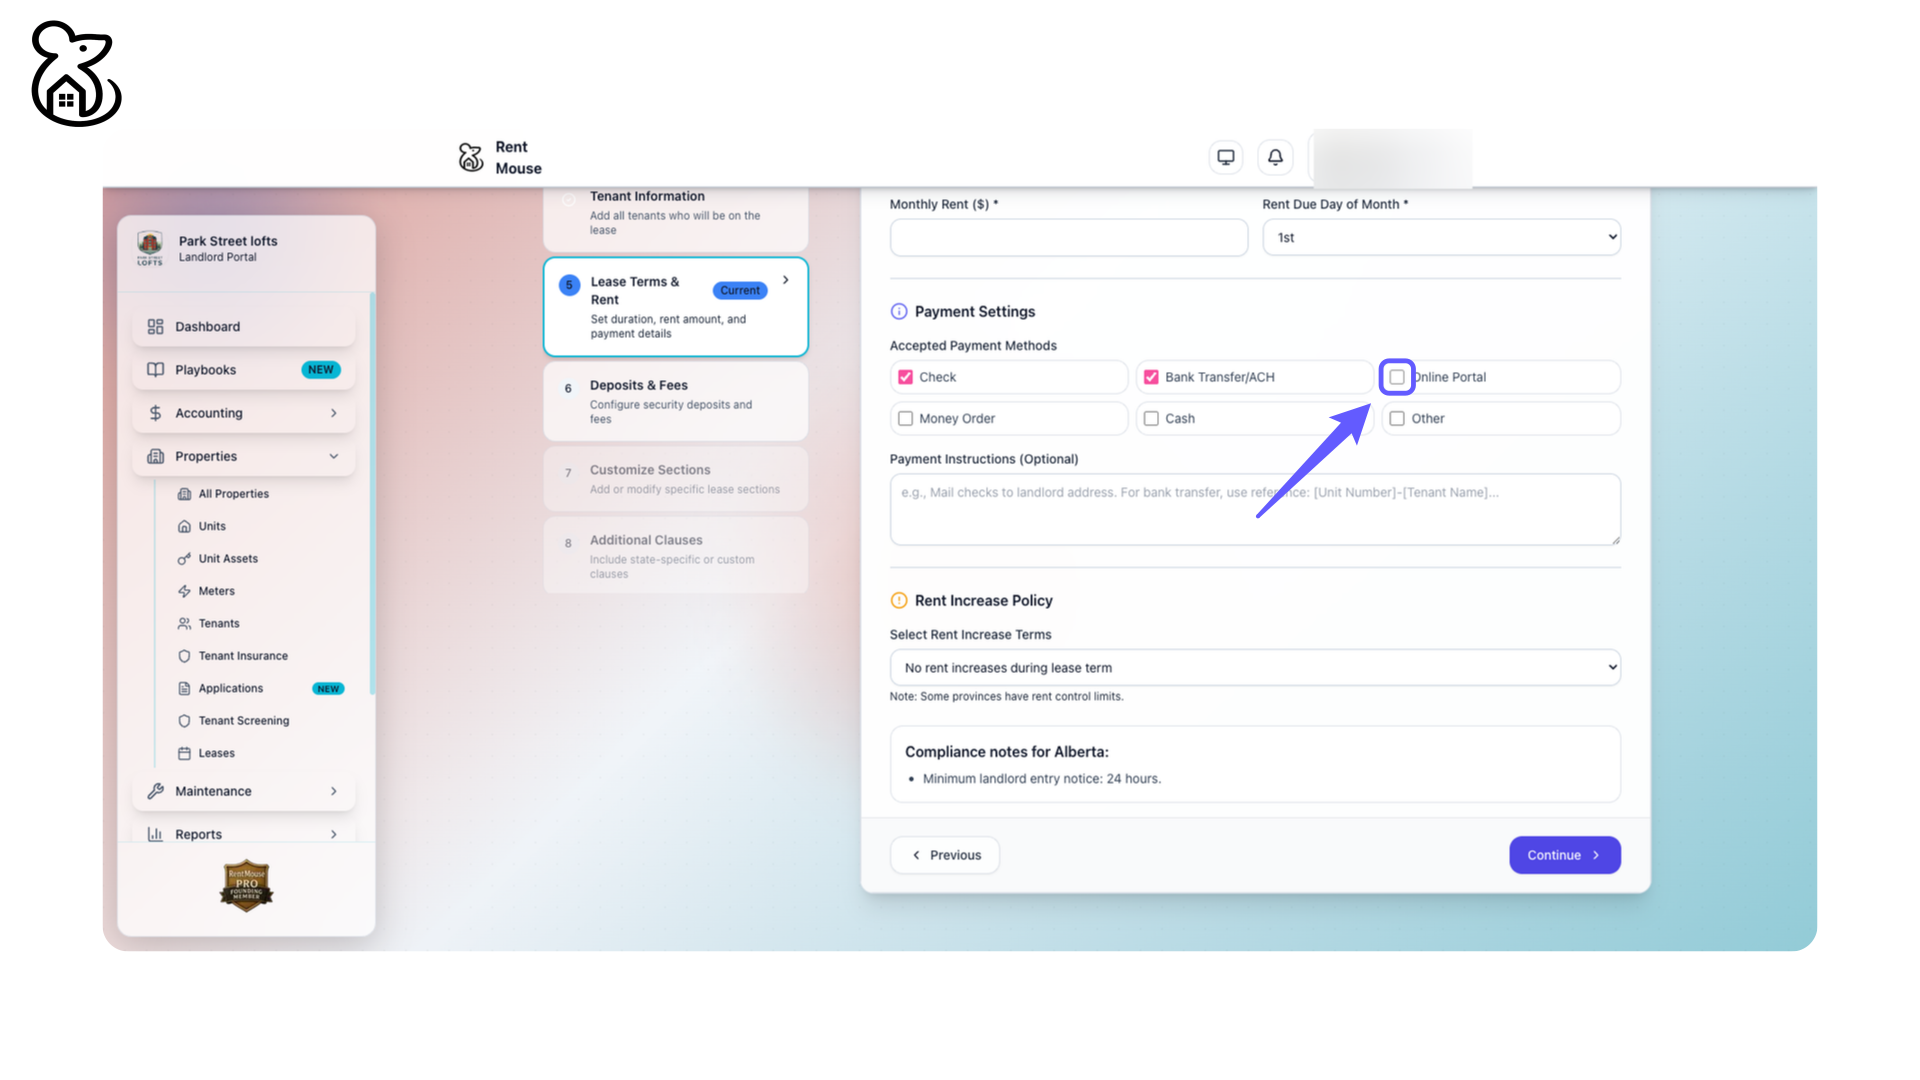
Step 32: Enable Online Portal Payment
Select the checkbox to enable payments via the online portal.
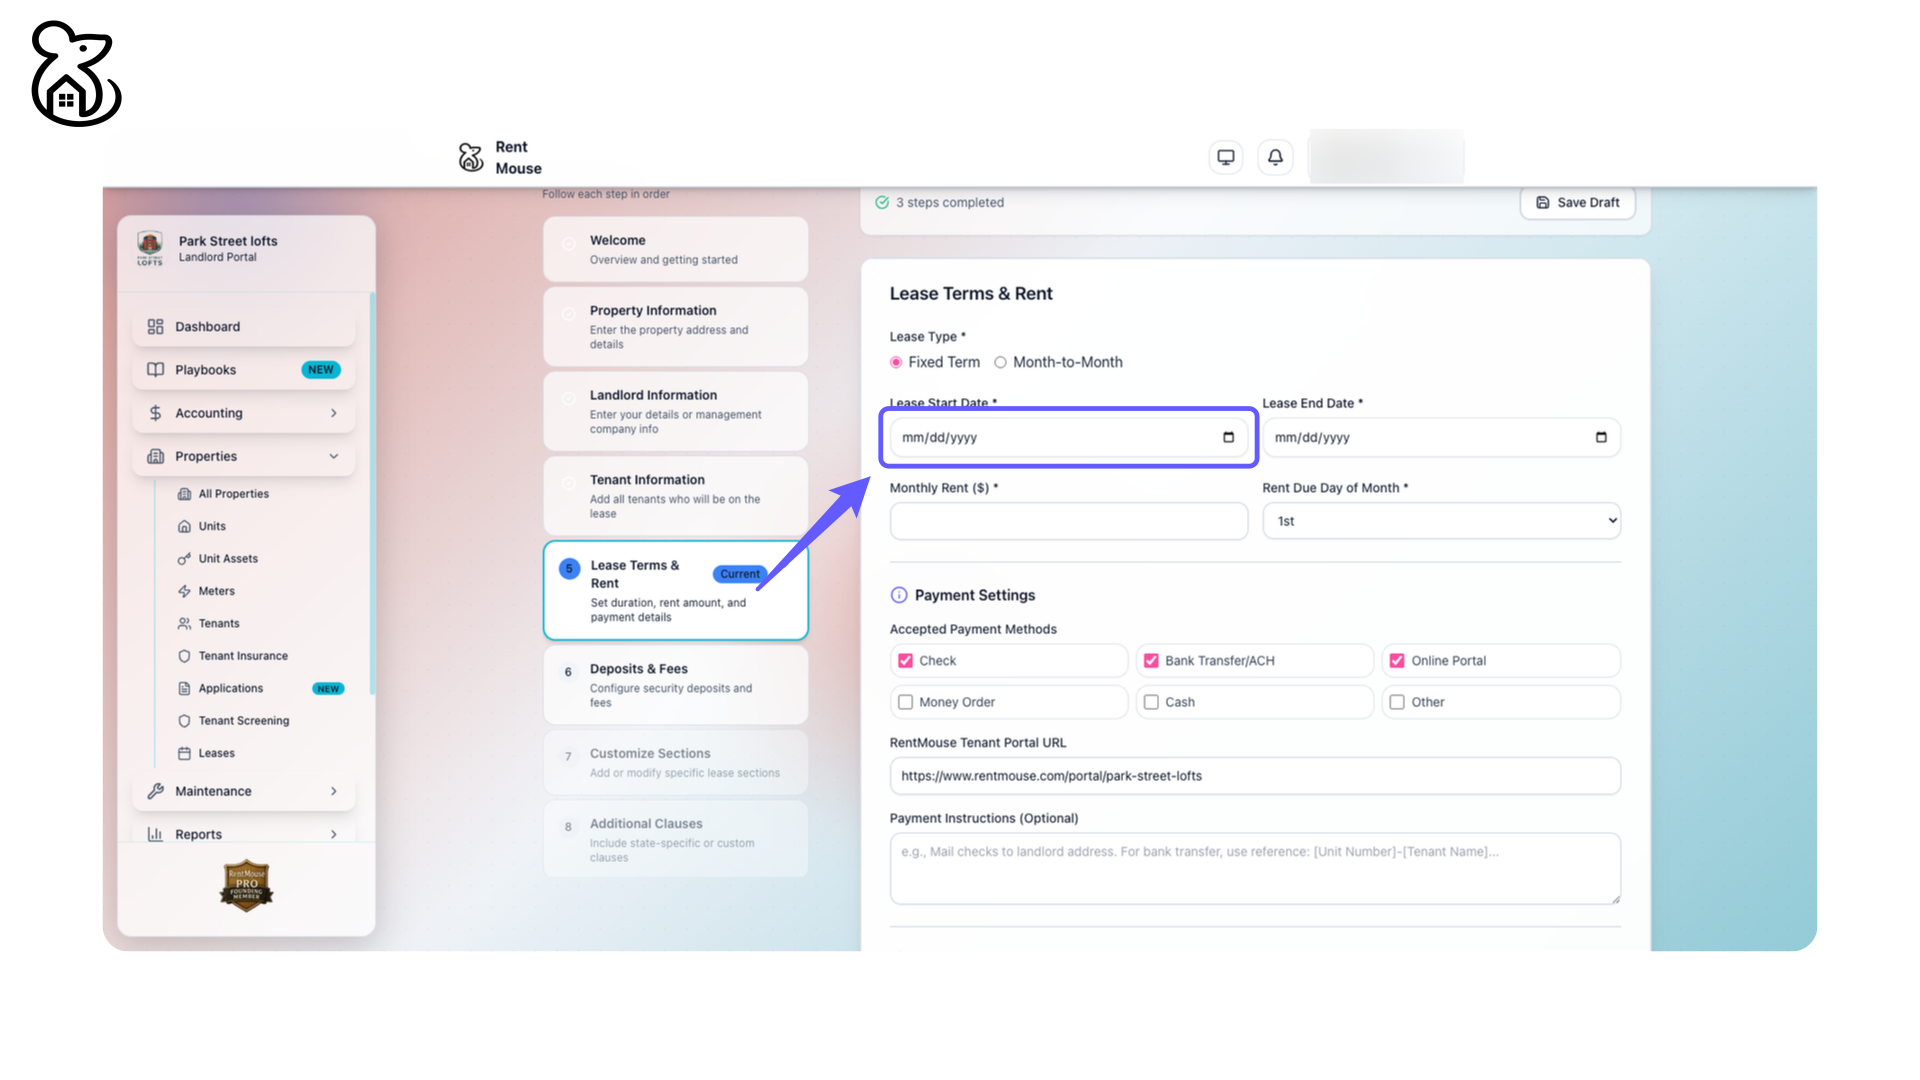
Step 33: Enter Lease Start Date
Input the lease start date in the format mm/dd/yyyy to proceed with setting up the lease terms.
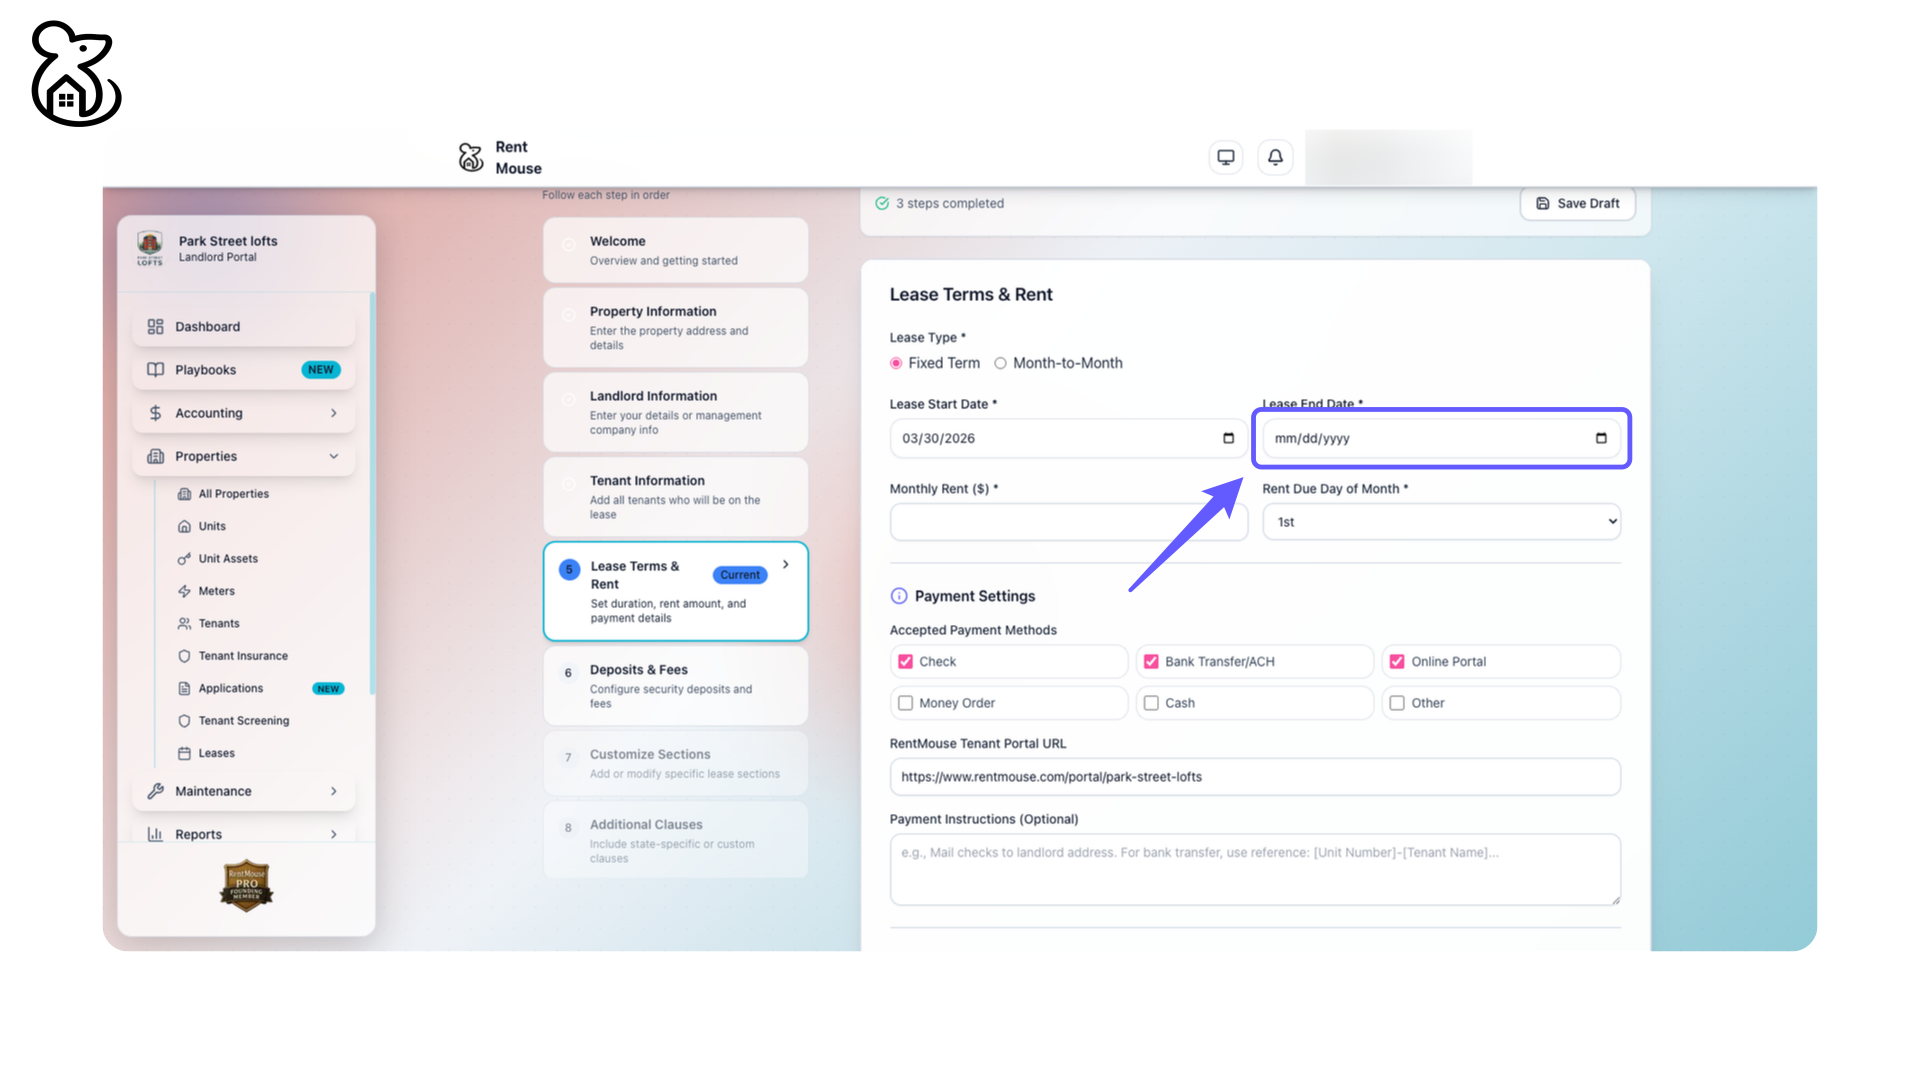
Step 34: Enter Lease End Date
Enter the lease end date in the format mm/dd/yyyy.
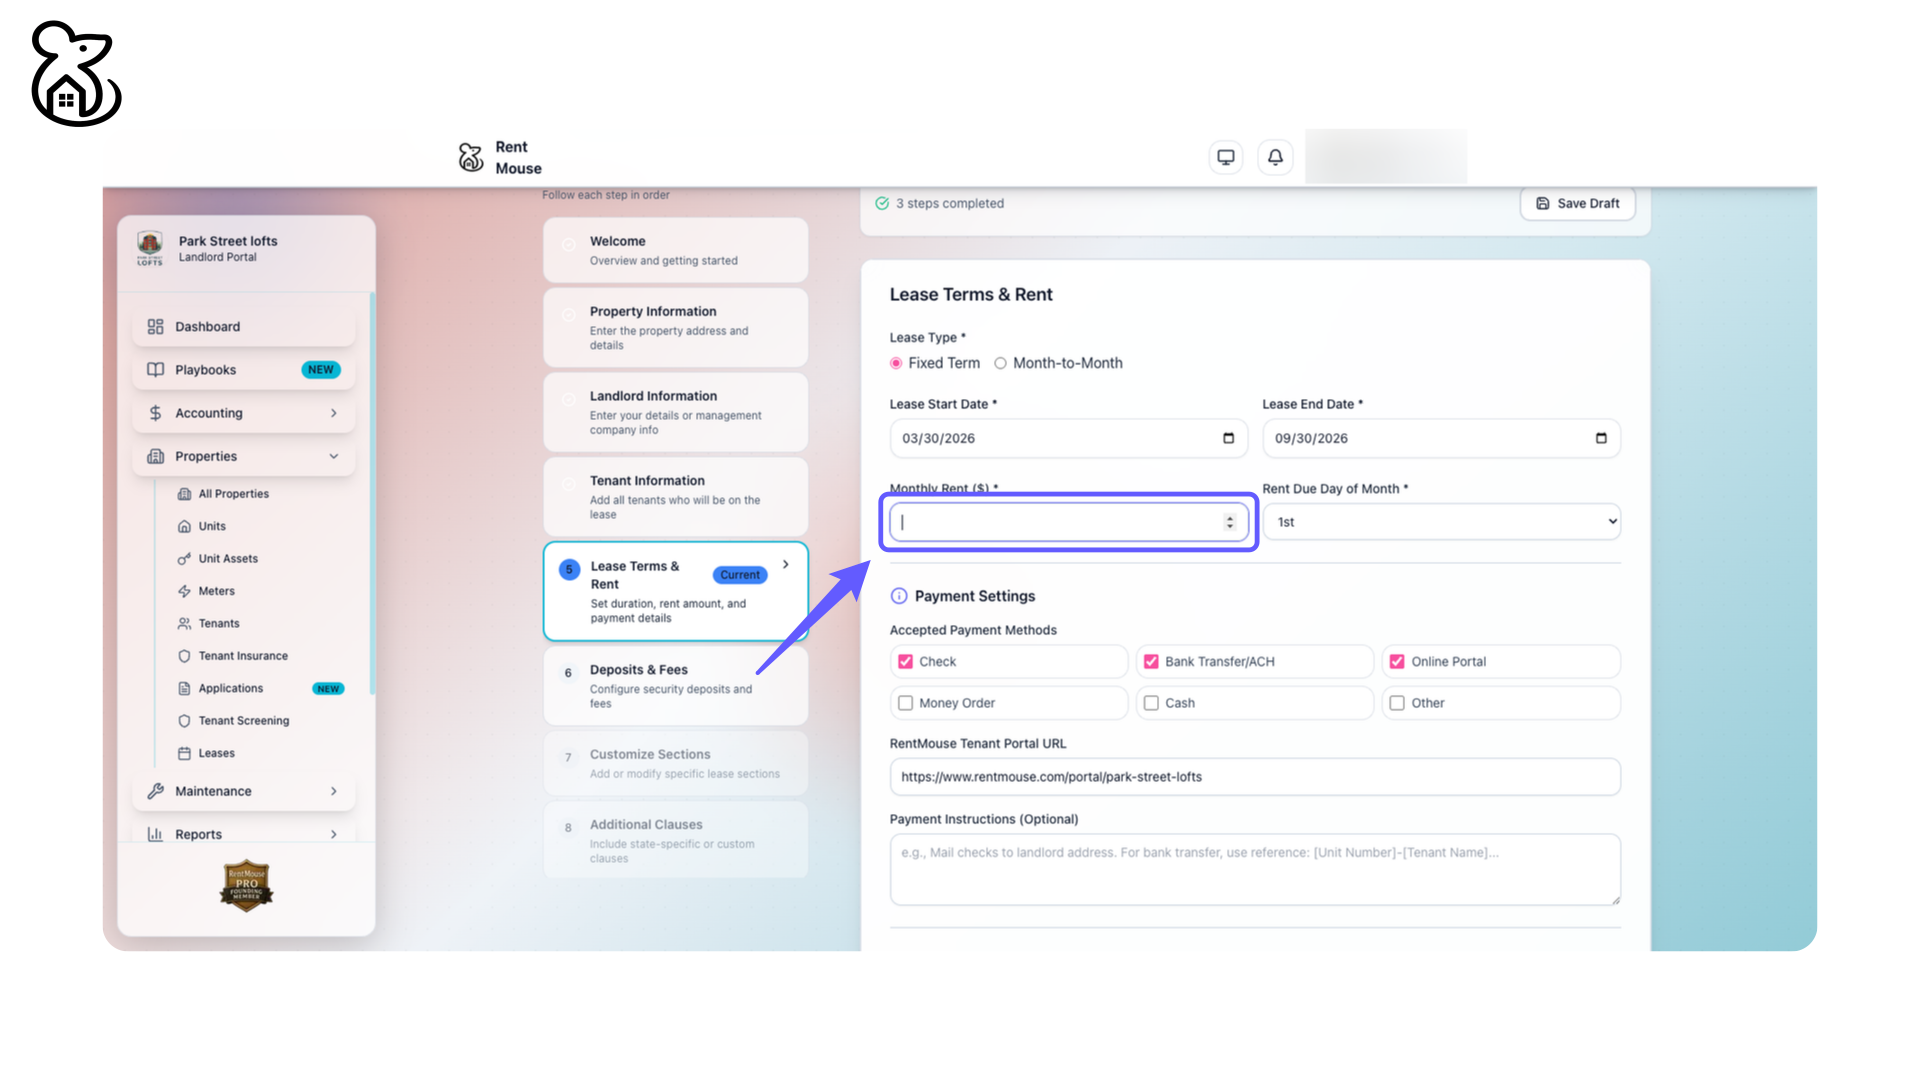
Step 35: Input Monthly Rent Amount
Enter the monthly rent amount in the provided field to set the rental price for the lease term.
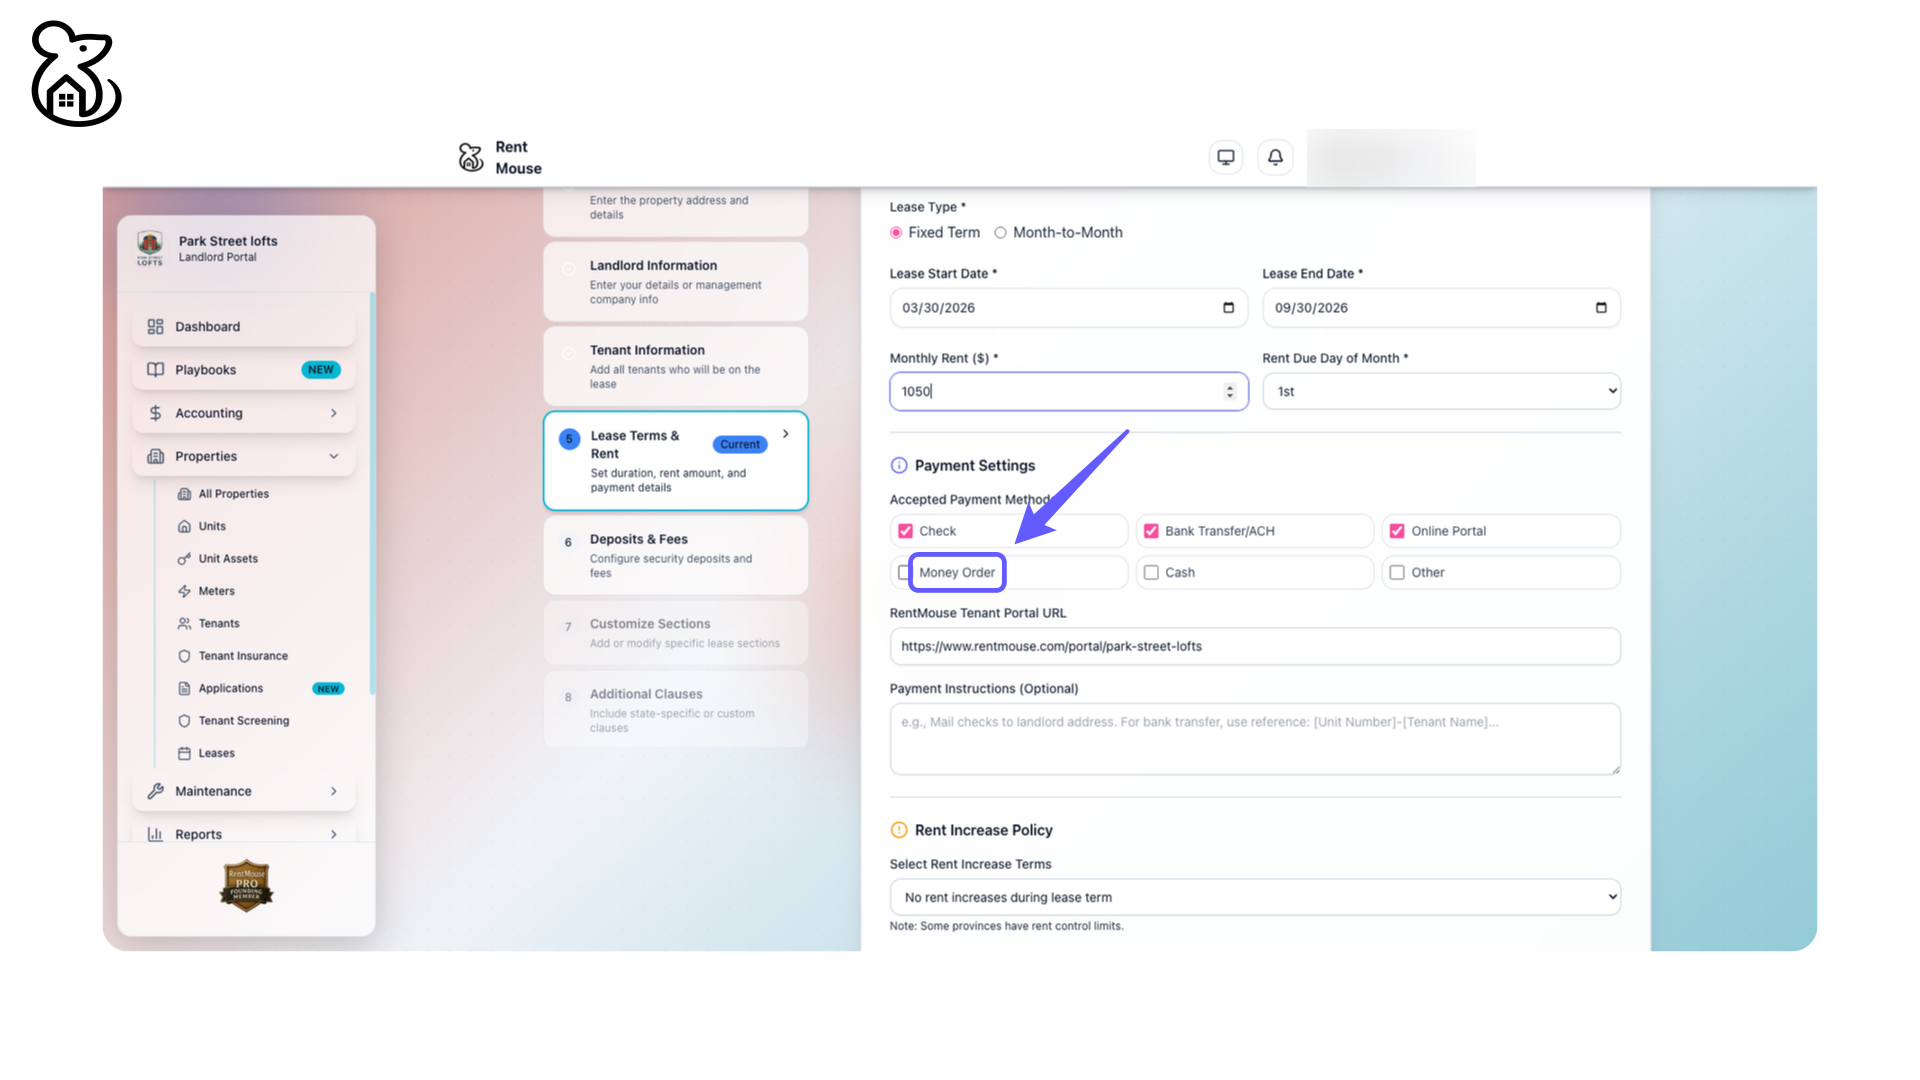
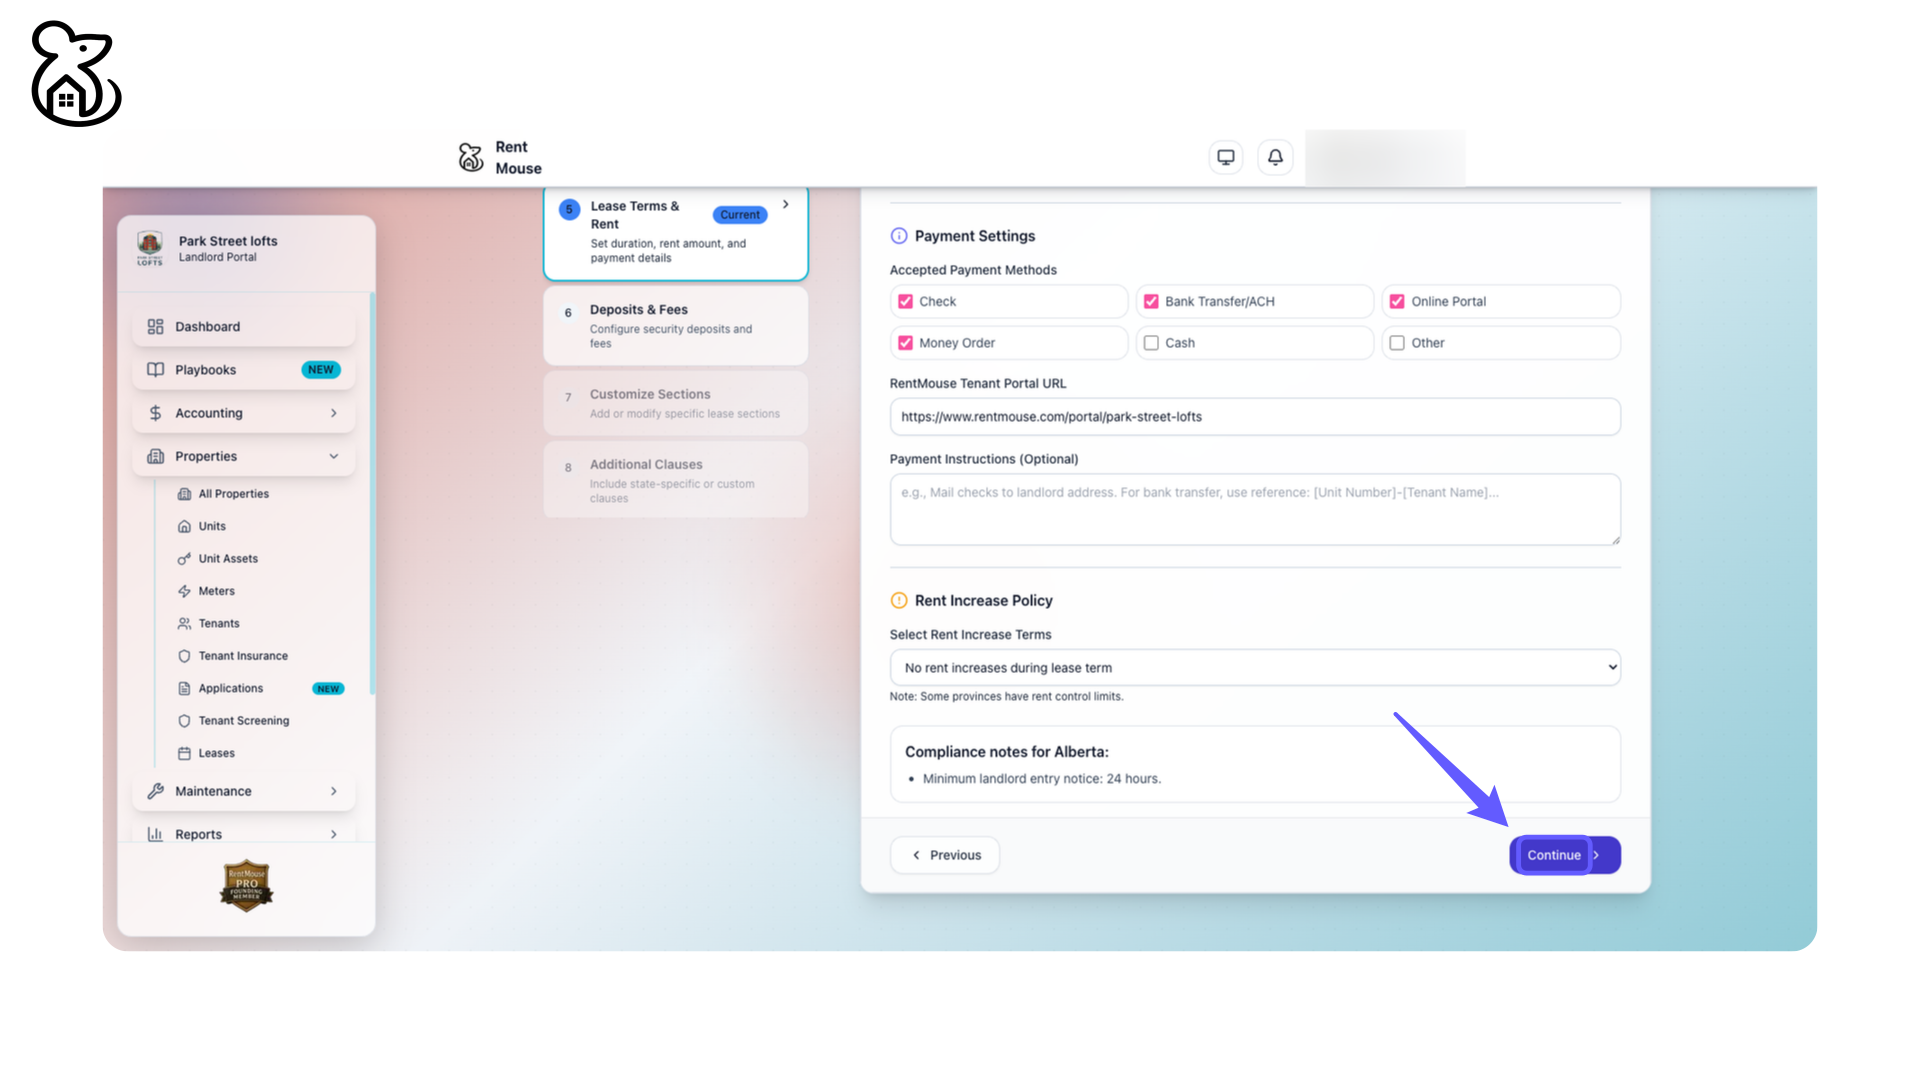
Step 36: Select Payment Method
Select 'Money Order' as an accepted payment method in the Payment Settings section.
Step 37: Access Tenant Portal
Visit the provided URL to access the RentMouse tenant portal. Use this link to manage your rental activities and preferences.

Step 38: Proceed to Next Step
Click 'Continue' to proceed to the next step in the process.
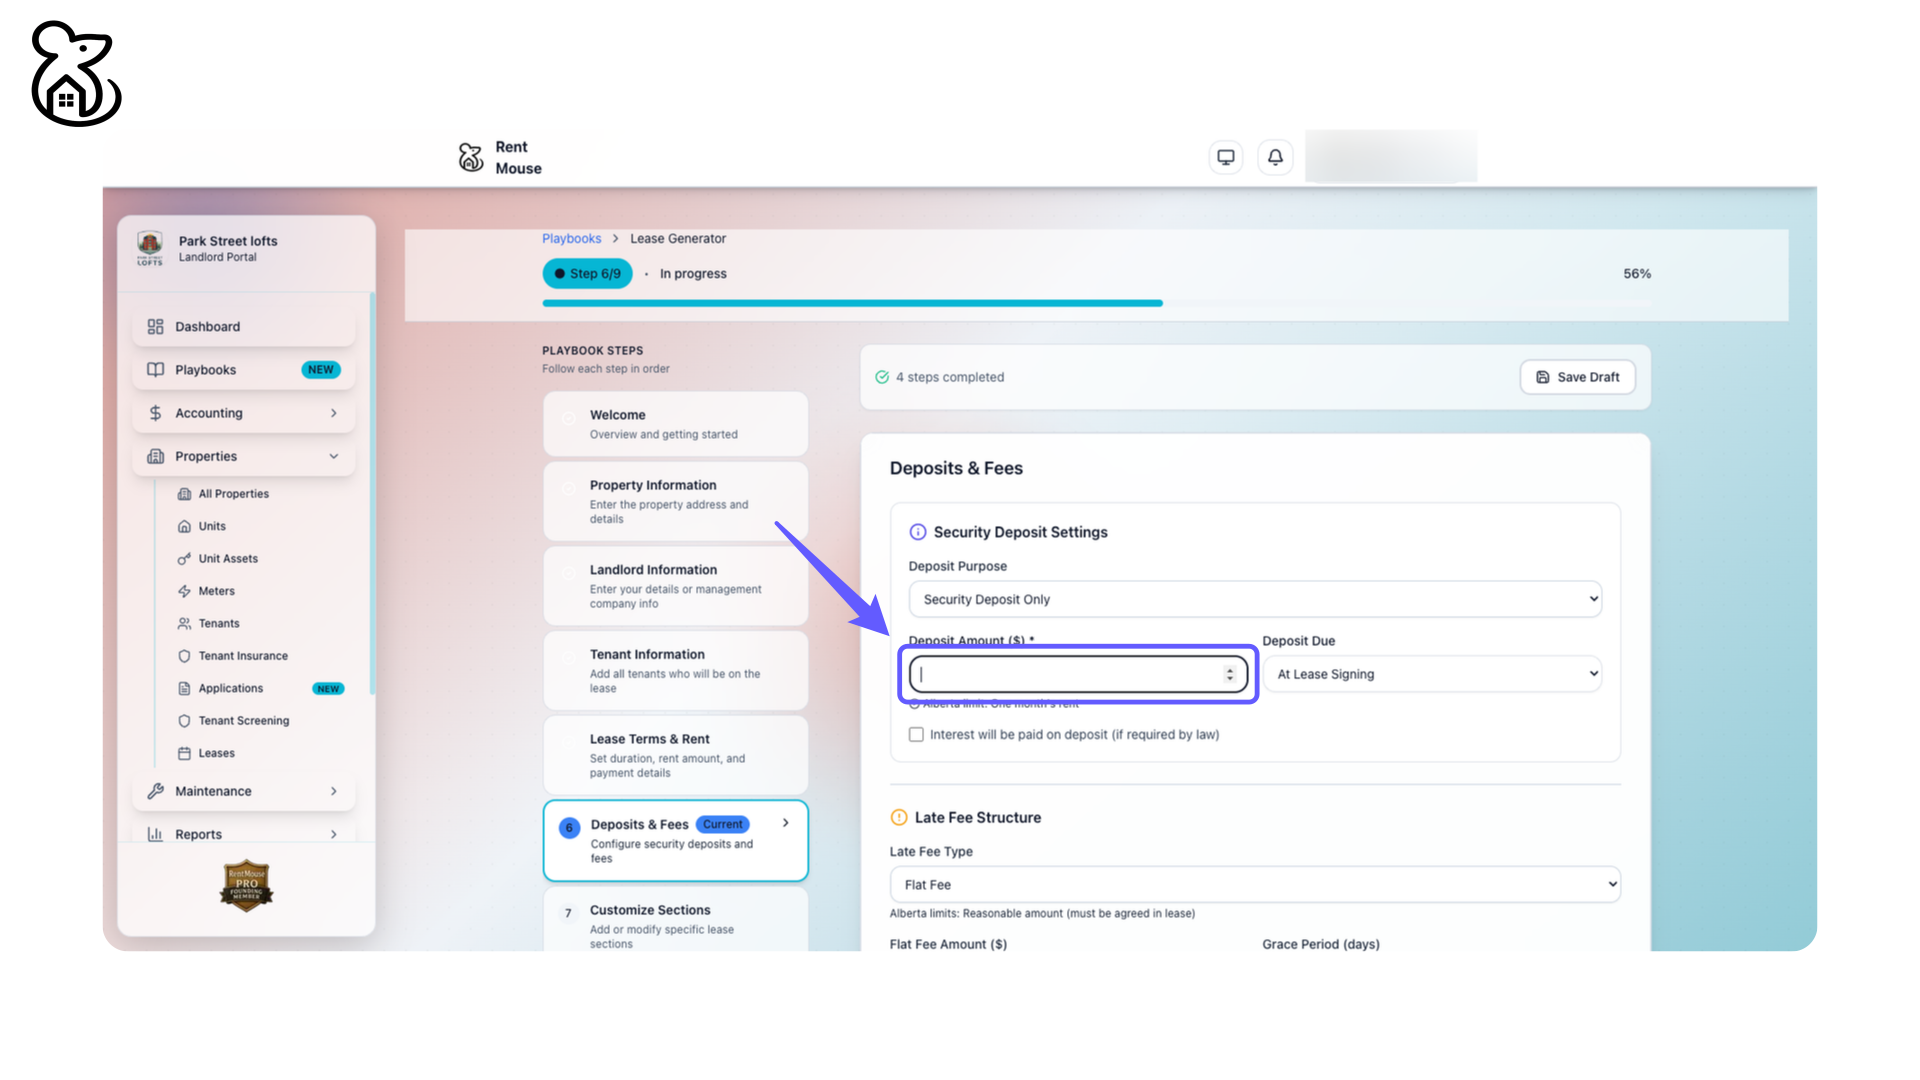
Step 39: Enter Security Deposit Amount
Enter the deposit amount in the field to set the security deposit for the lease. Refer to the Alberta limit guideline provided.
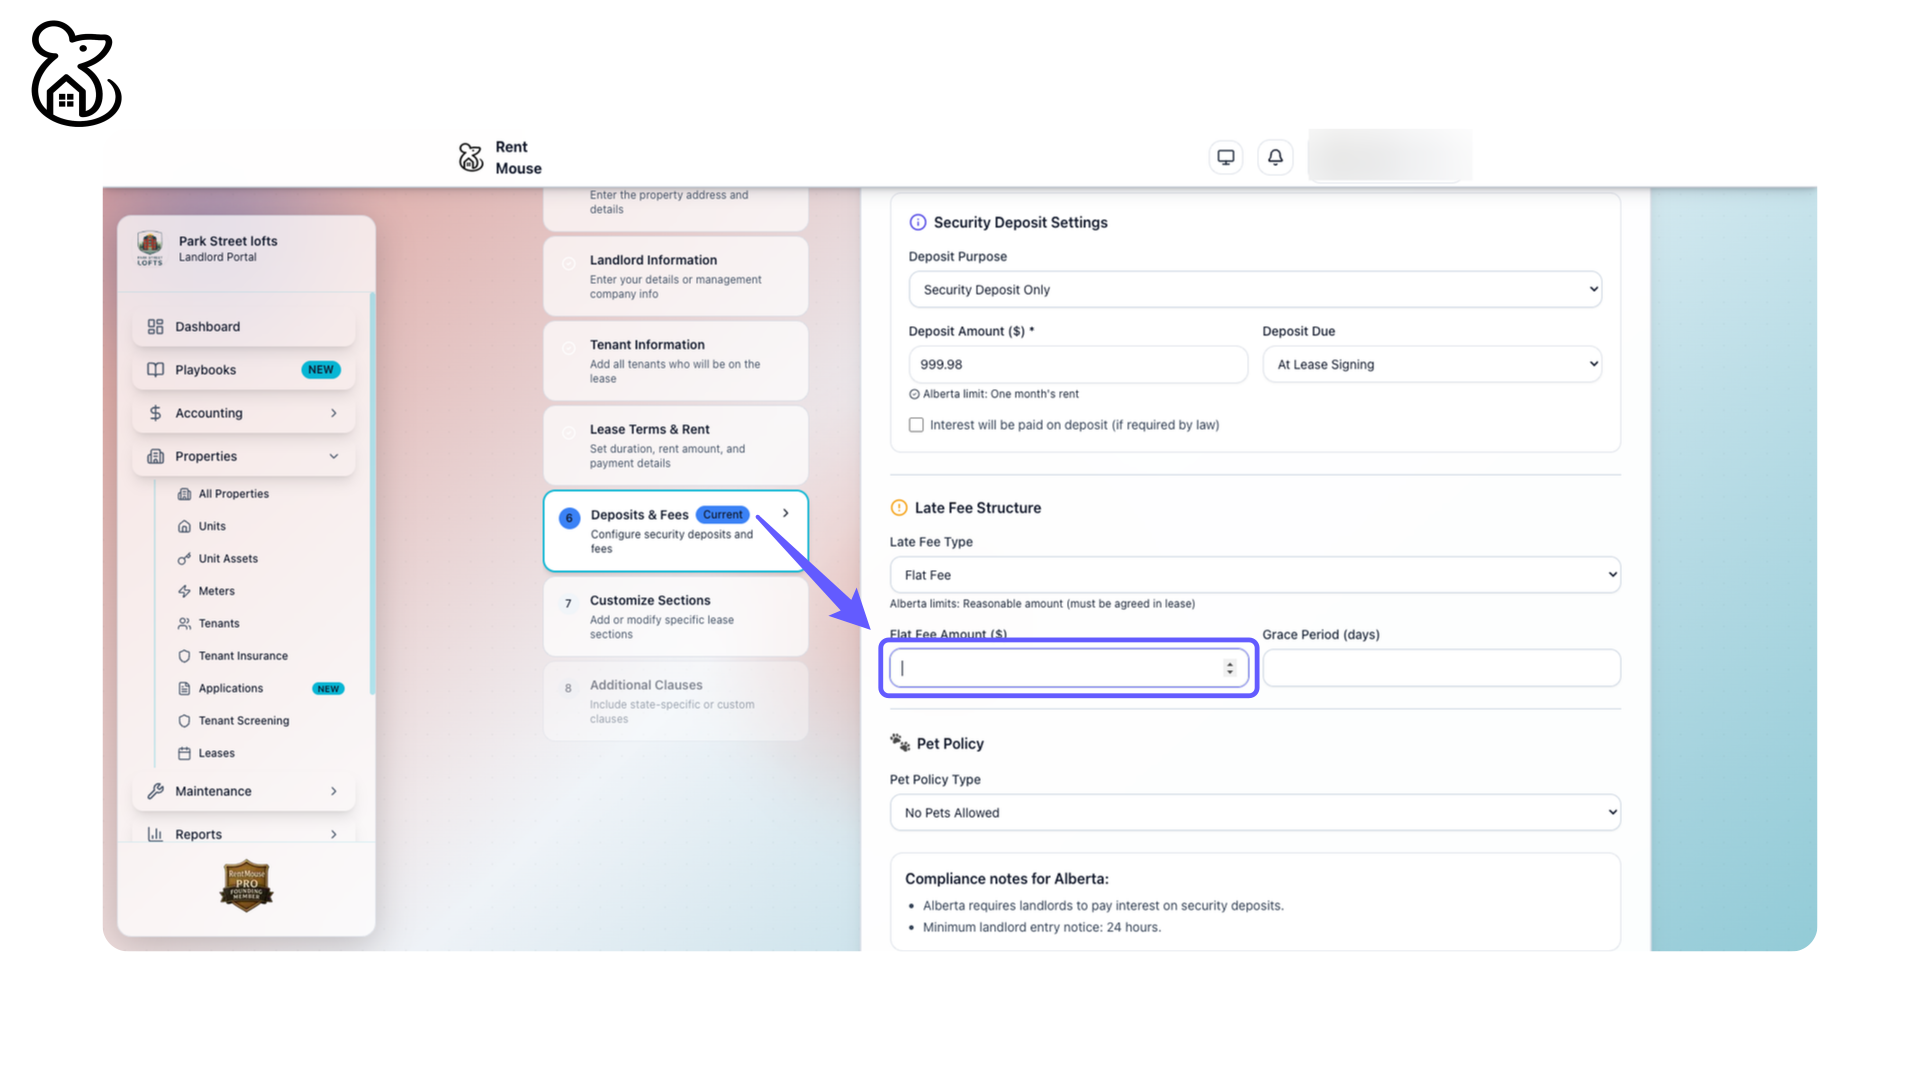
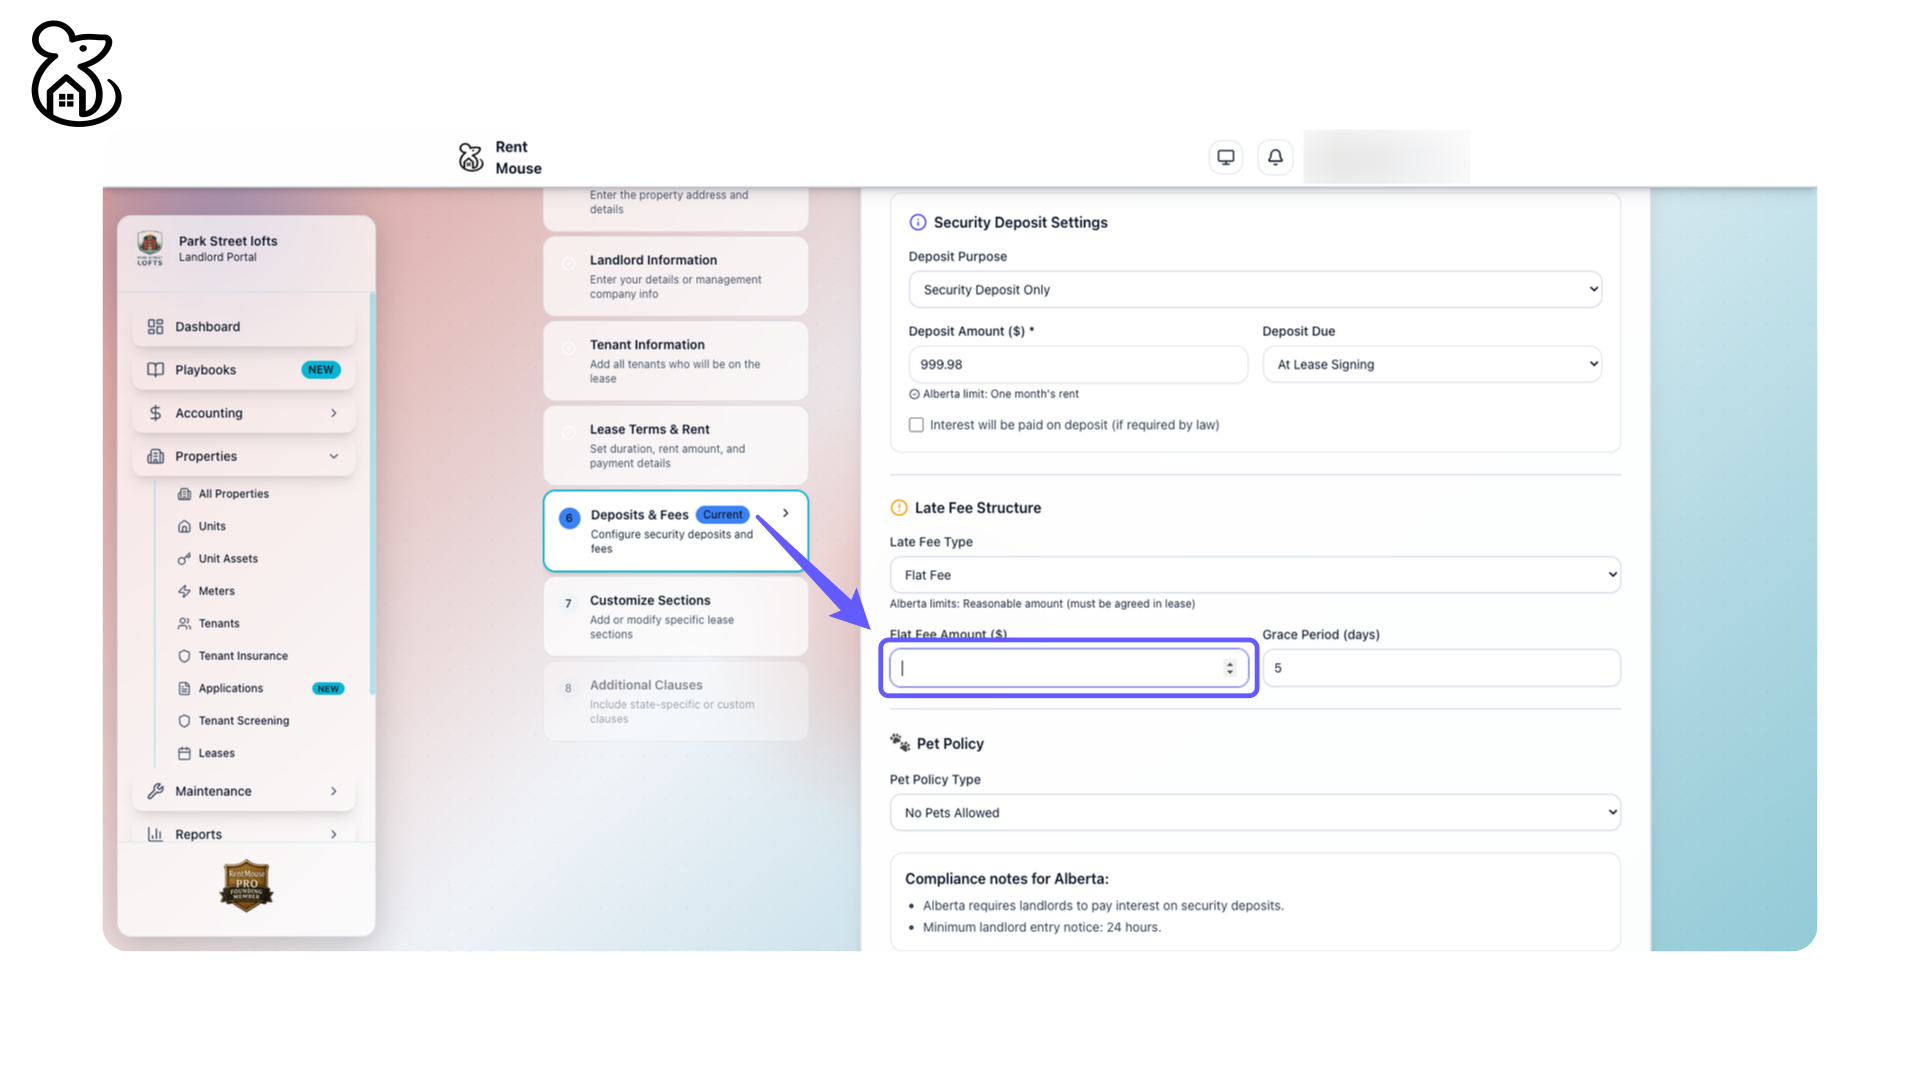
Step 40: Enter Late Fee Amount
Enter the amount for the flat fee under the 'Flat Fee Amount ($)' section.
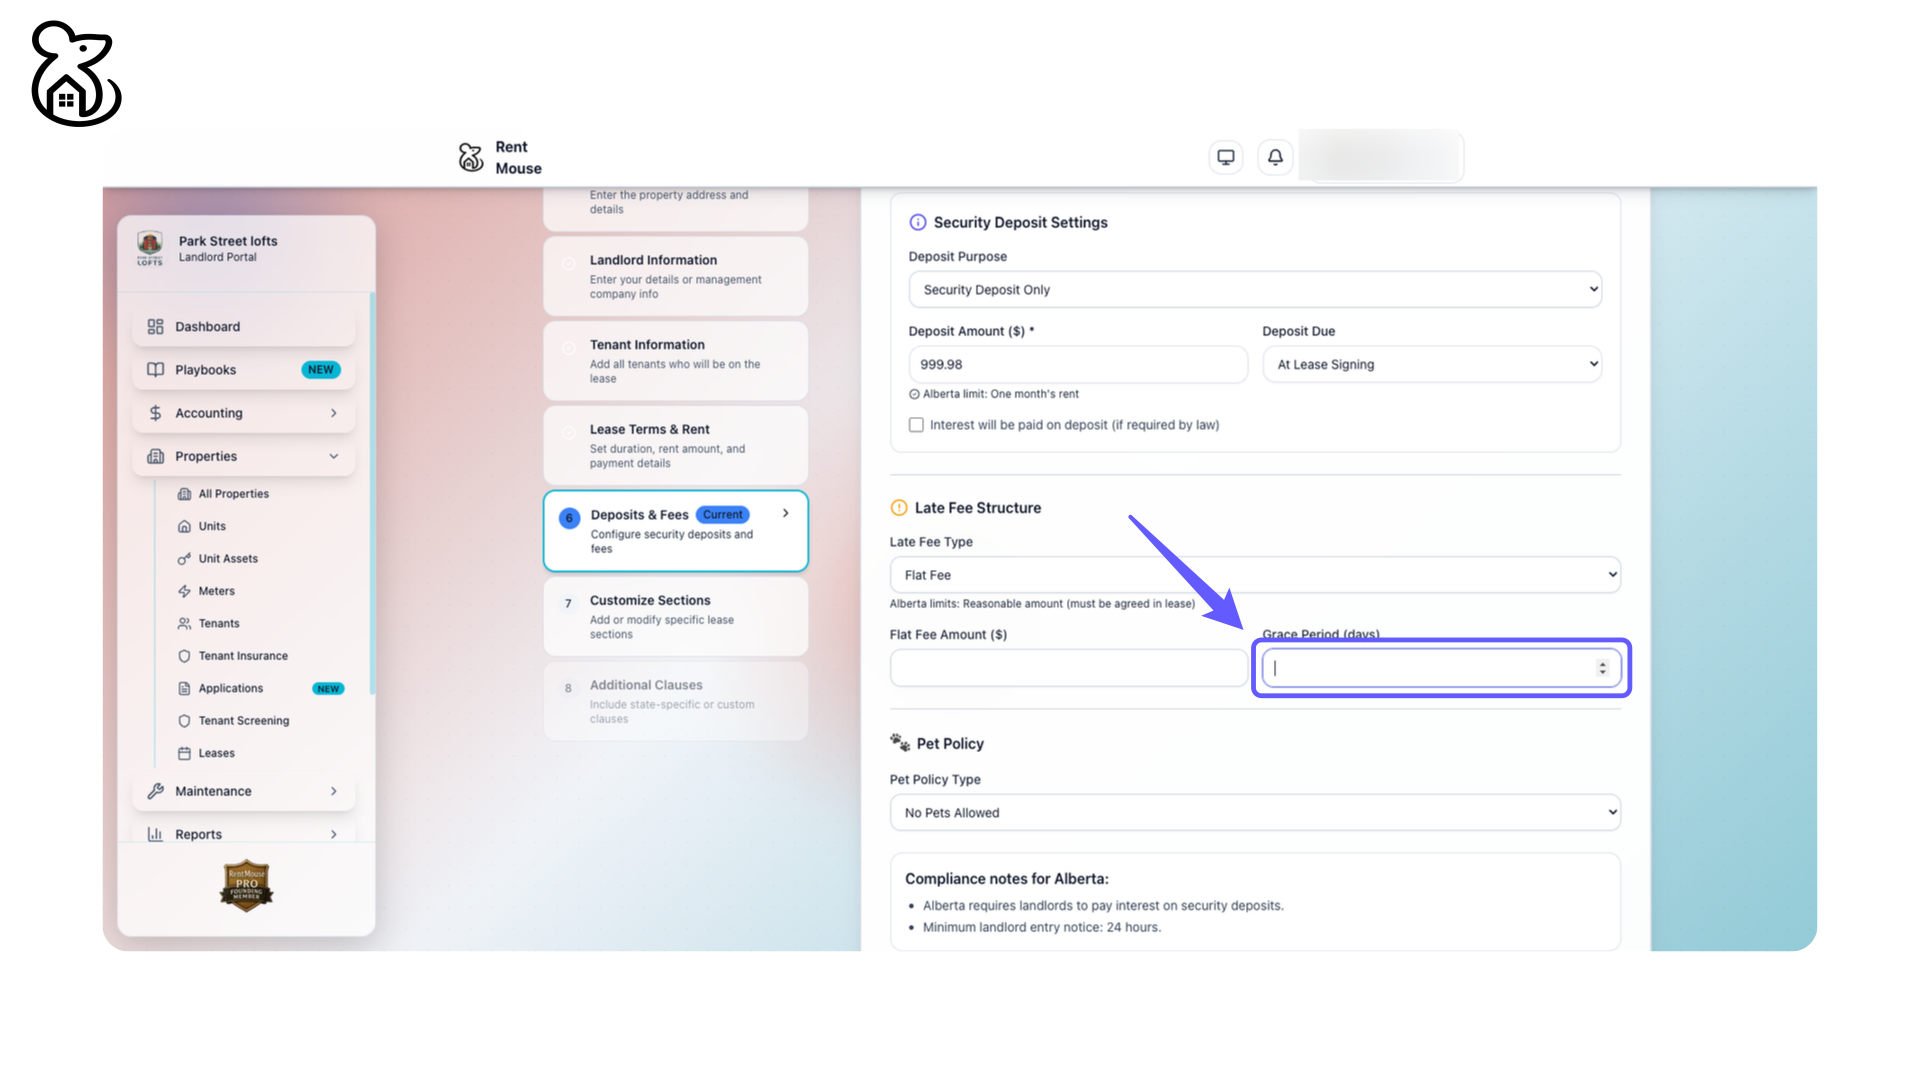
Step 41: Set Grace Period Duration
Select the number of days for the grace period from the dropdown menu to finalize late fee arrangements.
Step 42: Set the Flat Fee Amount
Enter the desired flat fee amount in the input field to specify the late fee charge.
Step 43: Review Pet Policy
Check the pet policy set to 'No Pets Allowed' to ensure compliance with your needs before proceeding.
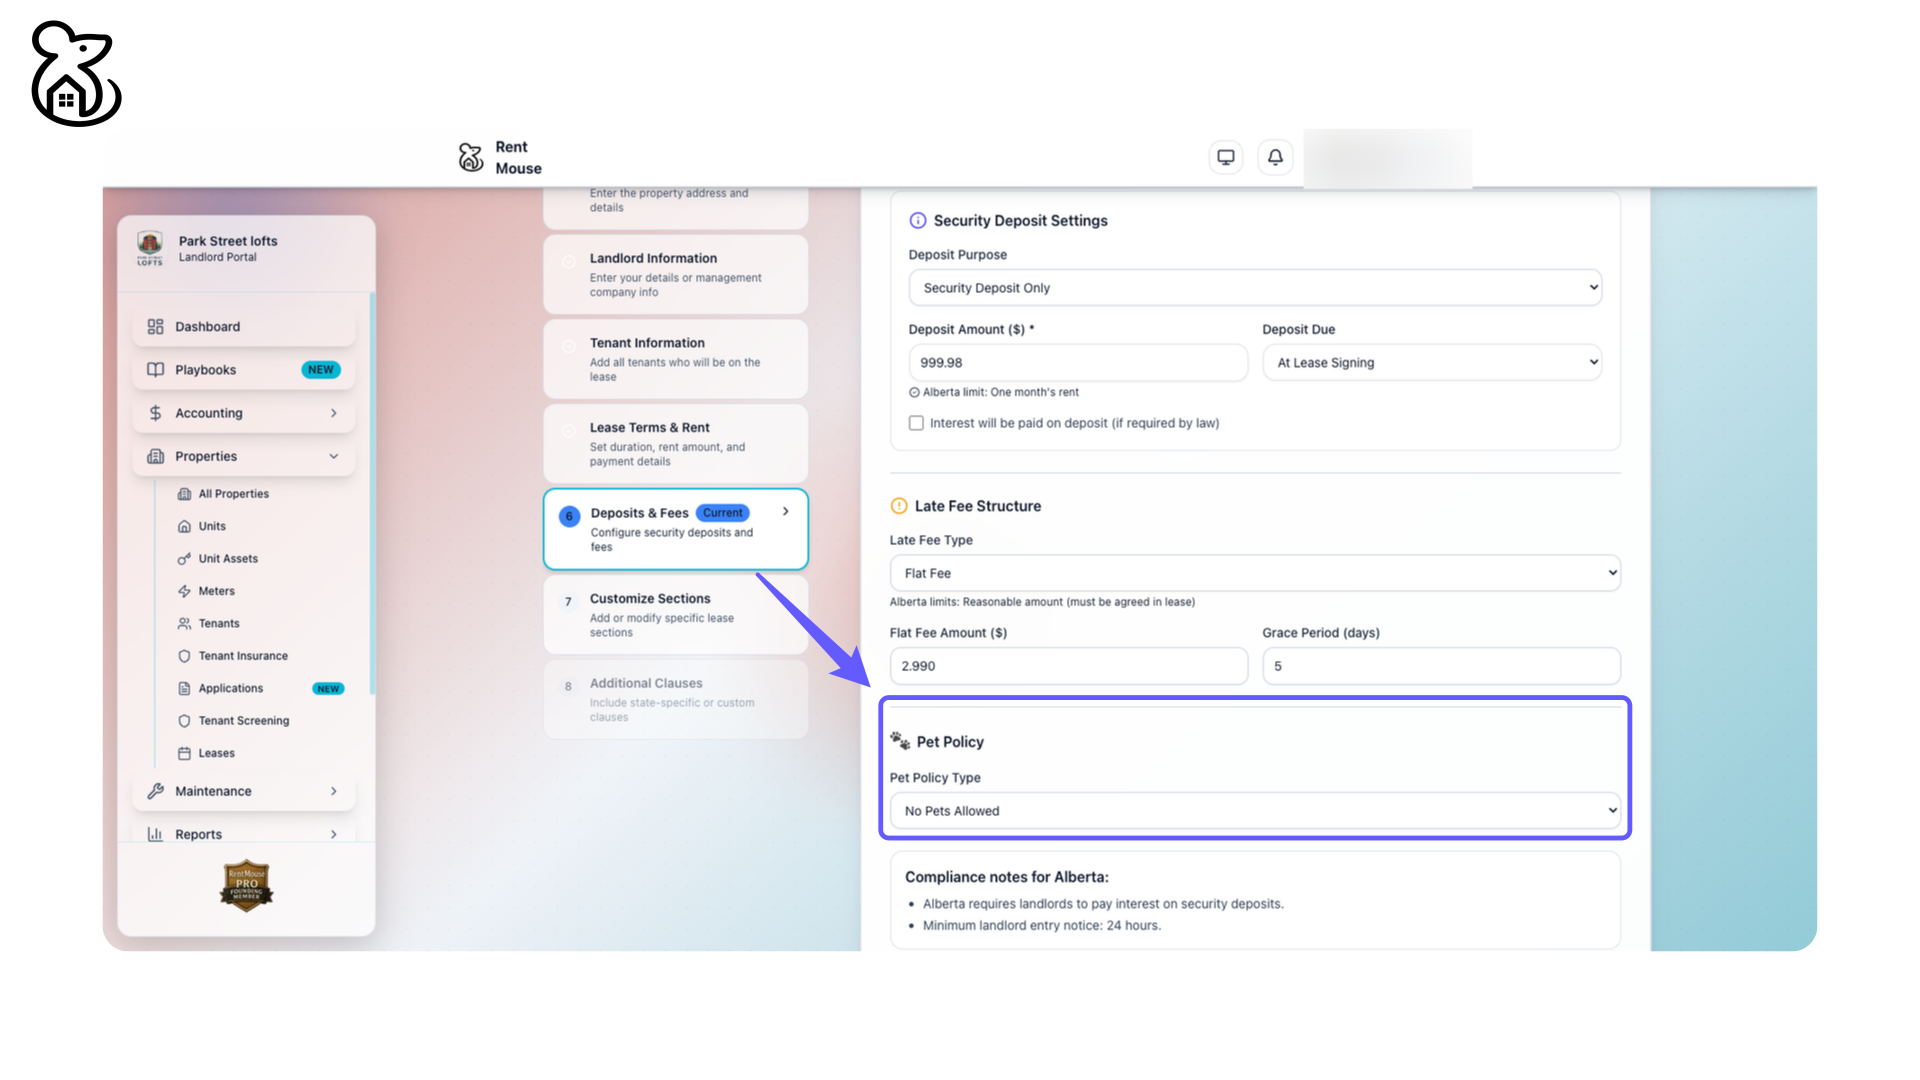
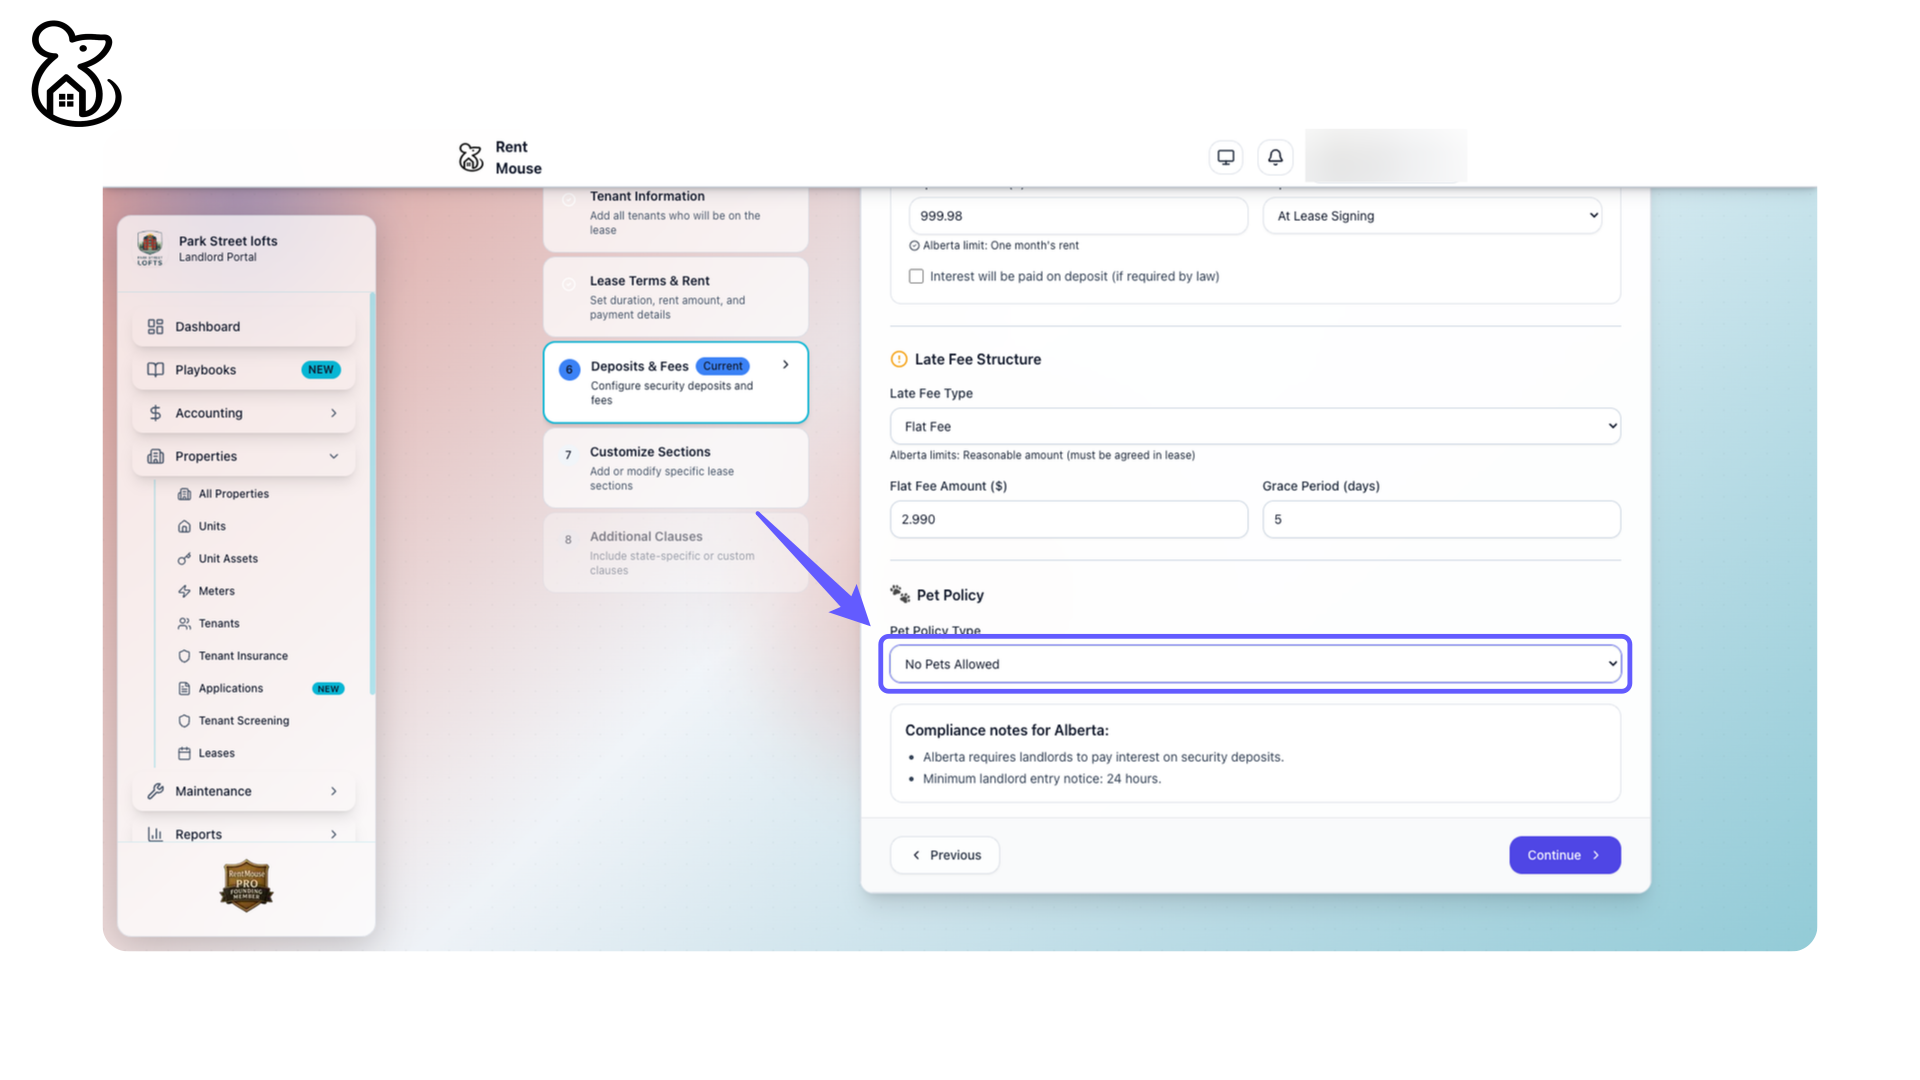
Step 44: Check Pet Policy Settings
Verify that the pet policy type is set to 'No Pets Allowed.' Change it if necessary to align with your rental agreement terms.
Step 45: Pet Weight Limitation
Select 'No Weight Limit' to allow any pet size without restrictions.
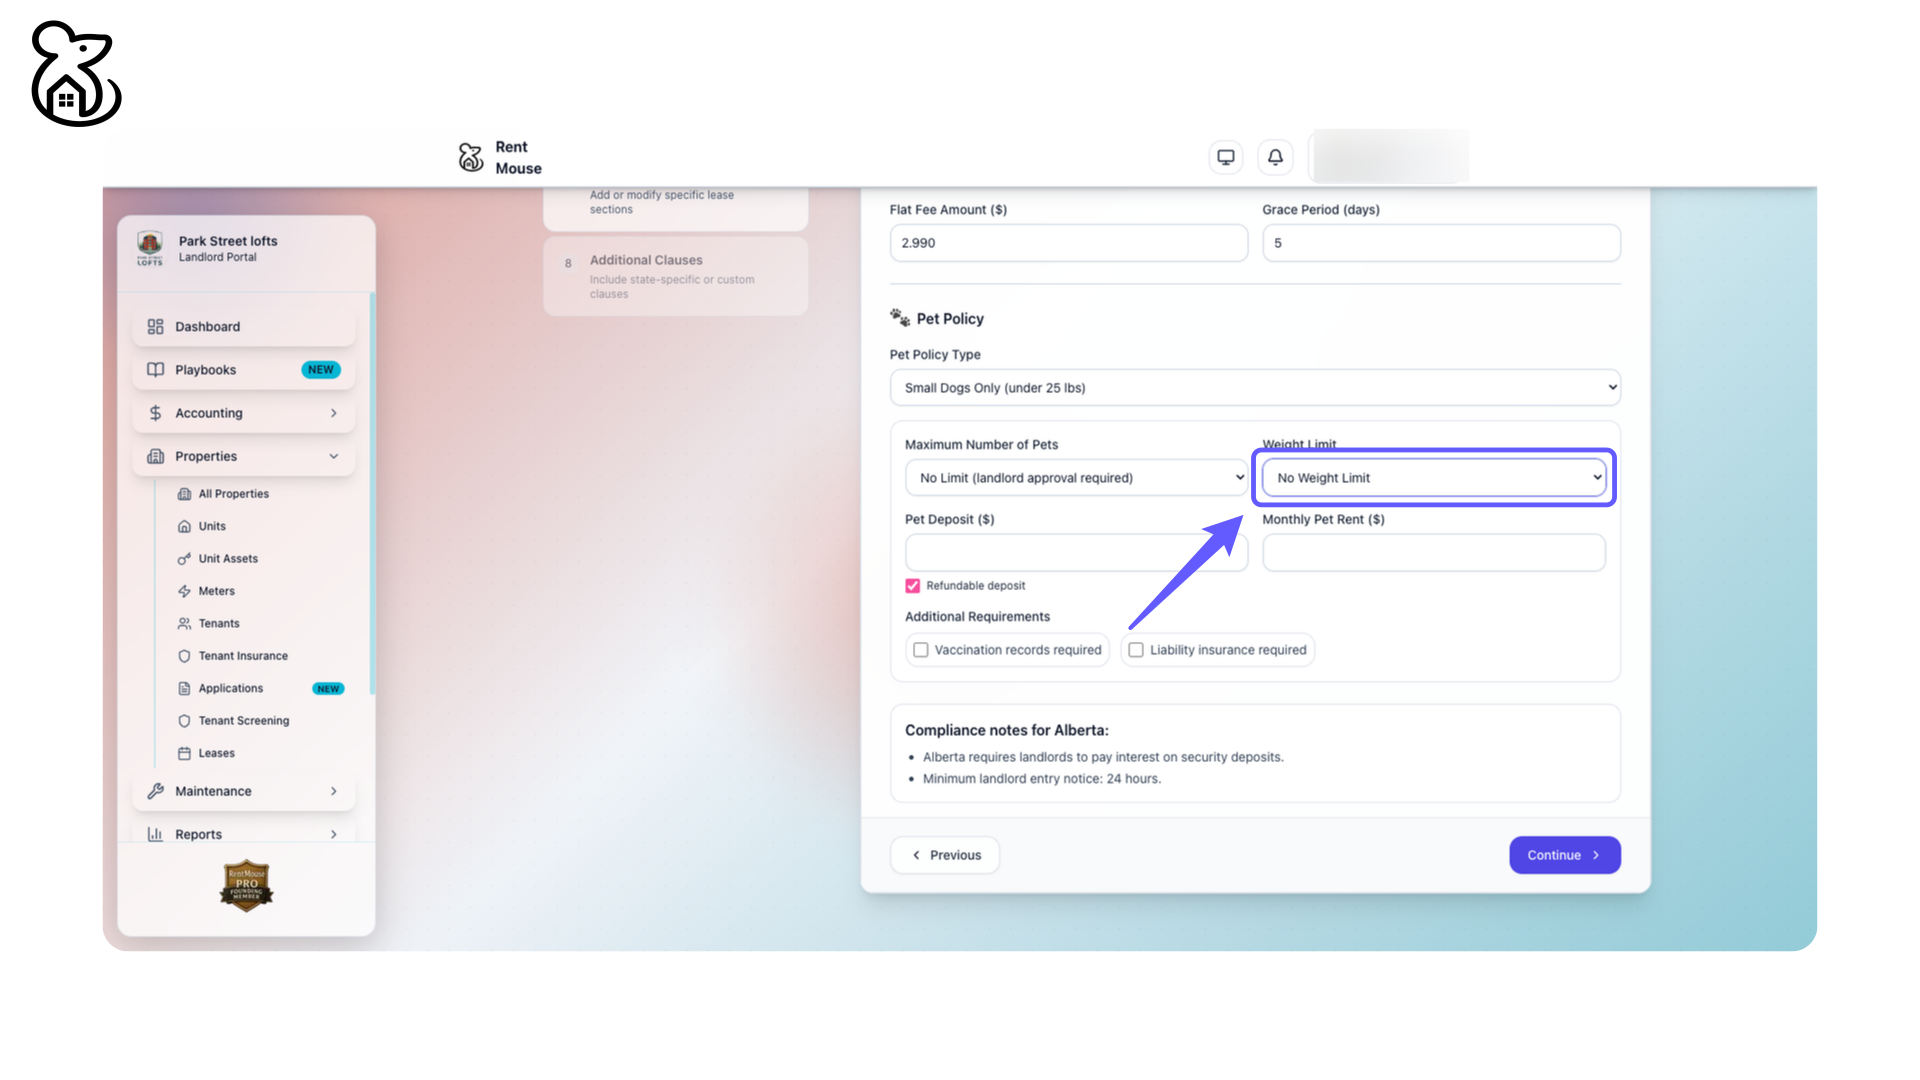
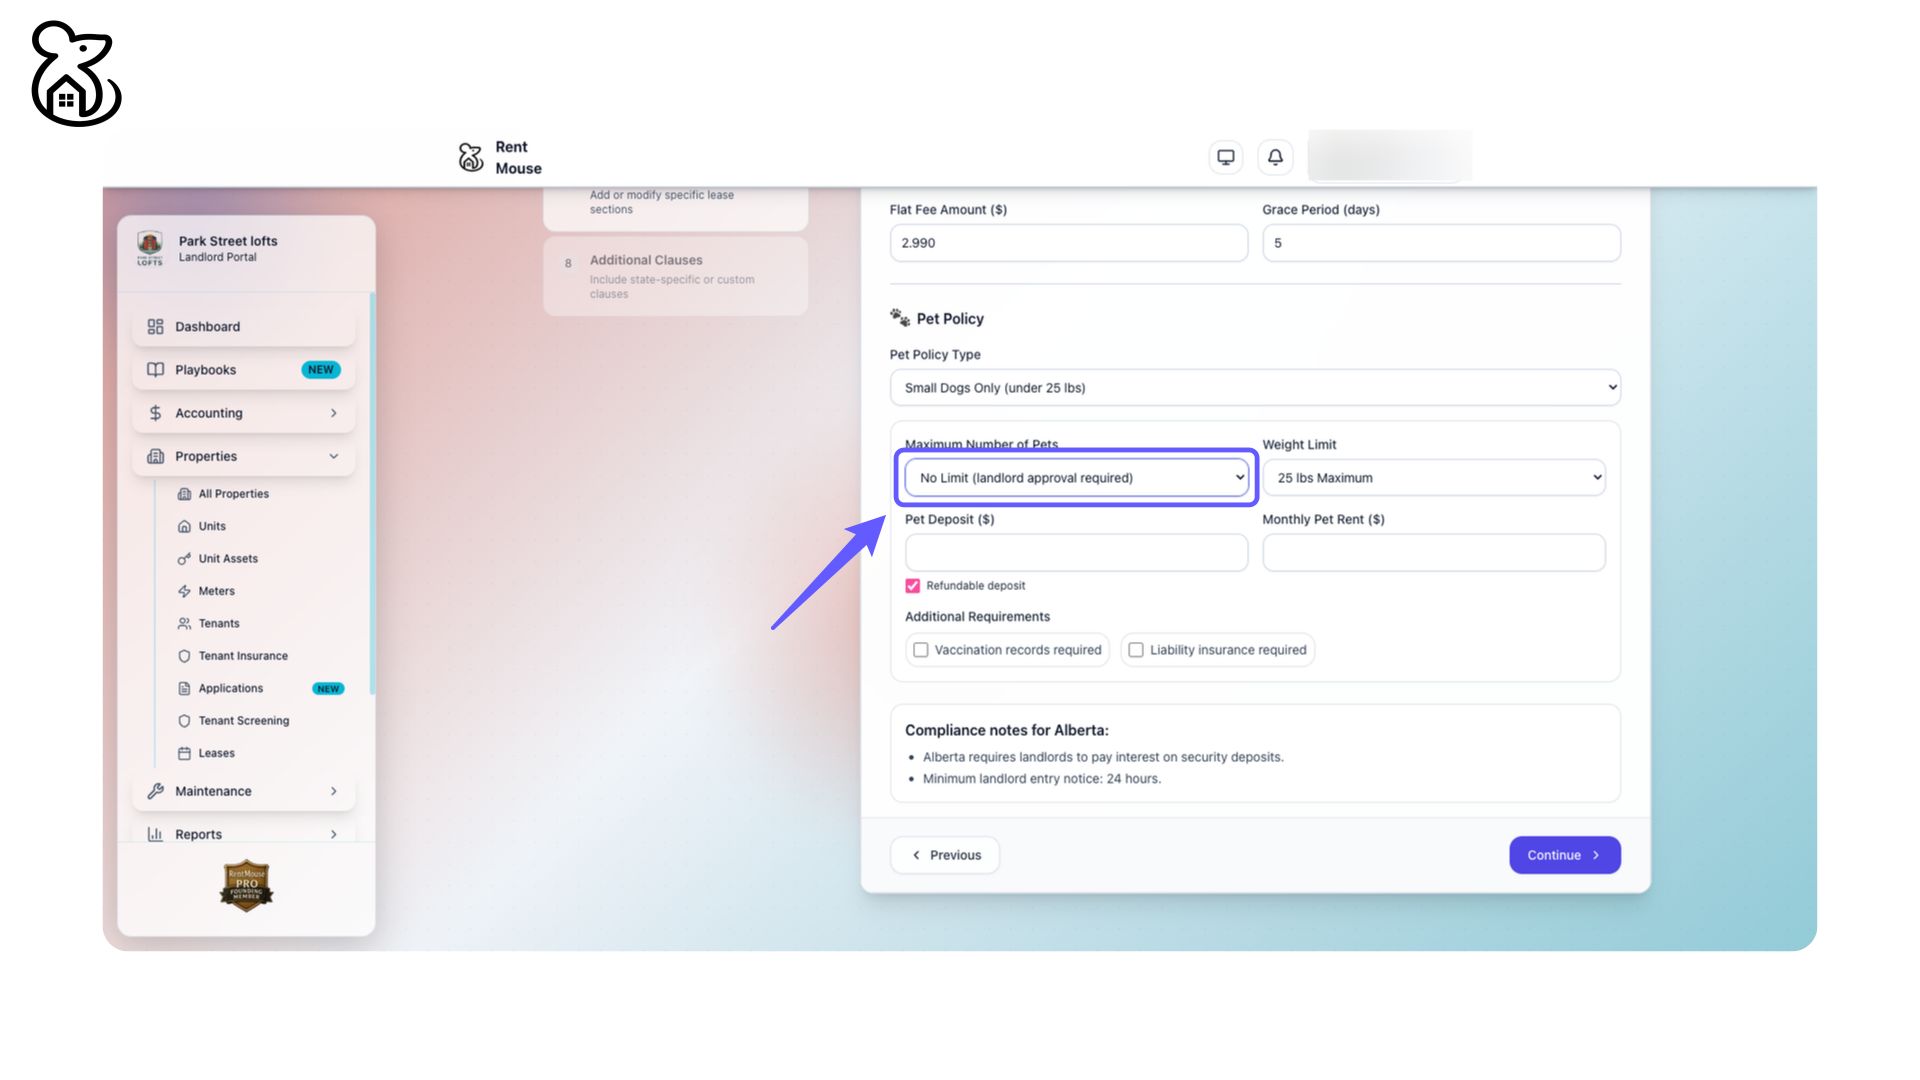
Step 46: Set Pet Limit
Select the maximum number of pets allowed and note that no limit is set, but landlord approval is required.
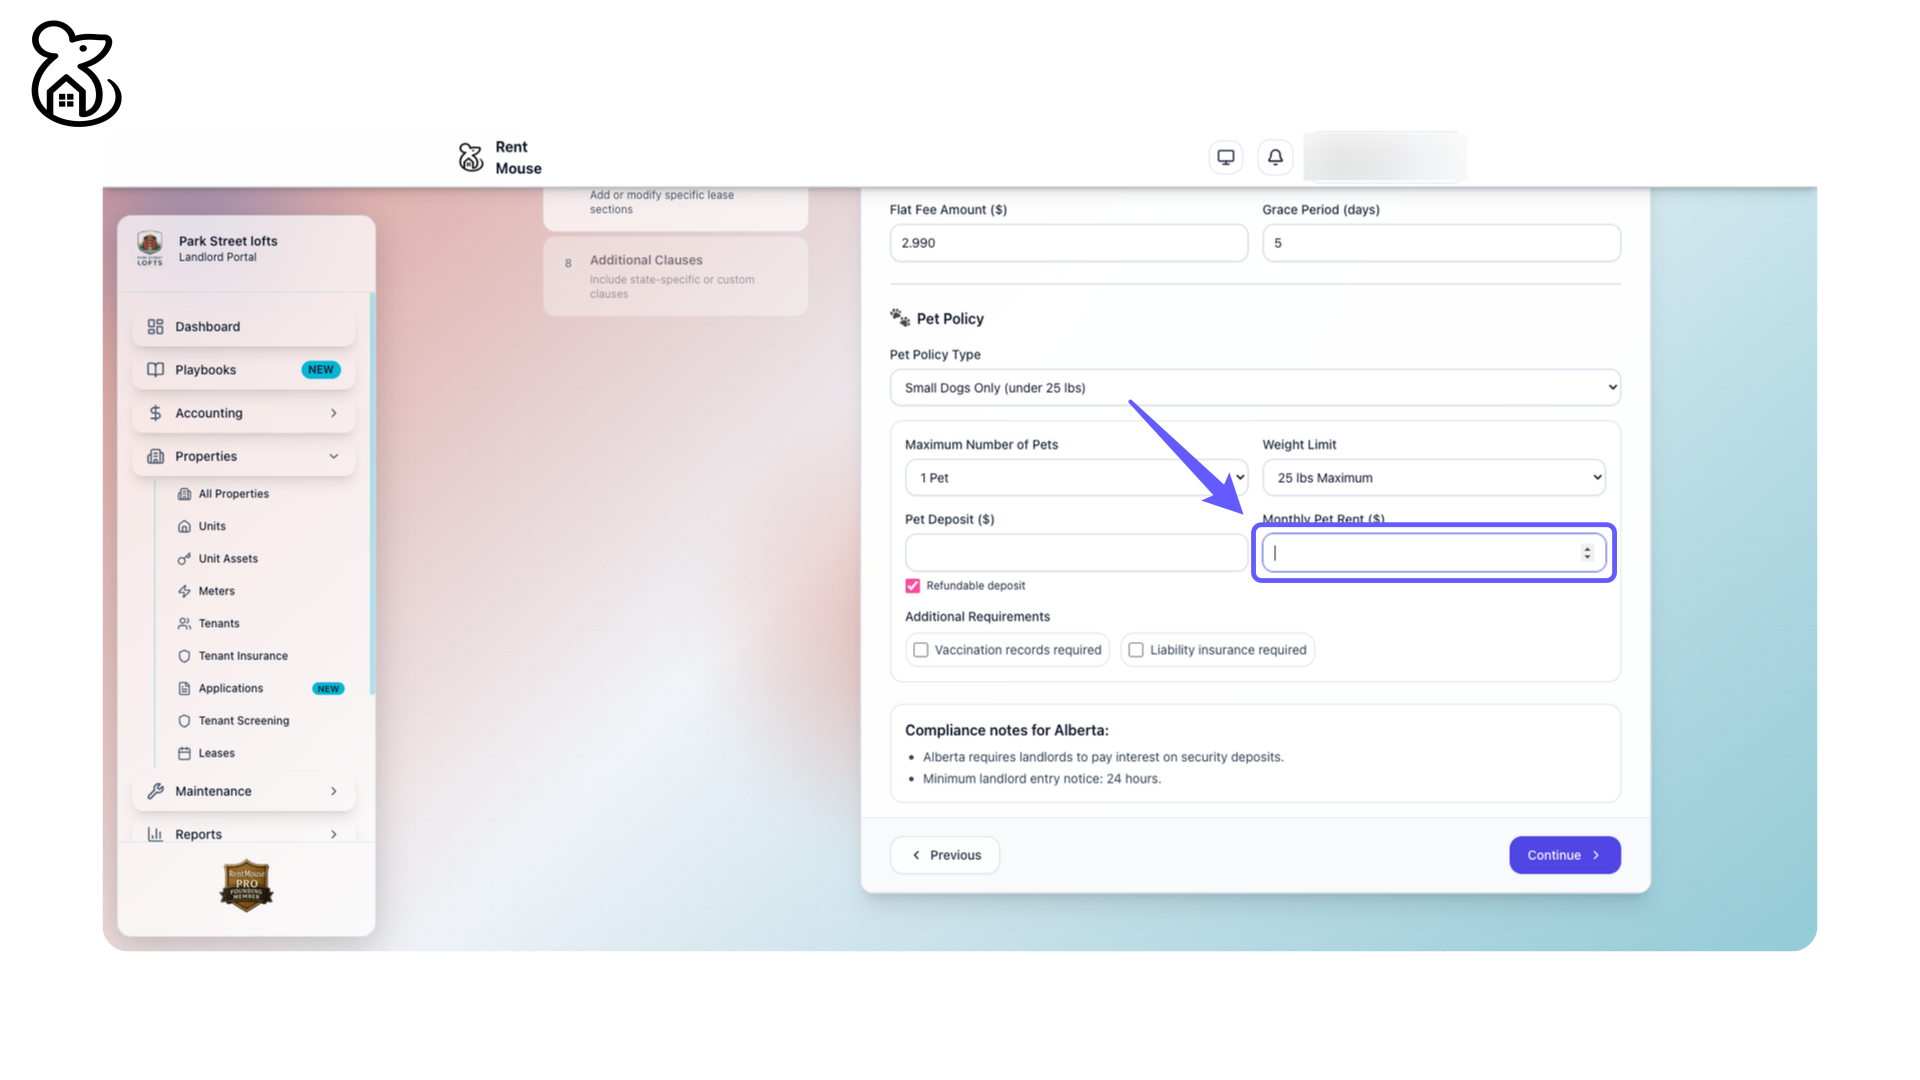
Step 47: Set Monthly Pet Rent
Enter the monthly pet rent amount in the space provided.
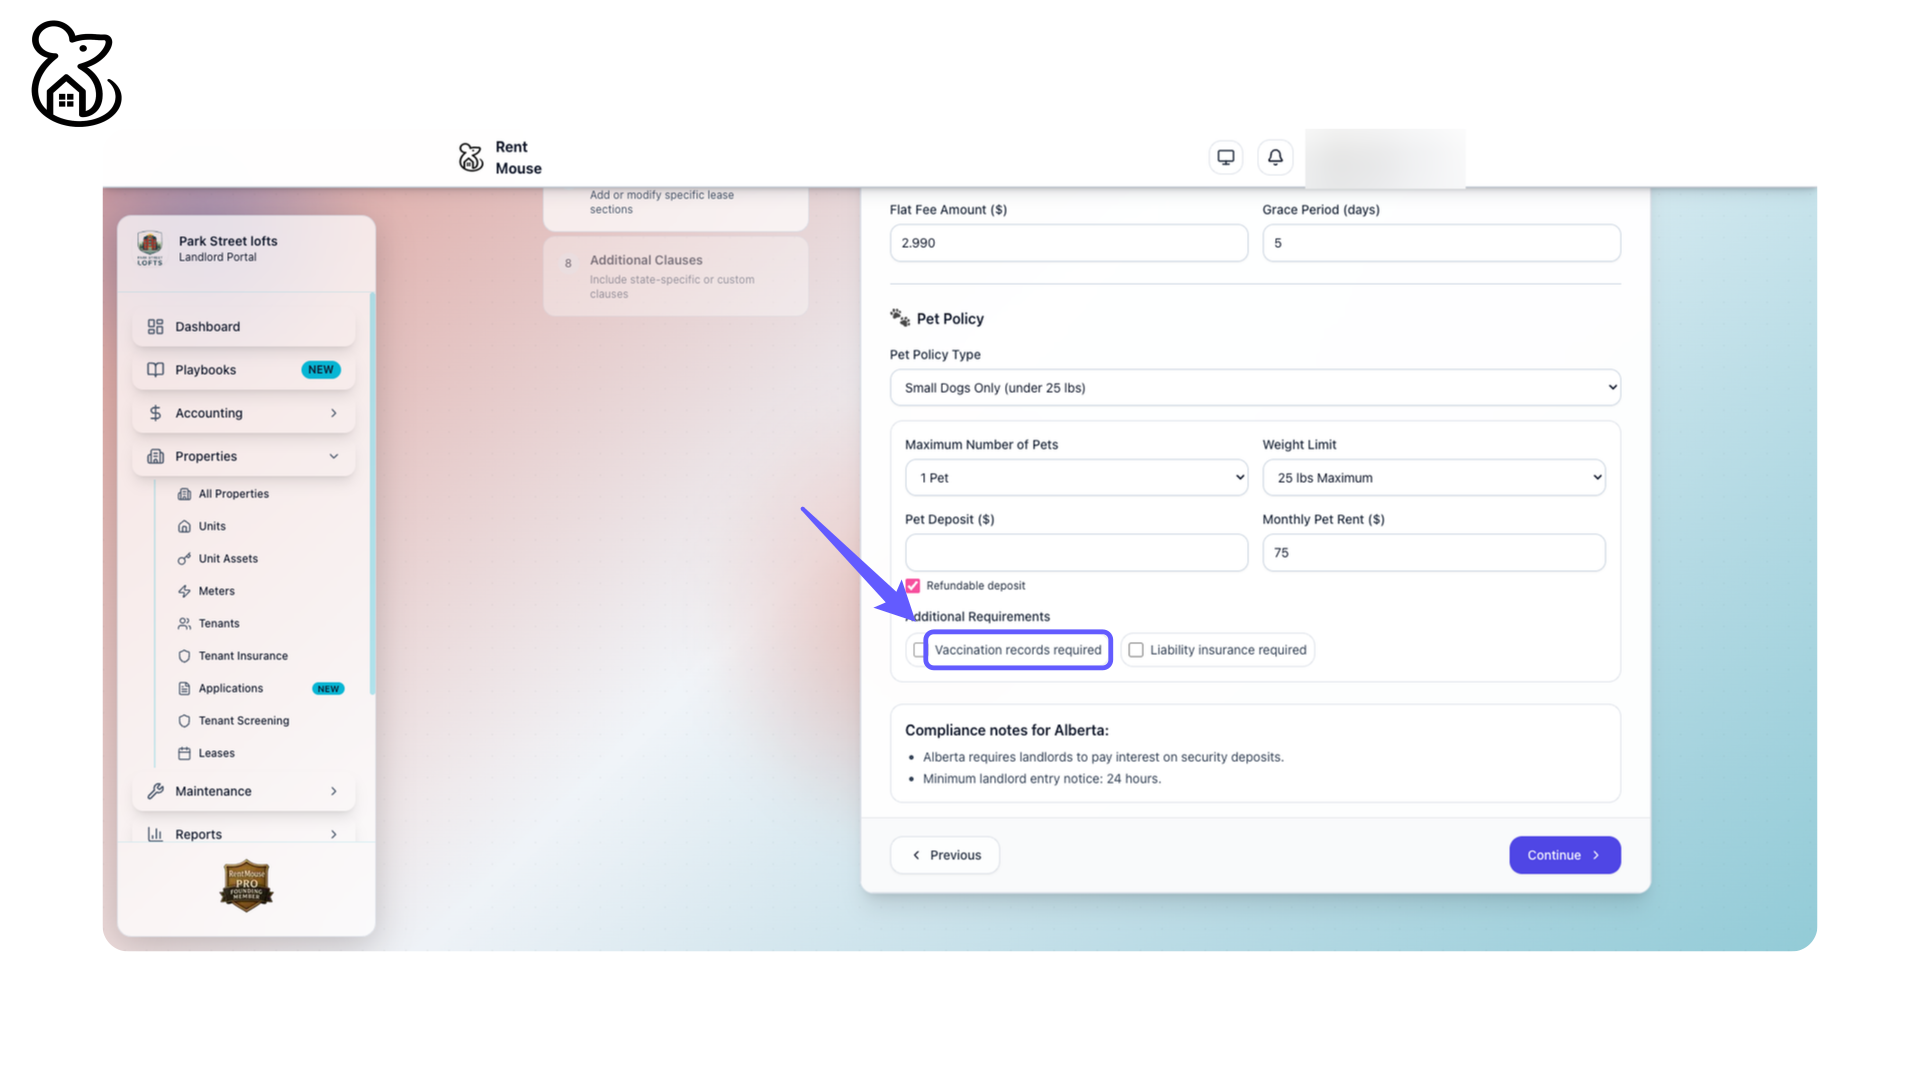
Step 48: Ensure Vaccination Records
Ensure that vaccination records are required for pet policy compliance.
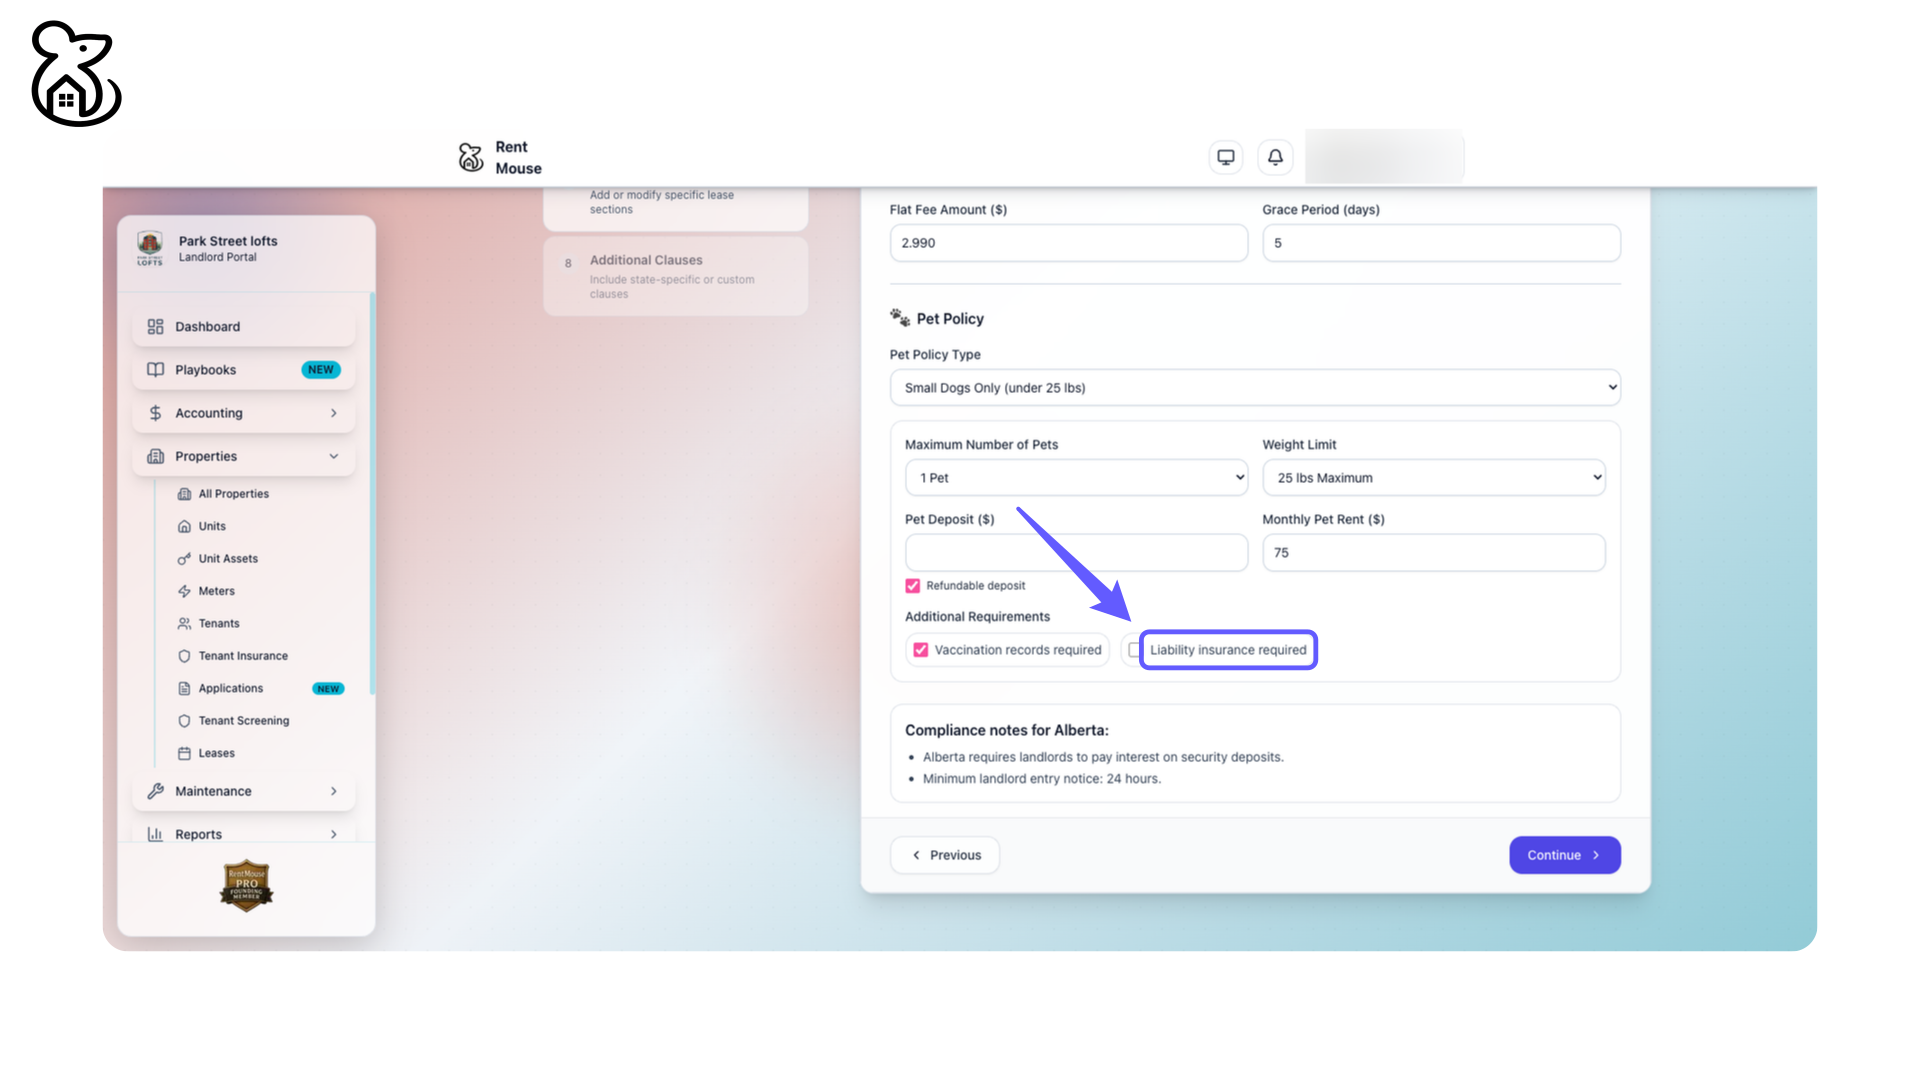
Step 49: Ensure Liability Insurance
Confirm that liability insurance is required for pet policies.
Step 50: Set Minimum Liability Coverage
Enter the minimum liability coverage amount in the designated field.
Step 51: Proceed to the Next Step
Click 'Continue' to proceed with the process.
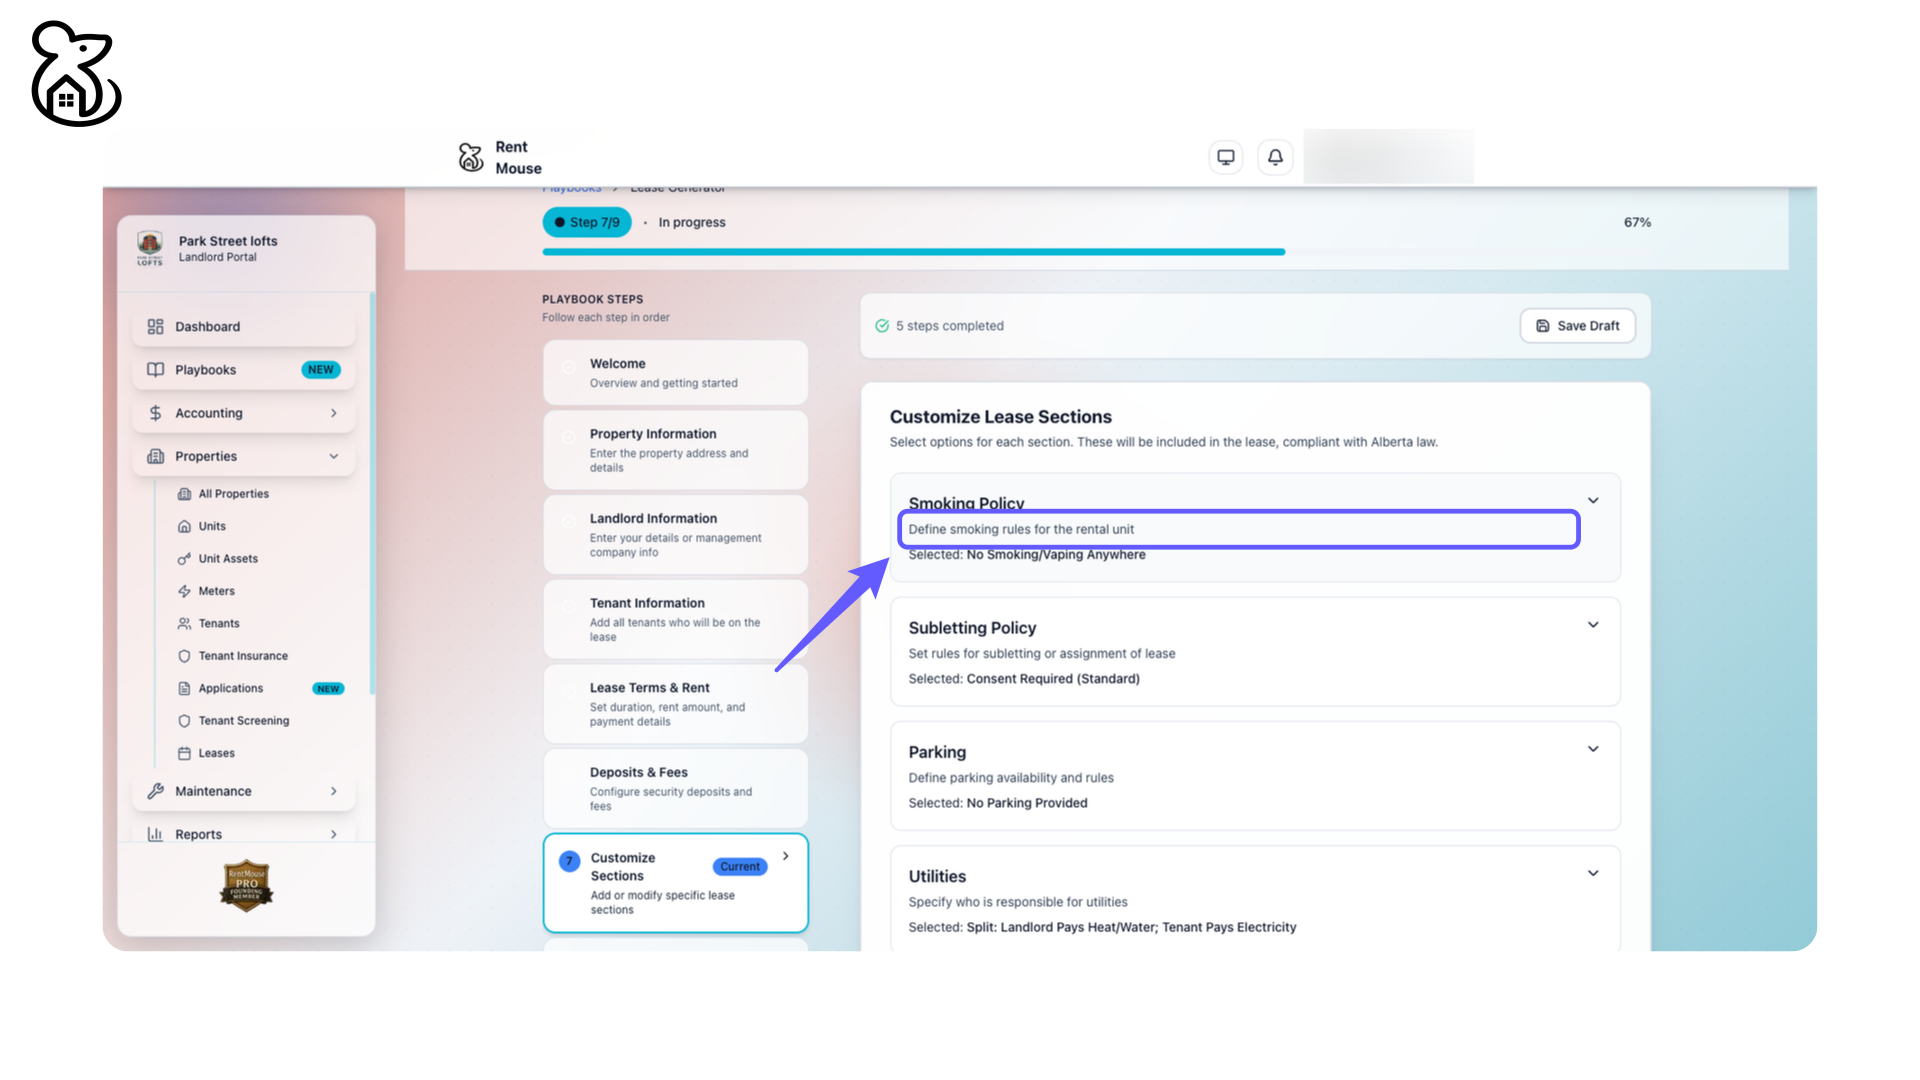
Step 52: Set Smoking Policy
Define smoking rules for the rental unit to ensure compliance.
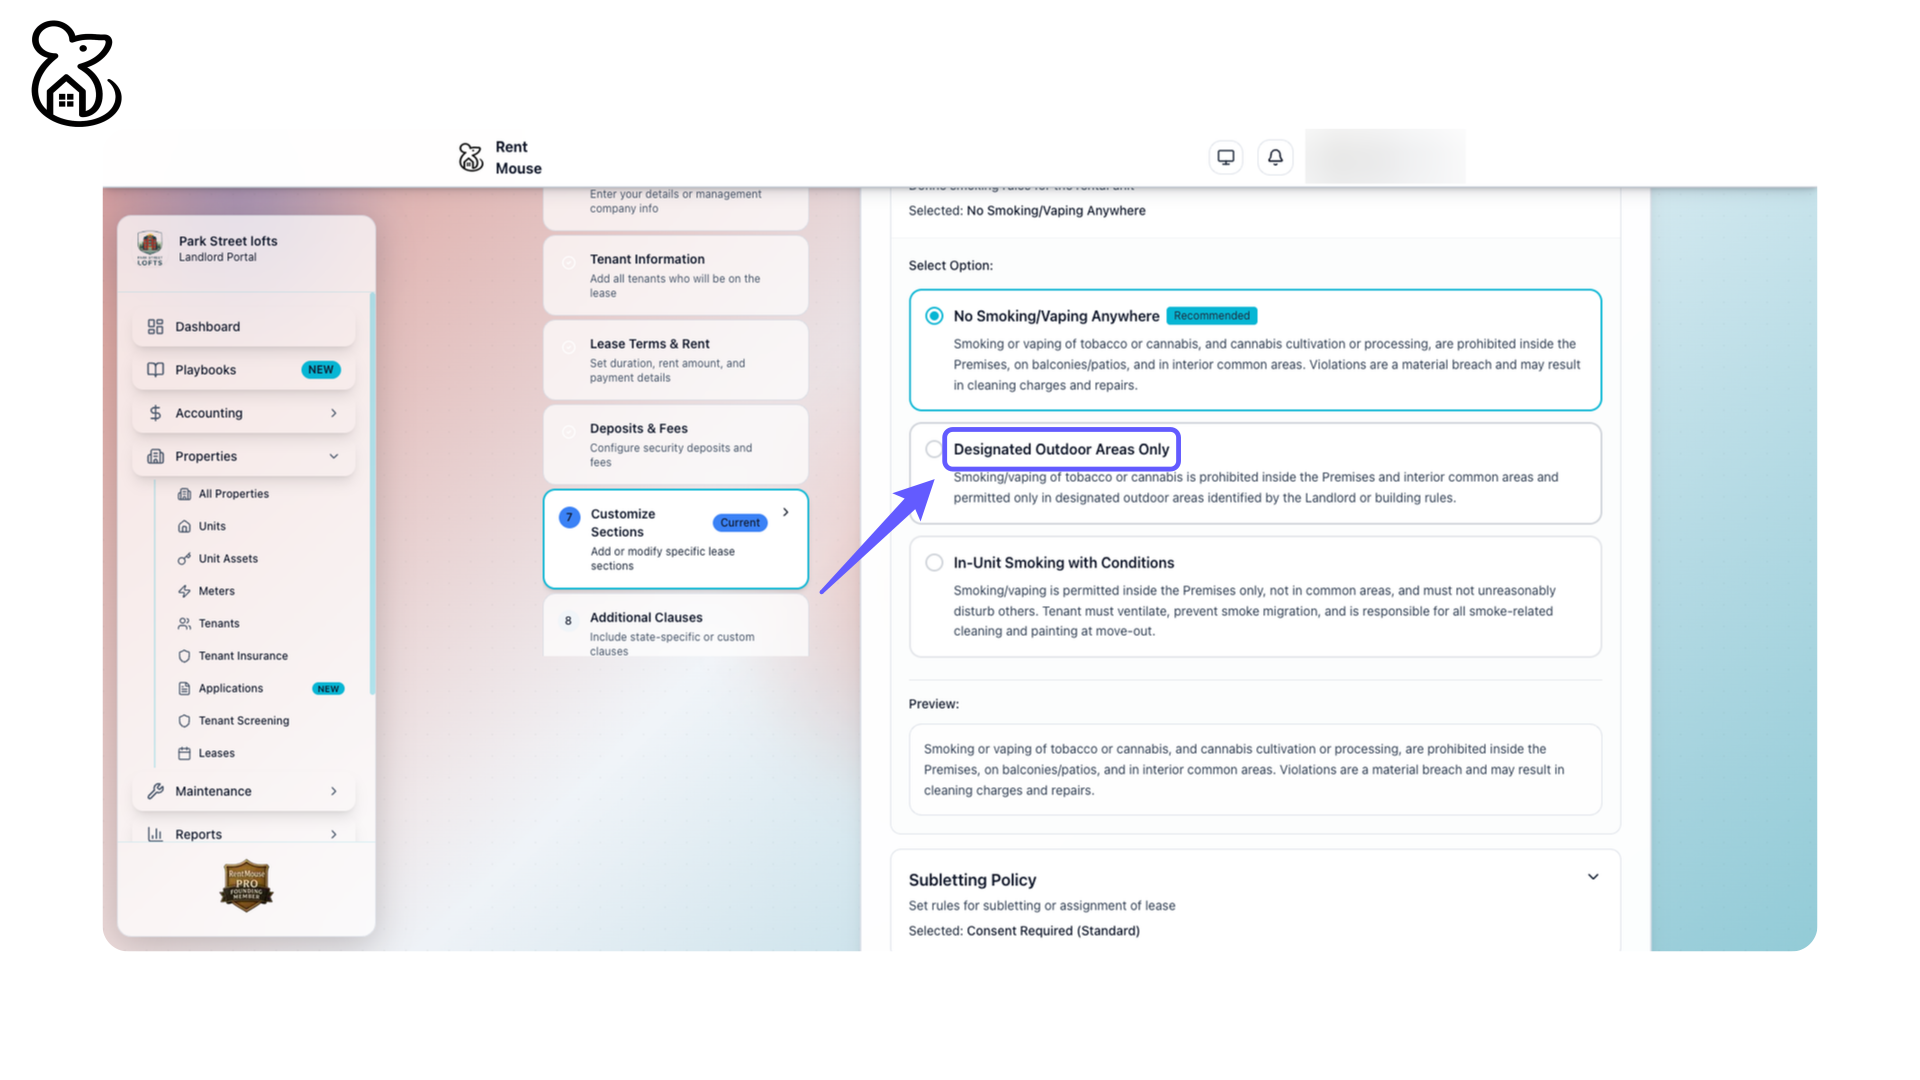
Step 53: Designate Outdoor Smoking Areas
Select the option allowing smoking or vaping in designated outdoor areas only, as identified by the landlord or building rules. Smoking inside premises or common areas is prohibited.
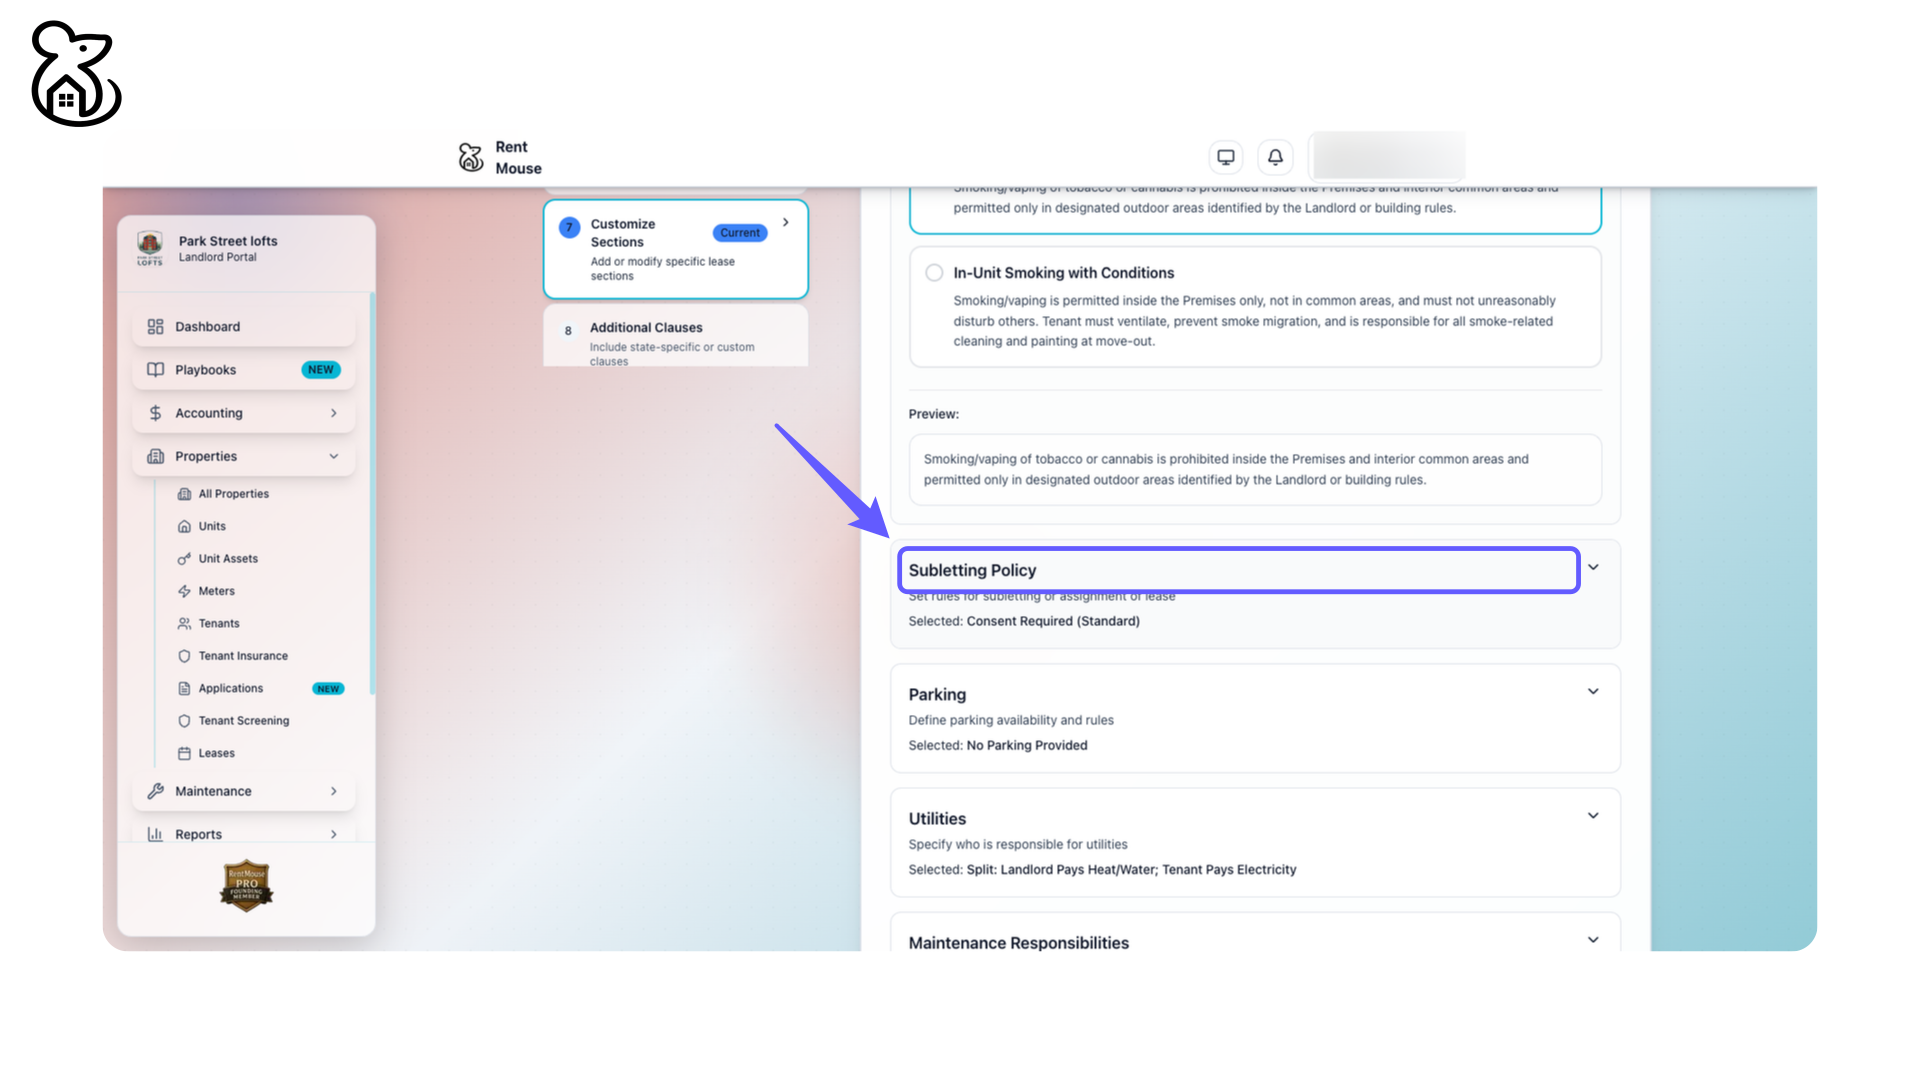
Step 54: Set Subletting Lease Rules
Set rules for subletting or assignment of lease. Consent required is standard.
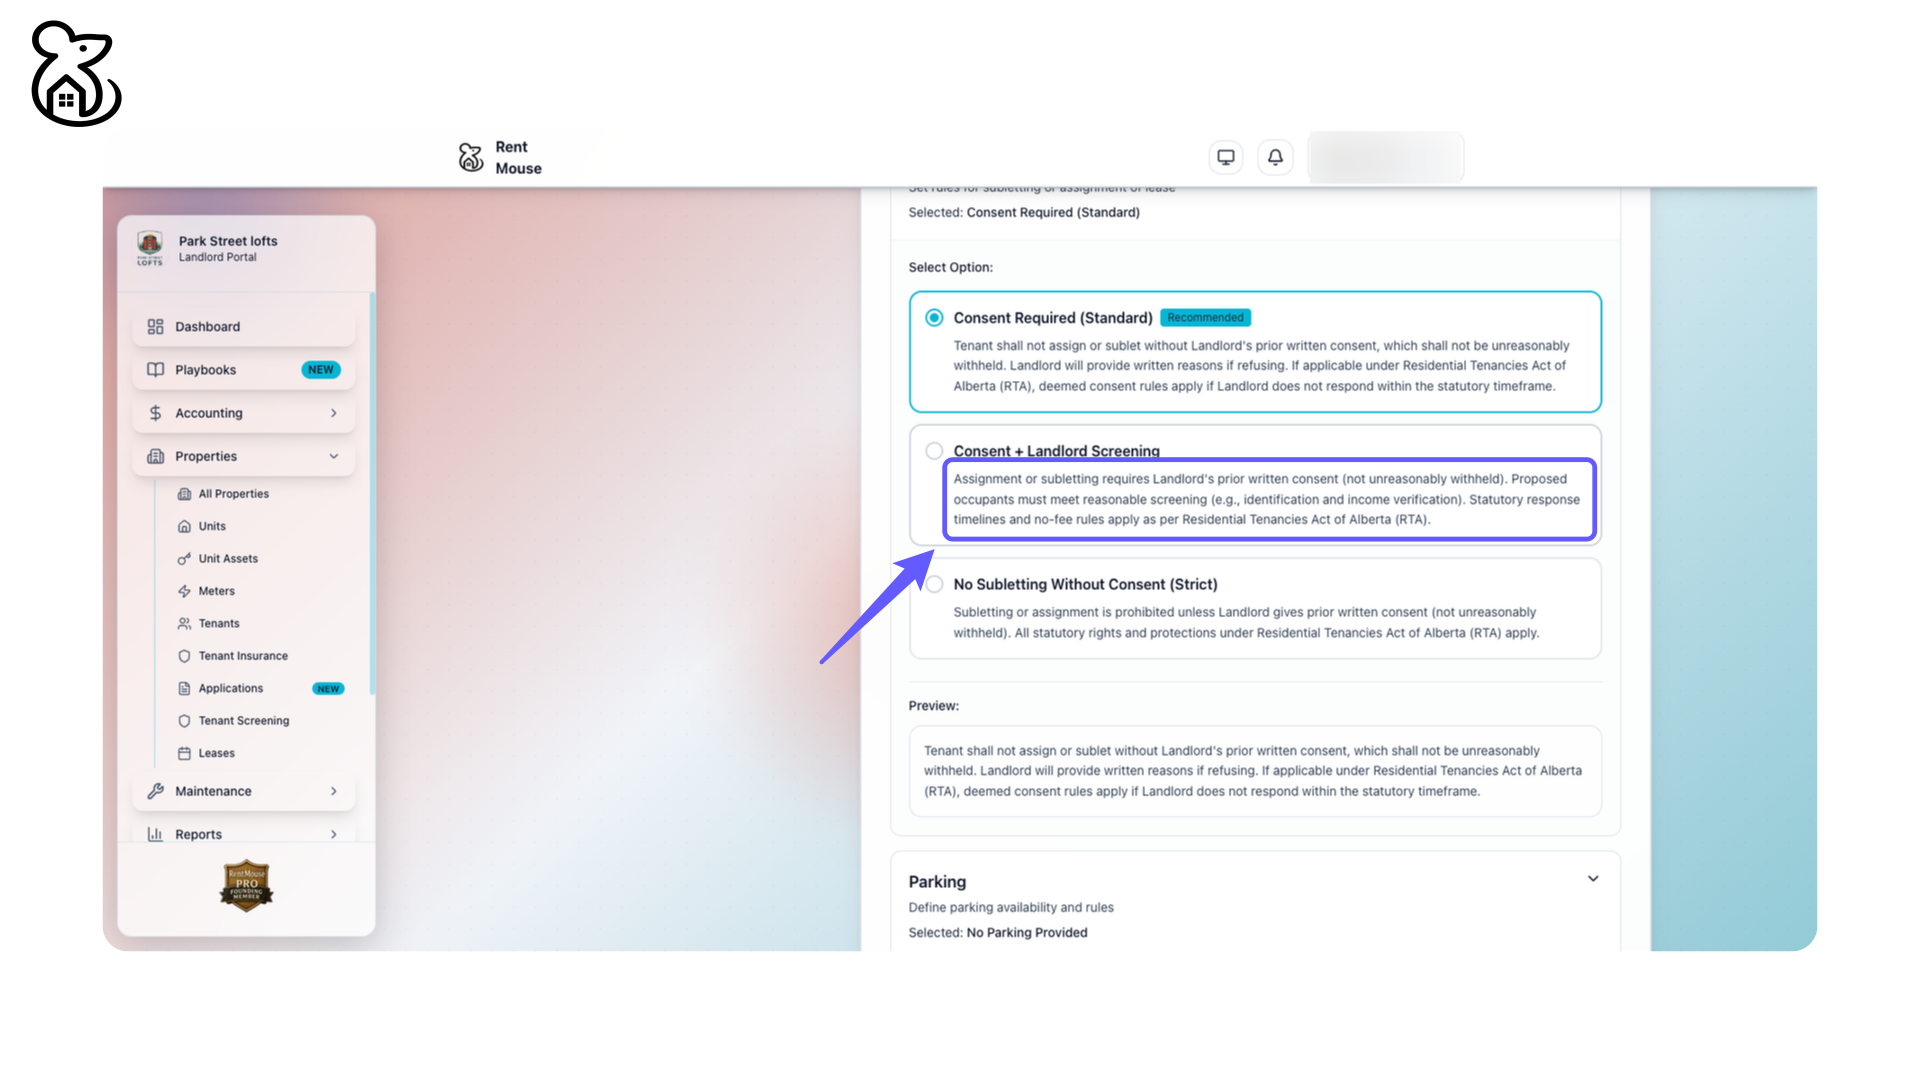
Step 55: Ensure Sublet Screening Compliance
Obtain landlord's prior written consent for assignment or subletting and ensure proposed occupants pass reasonable screening, including identification and income verification, according to the Residential Tenancies Act of Alberta (RTA).
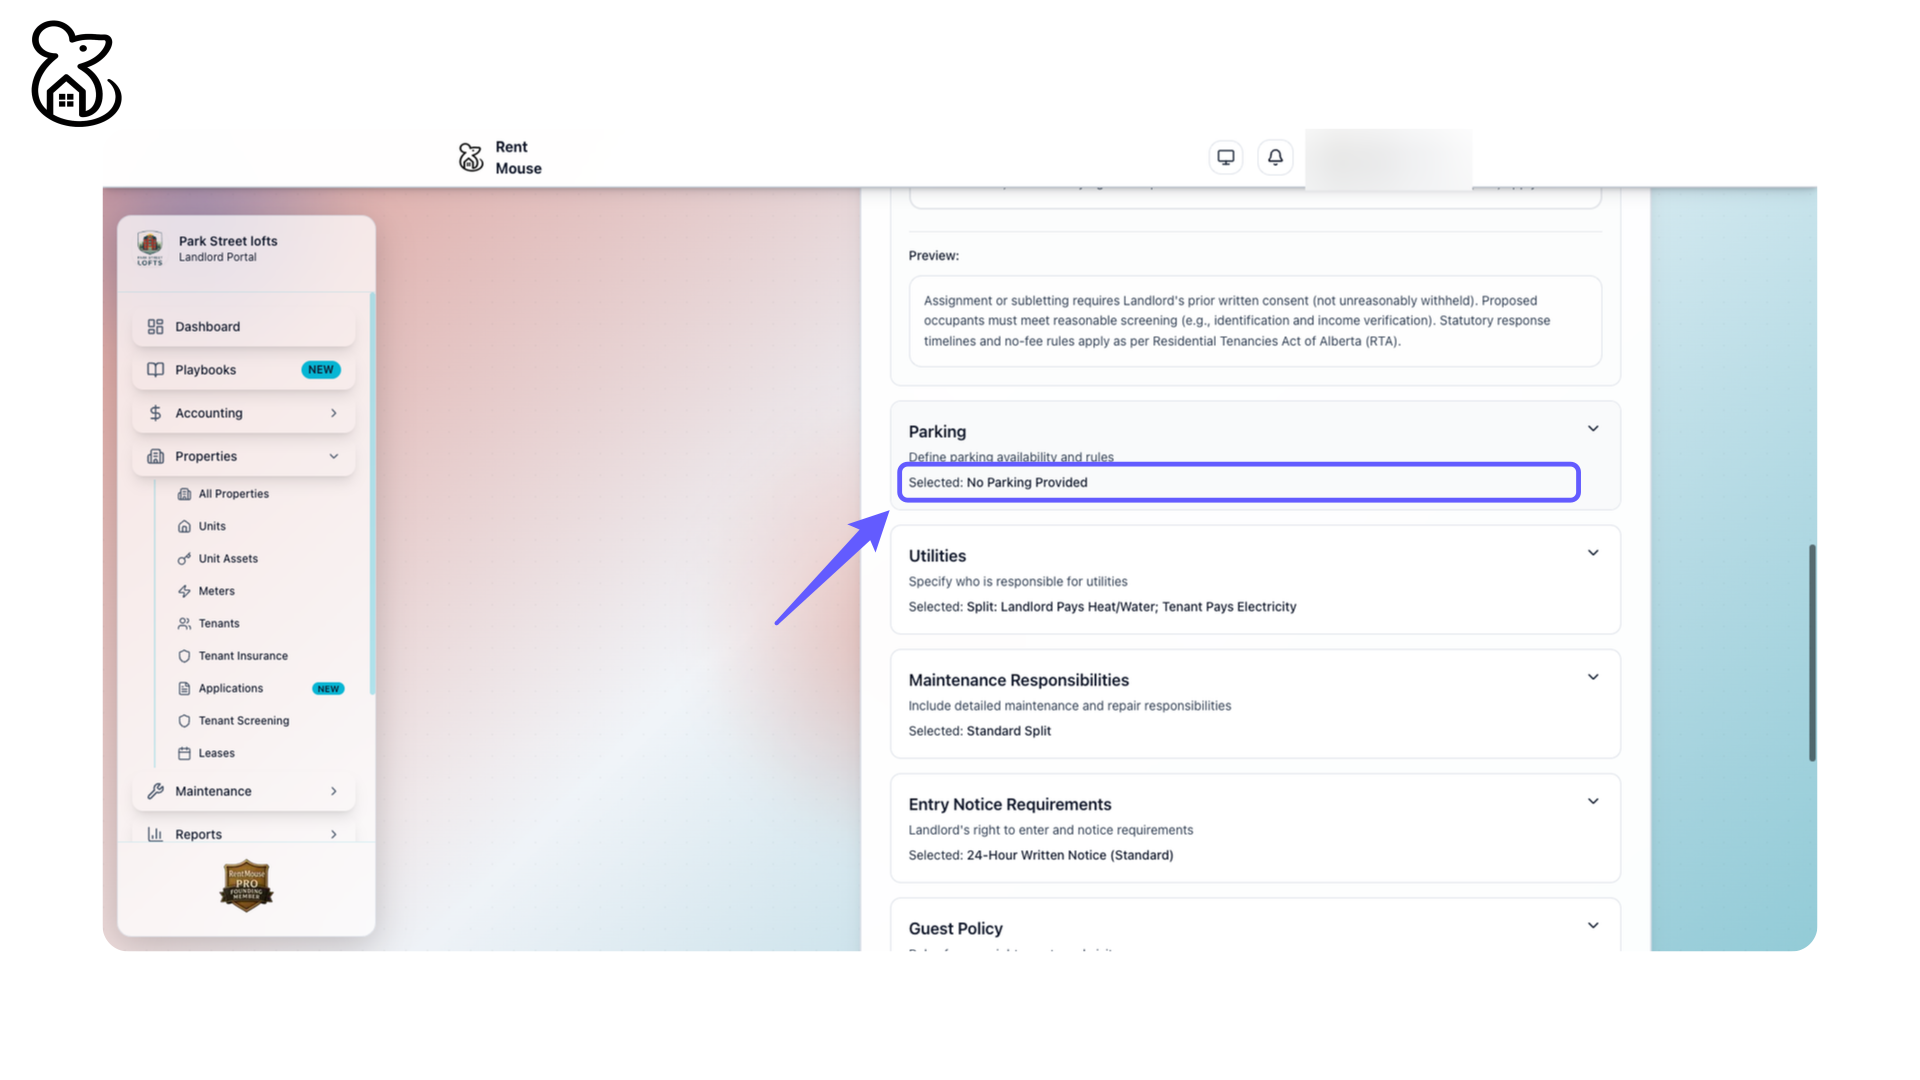
Step 56: Parking Details
Specify whether parking is available. Current selection: No Parking Provided.
Step 57: Select Parking Option
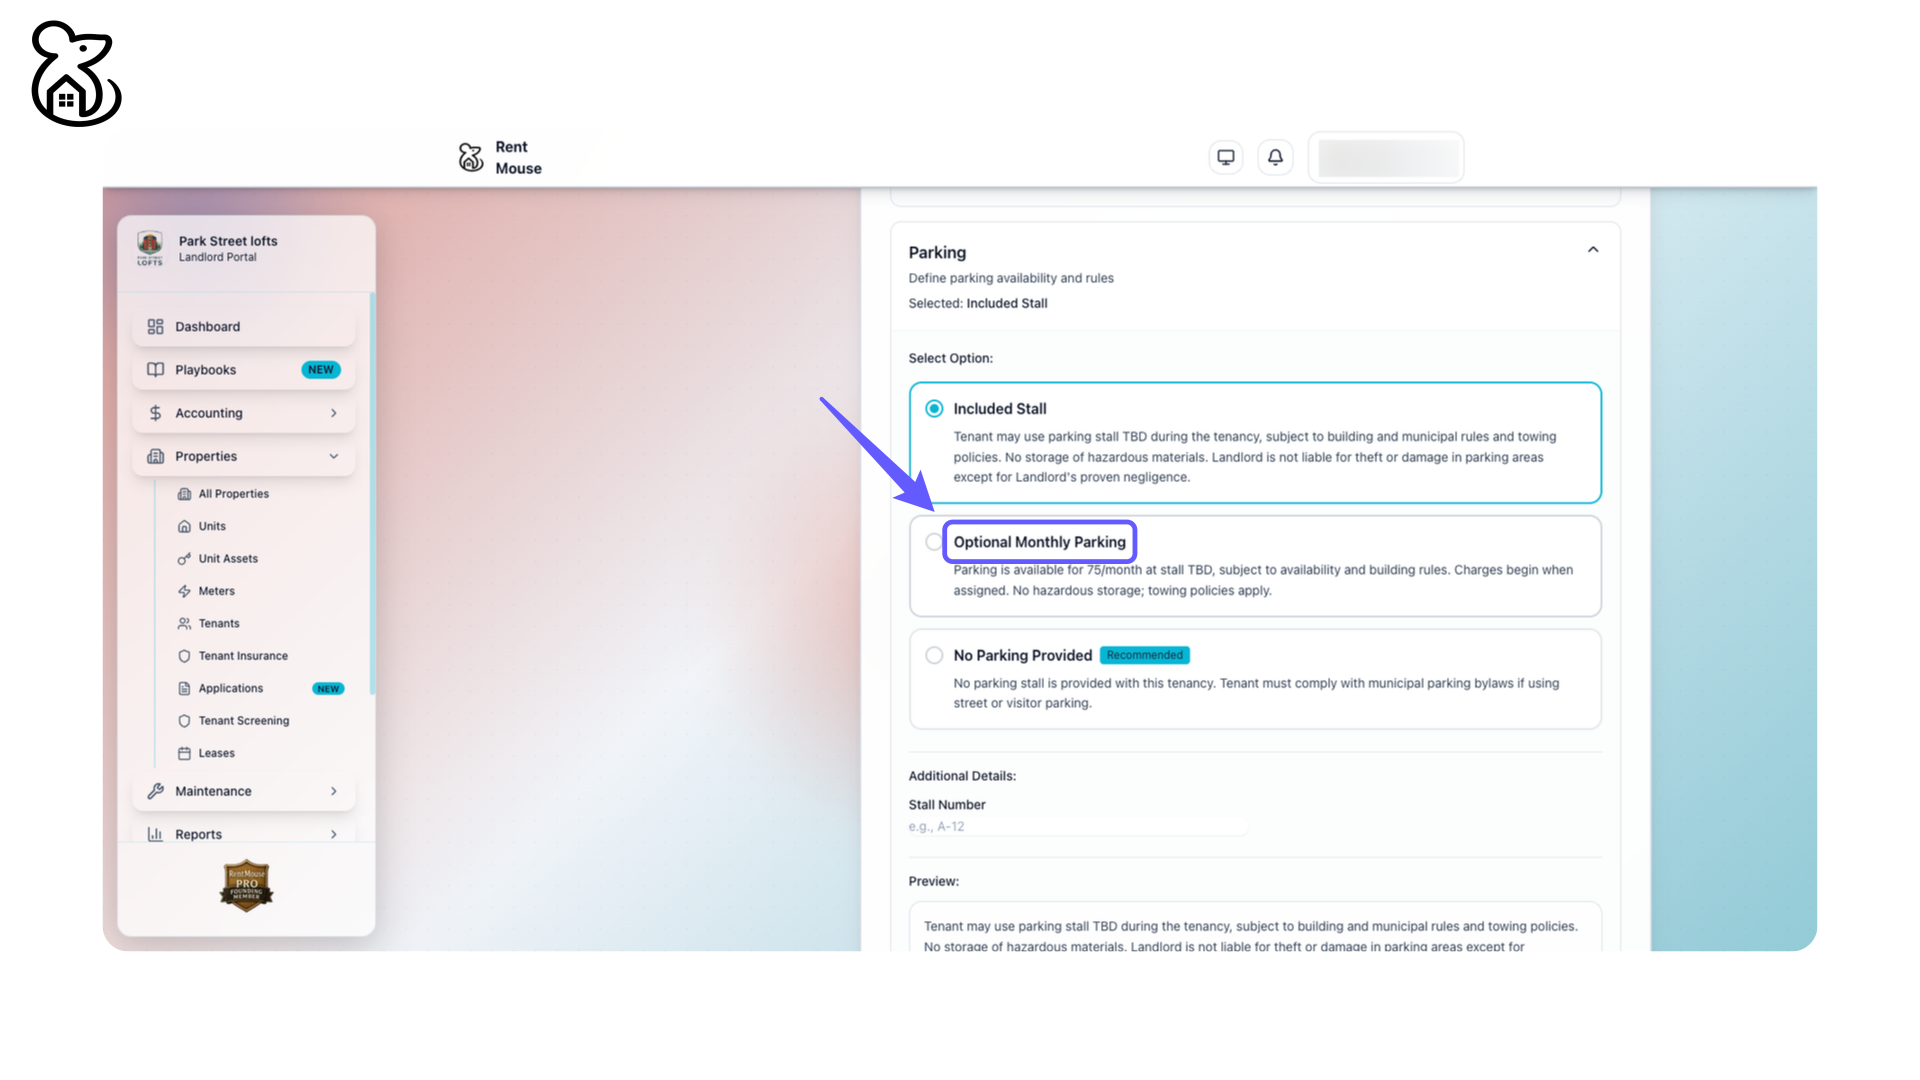
Select the 'Included Stall' option to provide parking with tenancy. Ensure tenants adhere to parking policies and note that landlord liability is excluded except in cases of proven negligence.
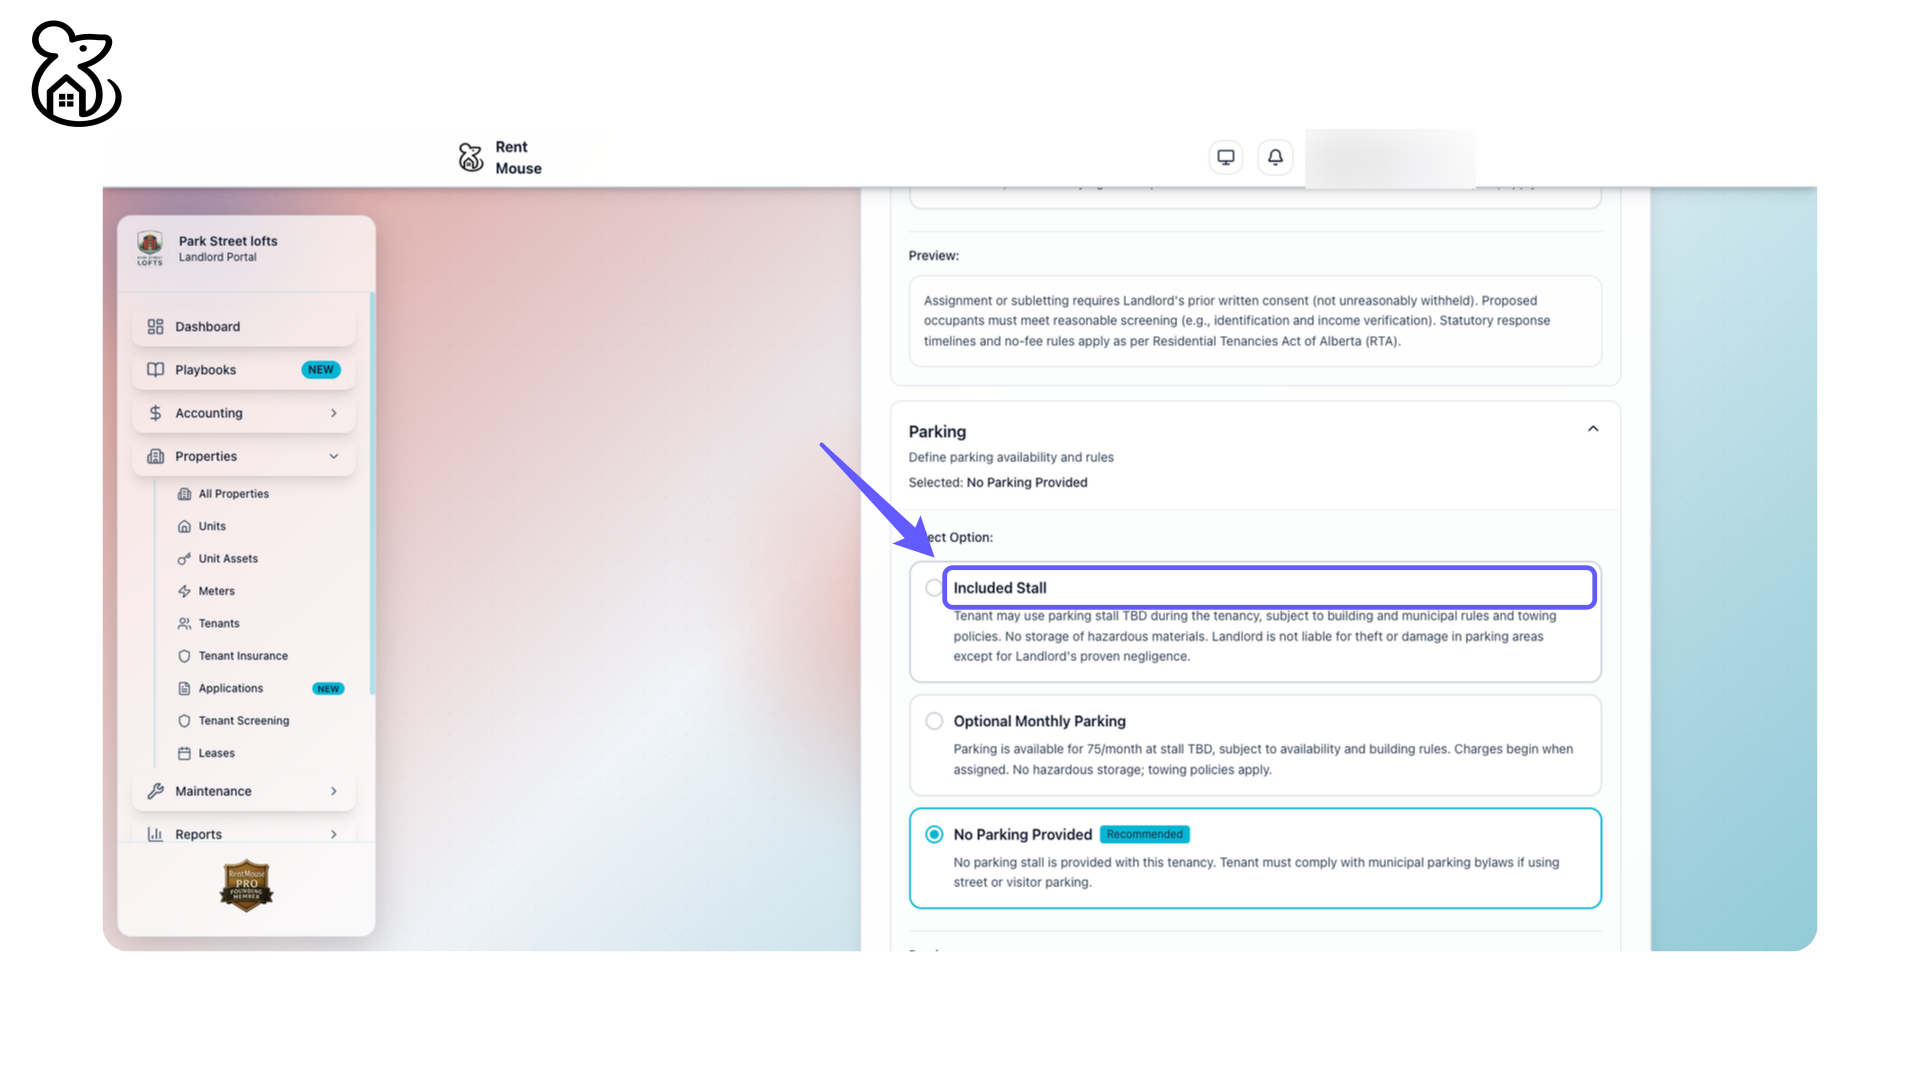
Step 58: Select Optional Monthly Parking
Choose the 'Optional Monthly Parking' option for a $75 monthly fee, based on availability and rules. Charges start upon assignment. Ensure no hazardous storage; towing policies apply.
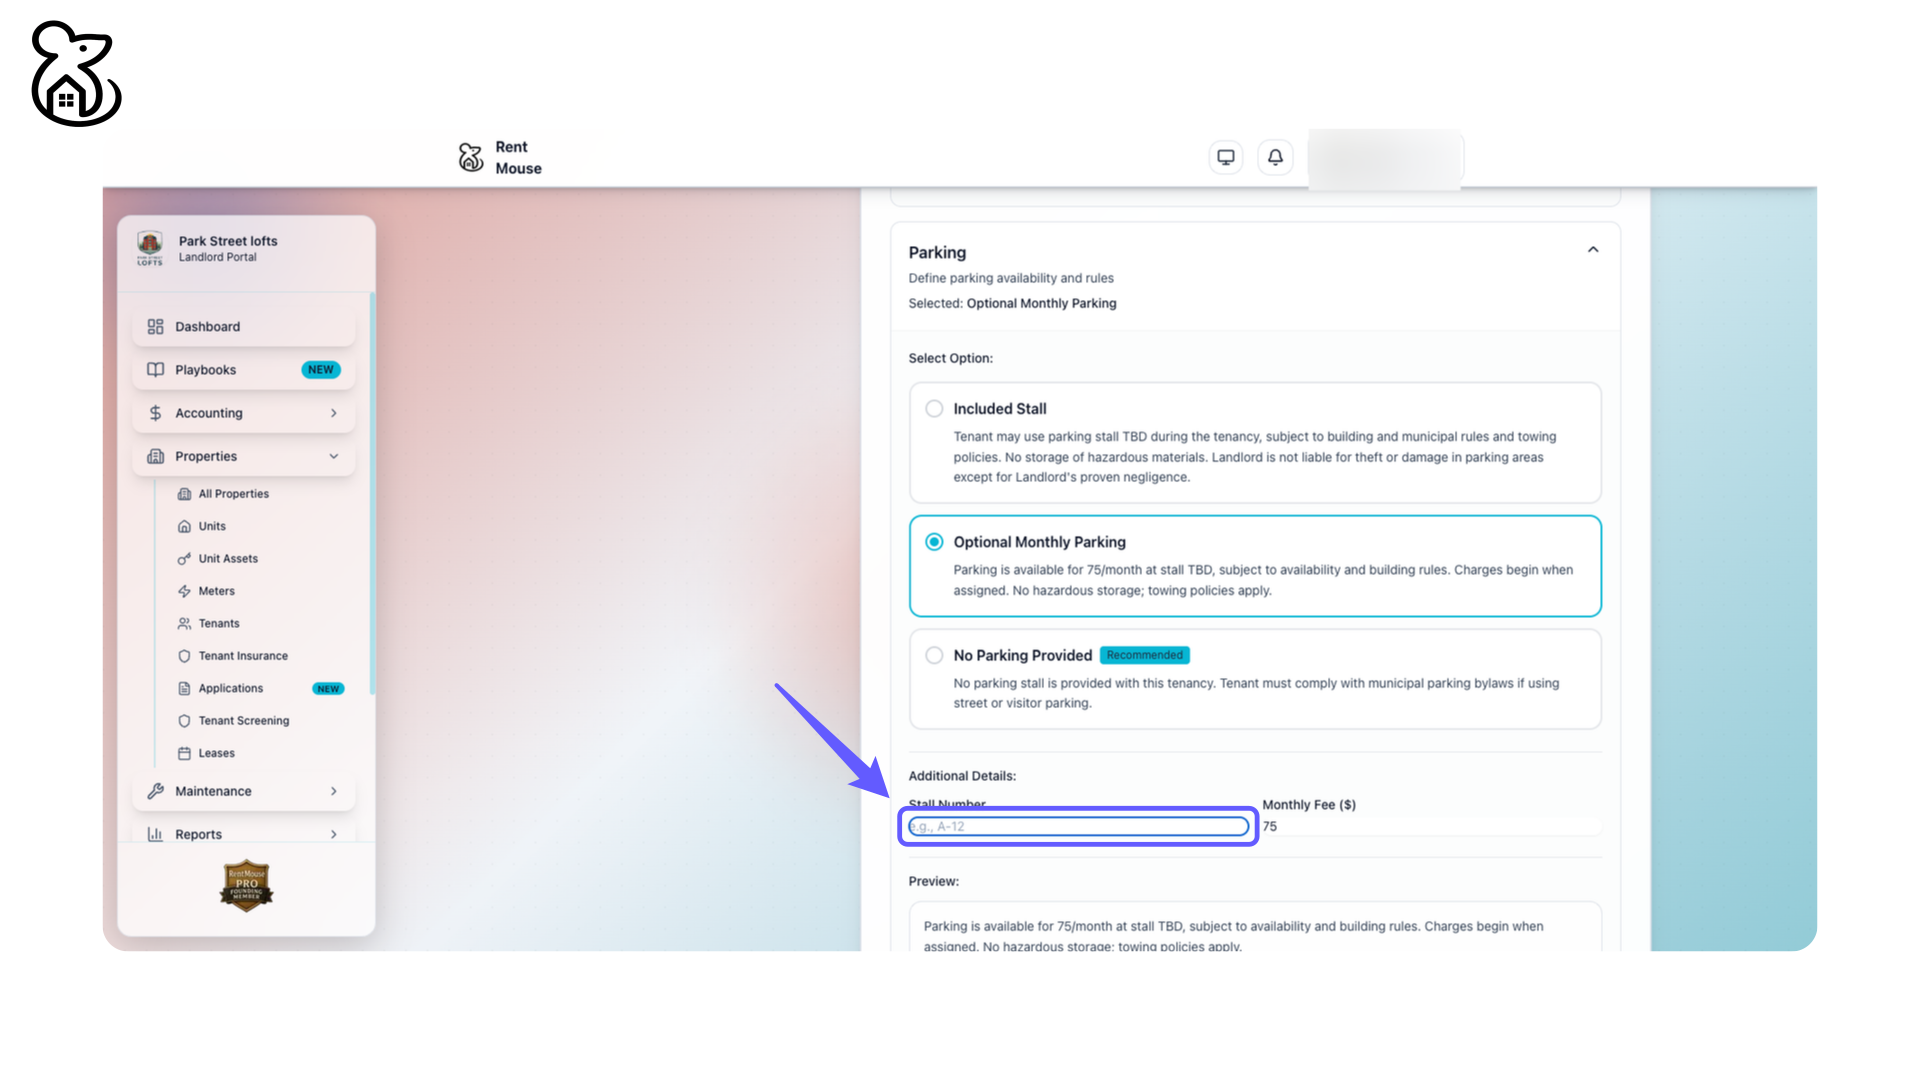
Step 59: Enter Parking Stall Number
Input the designated stall number, such as G, A-12, for parking identification.
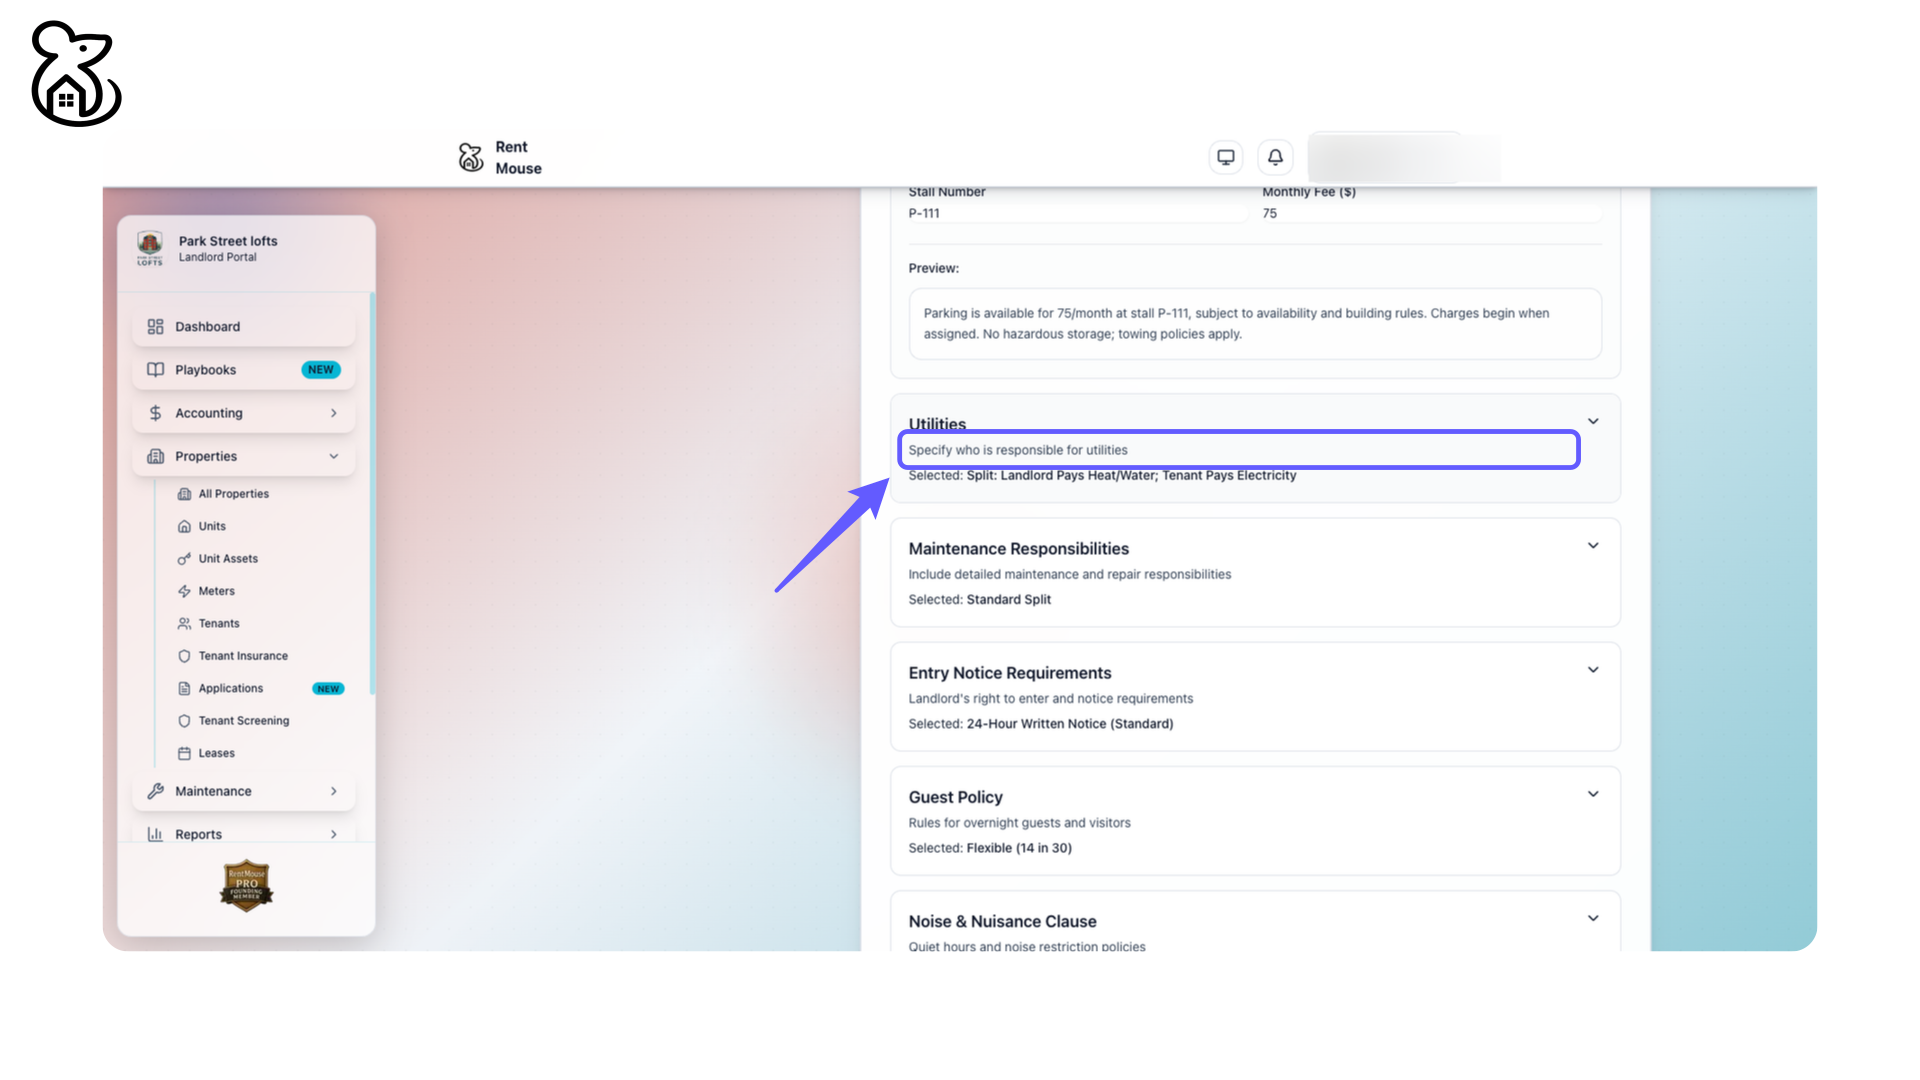
Step 60: Define Utility Responsibilities
Specify who is responsible for utilities. Select from options like landlord or tenant paying for water and electricity.
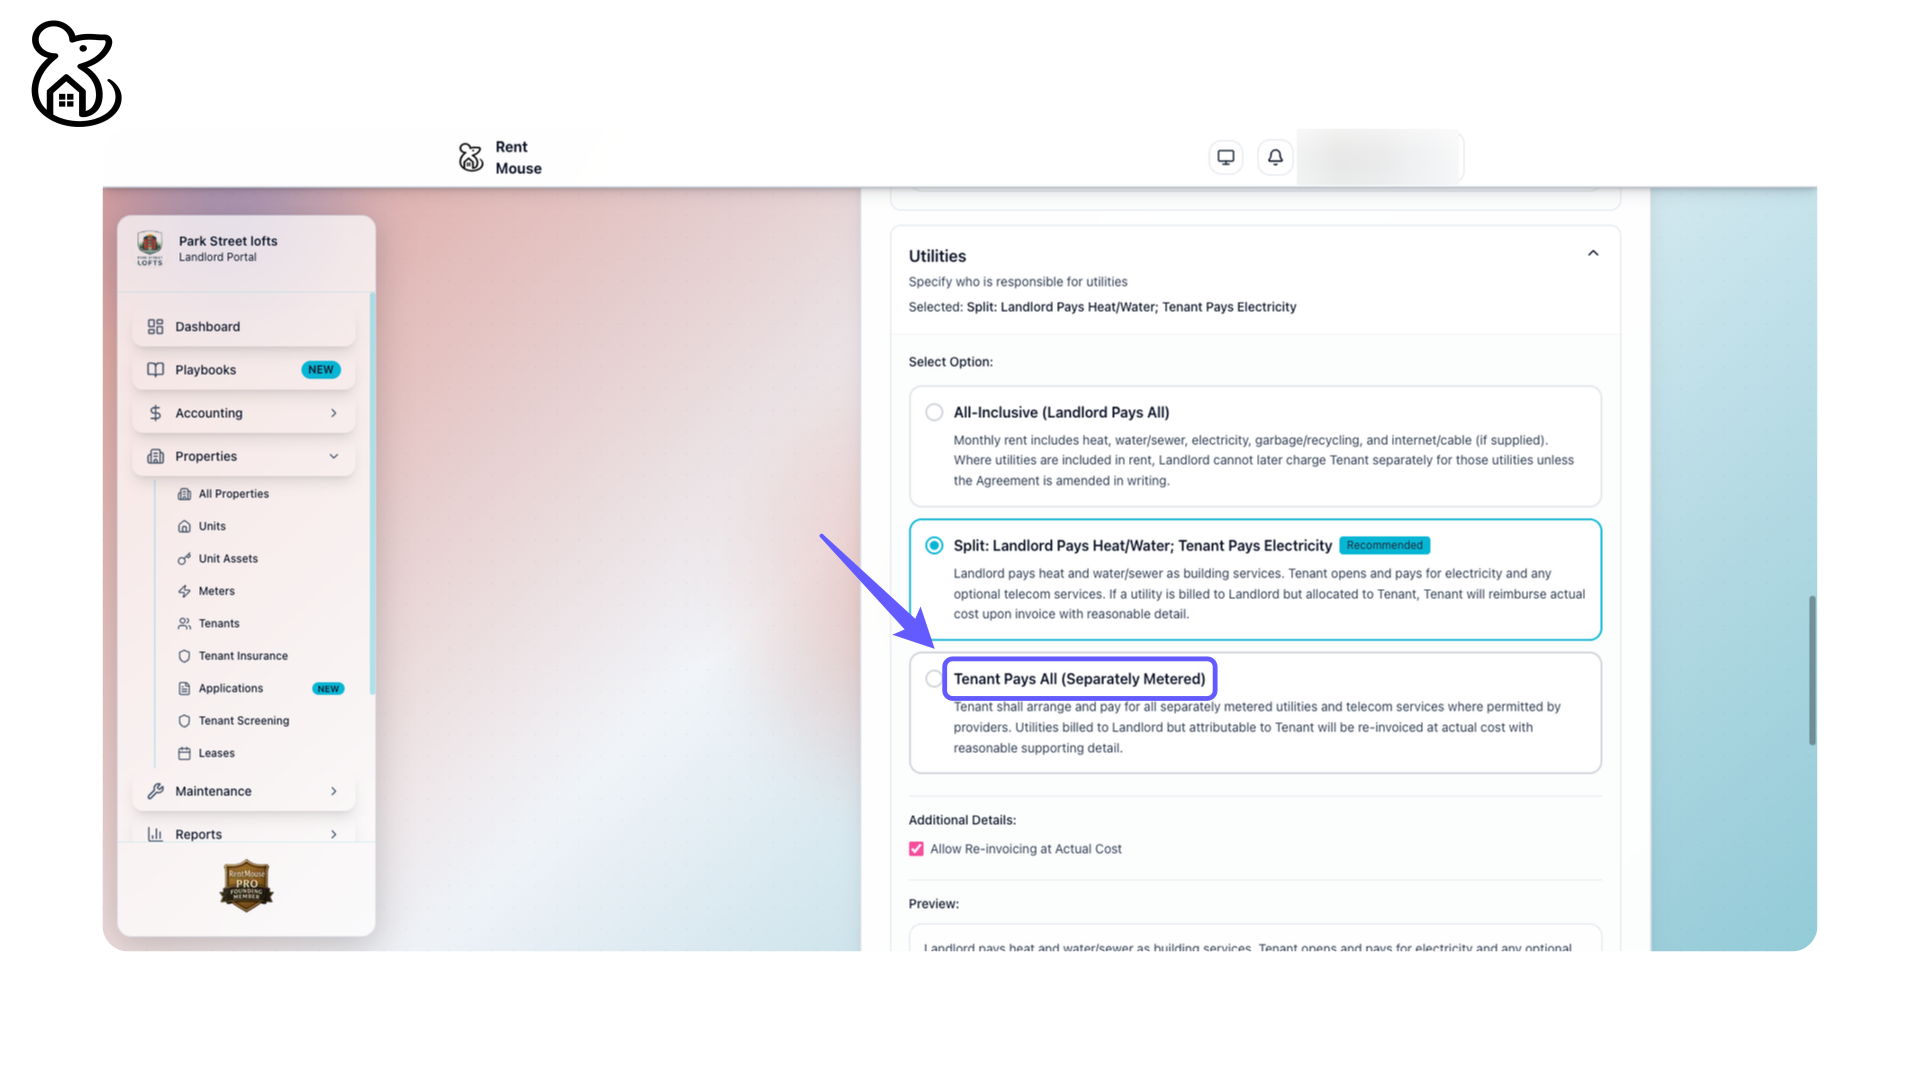
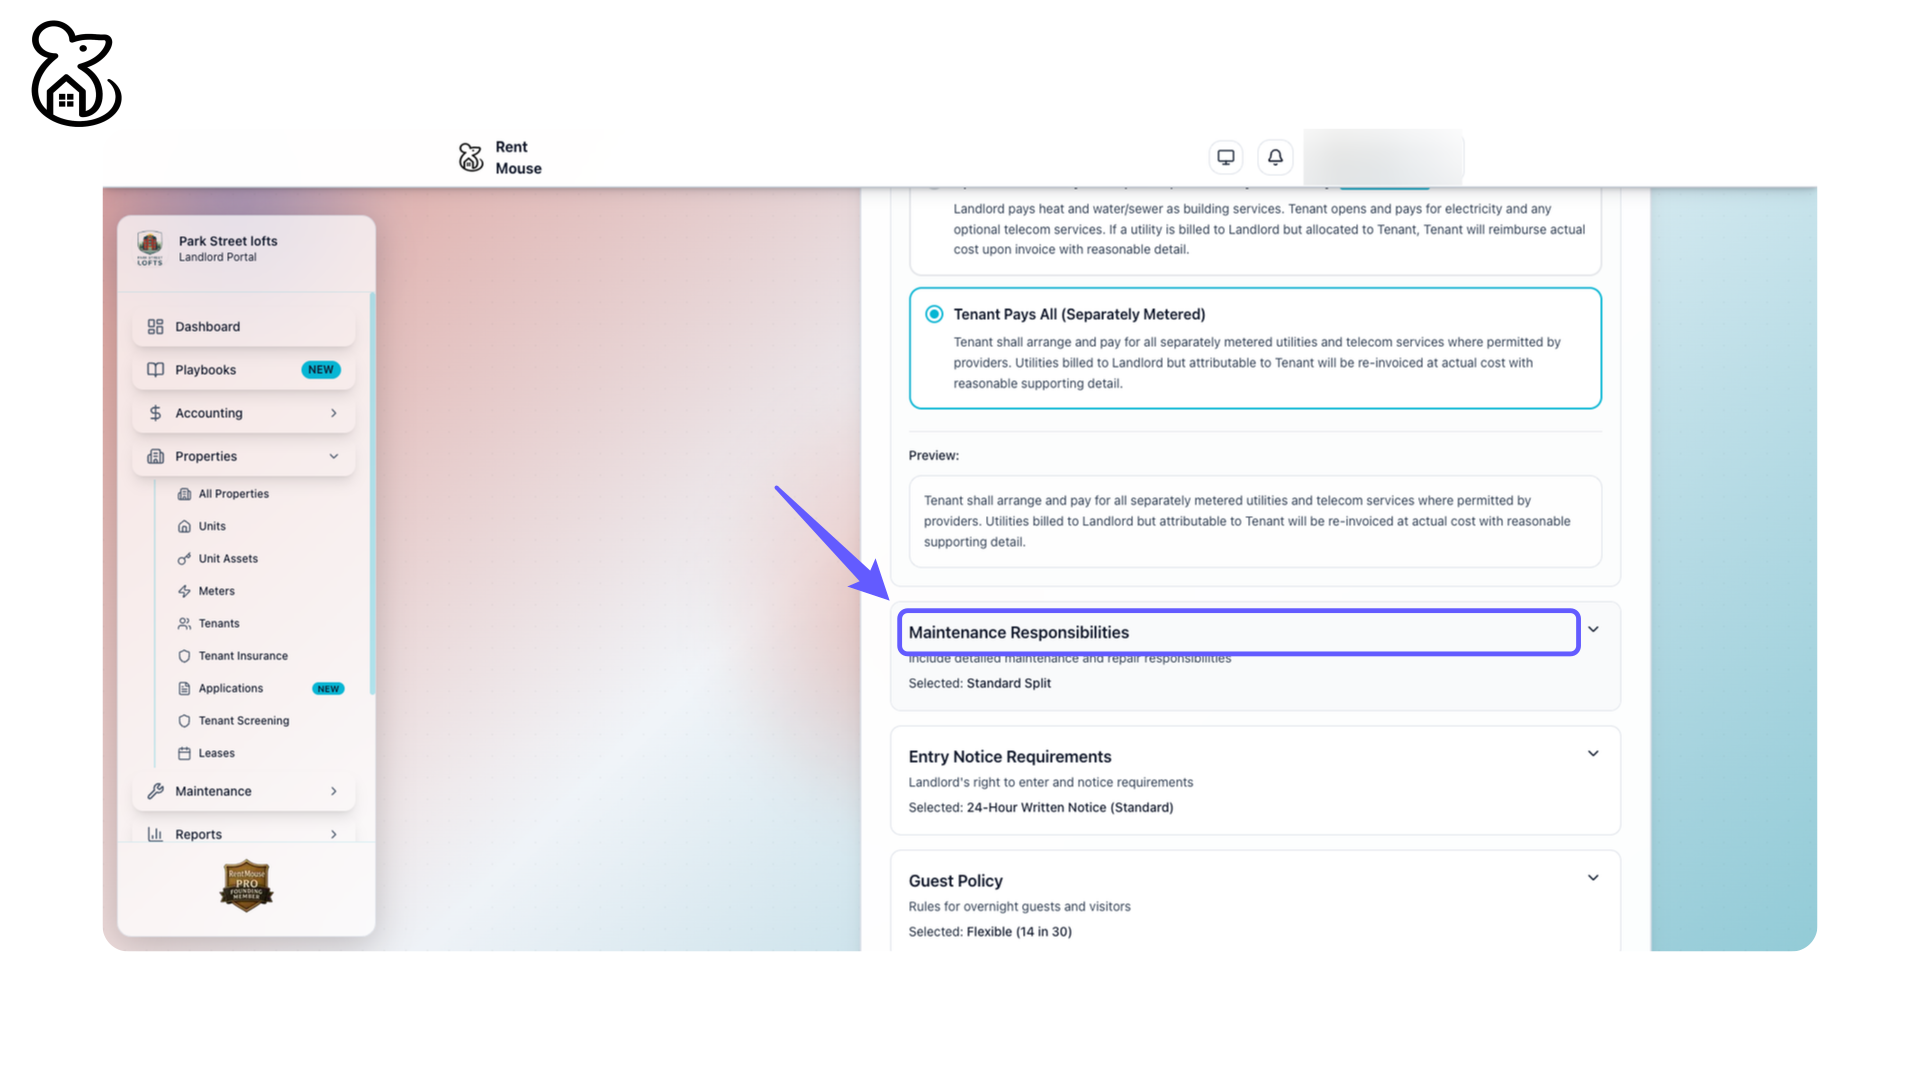
Step 61: Choose Tenant Pays All
Select the option where tenants cover all metered utilities, including telecom services, as permitted by providers. Ensure any bills charged to the landlord but allocable to tenants are re-invoiced at actual cost with proper documentation.
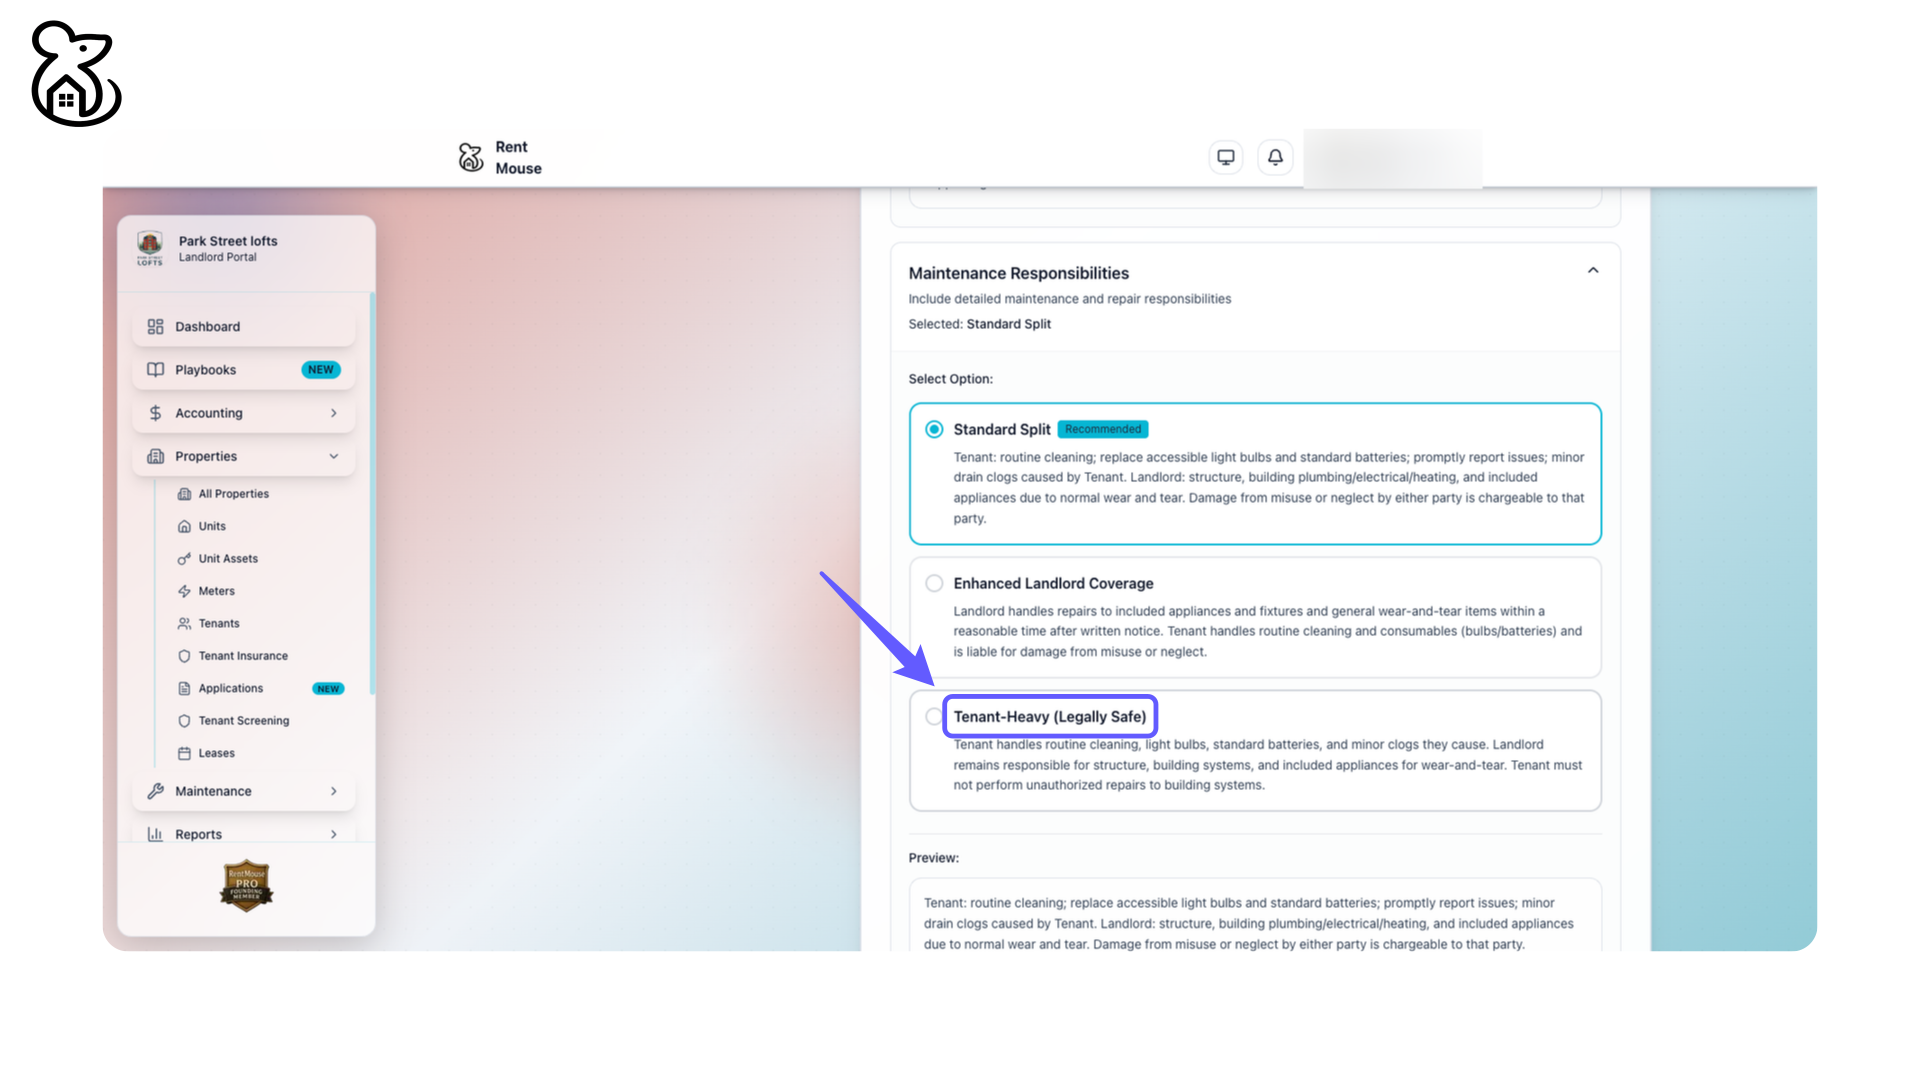
Step 62: Define Maintenance Duties
Include detailed maintenance and repair responsibilities.
Step 63: Select Tenant-Heavy Option
Choose the 'Tenant-Heavy (Legally Safe)' option for maintenance responsibilities, where tenants manage routine cleaning, light bulbs, batteries, and minor clogs. Landlord oversees building systems and wear-and-tear appliances. Tenants must avoid unauthorized repairs.
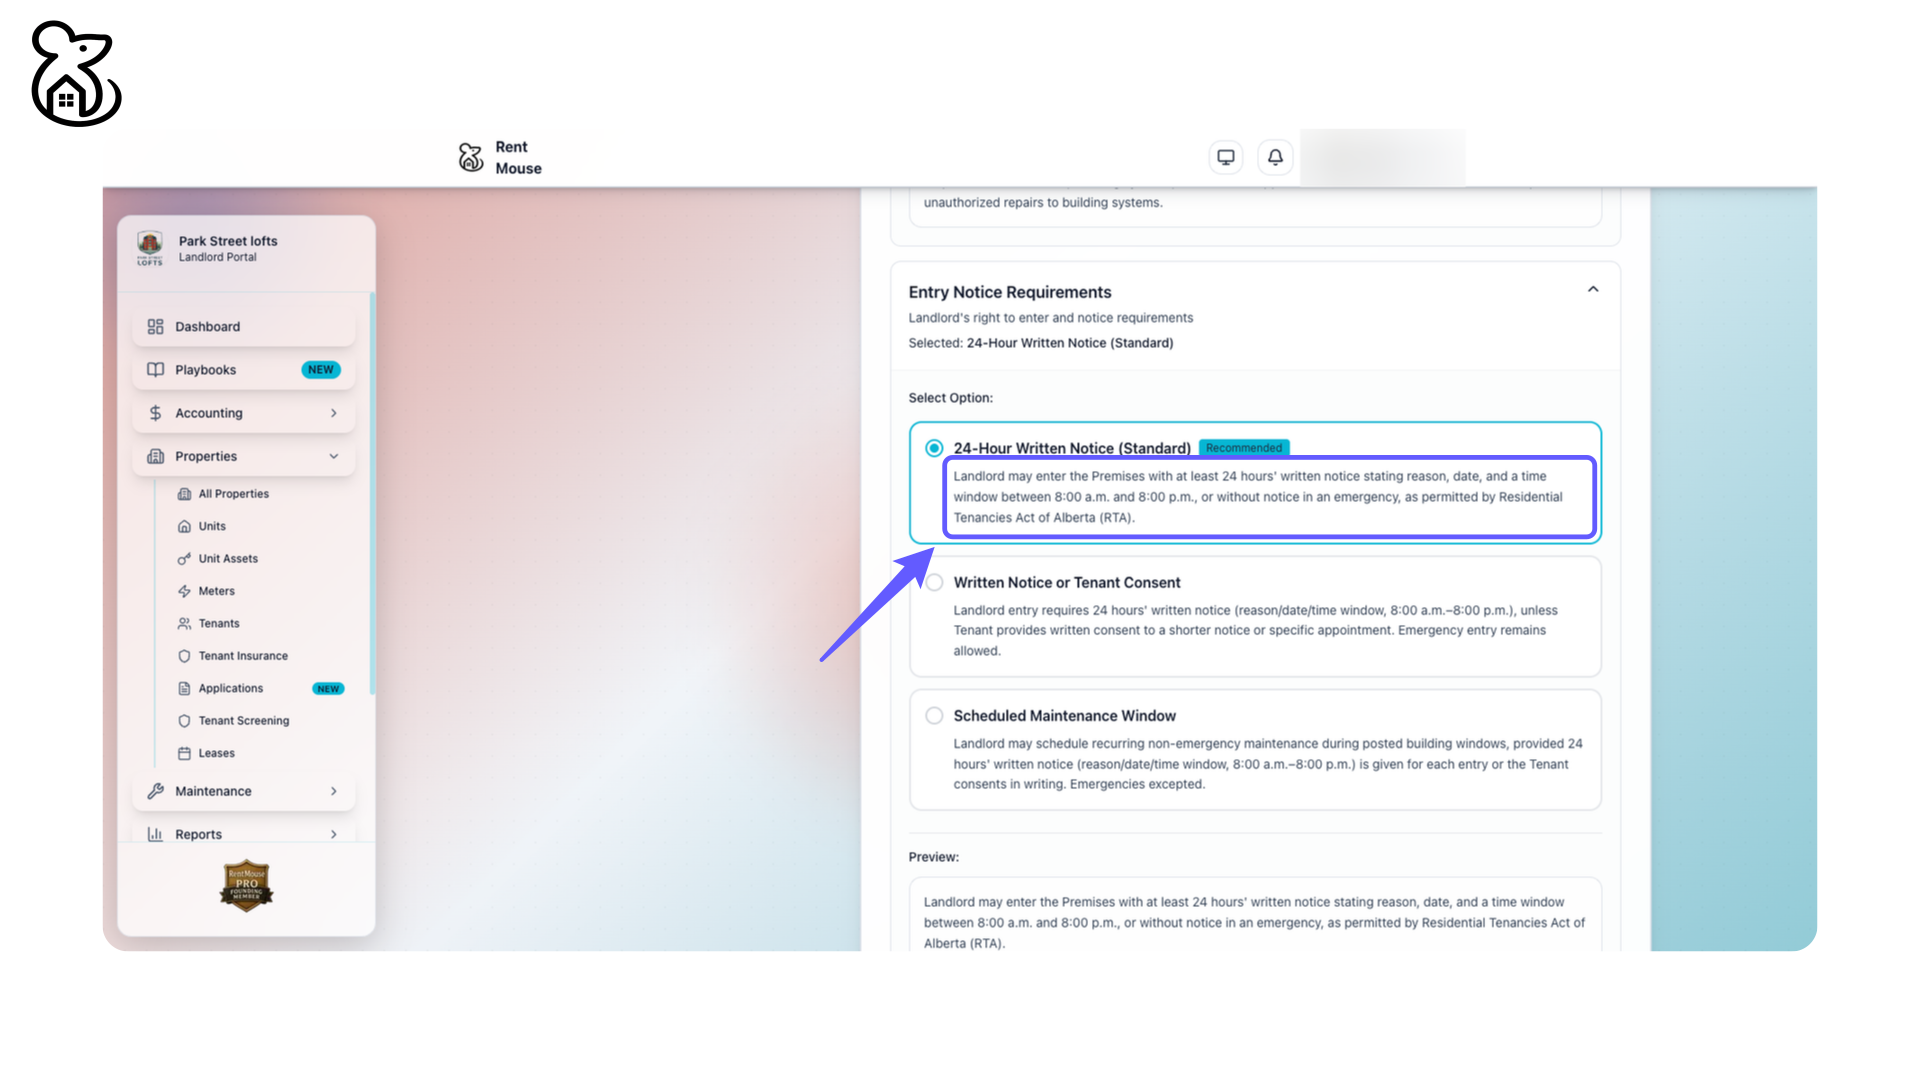
Step 64: Select 24-Hour Written Notice
Select '24-Hour Written Notice (Standard)' as the notice requirement for entry.
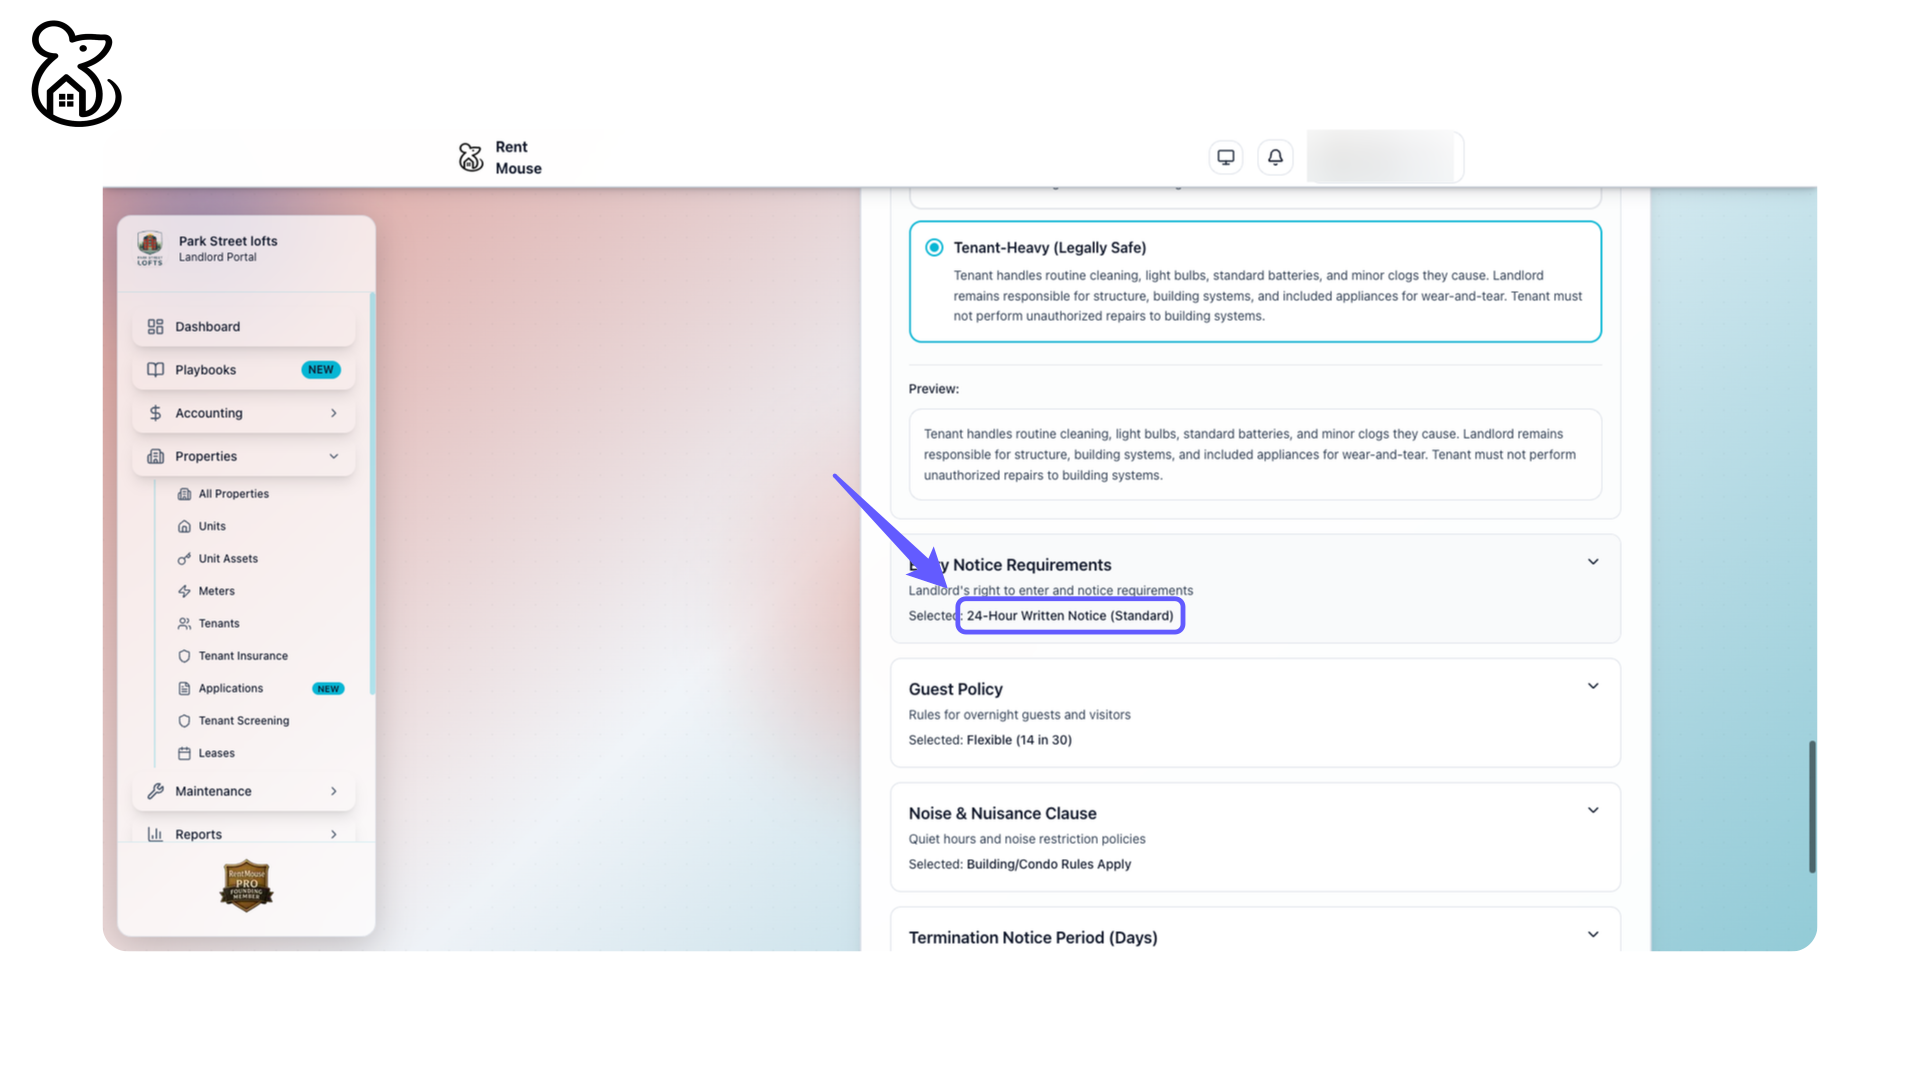
Step 65: Landlord Entry Requirement
Ensure landlords provide at least 24-hour written notice for entry, stating reason, date, and time between 8:00 a.m. and 8:00 p.m., unless it's an emergency under the Residential Tenancies Act of Alberta.
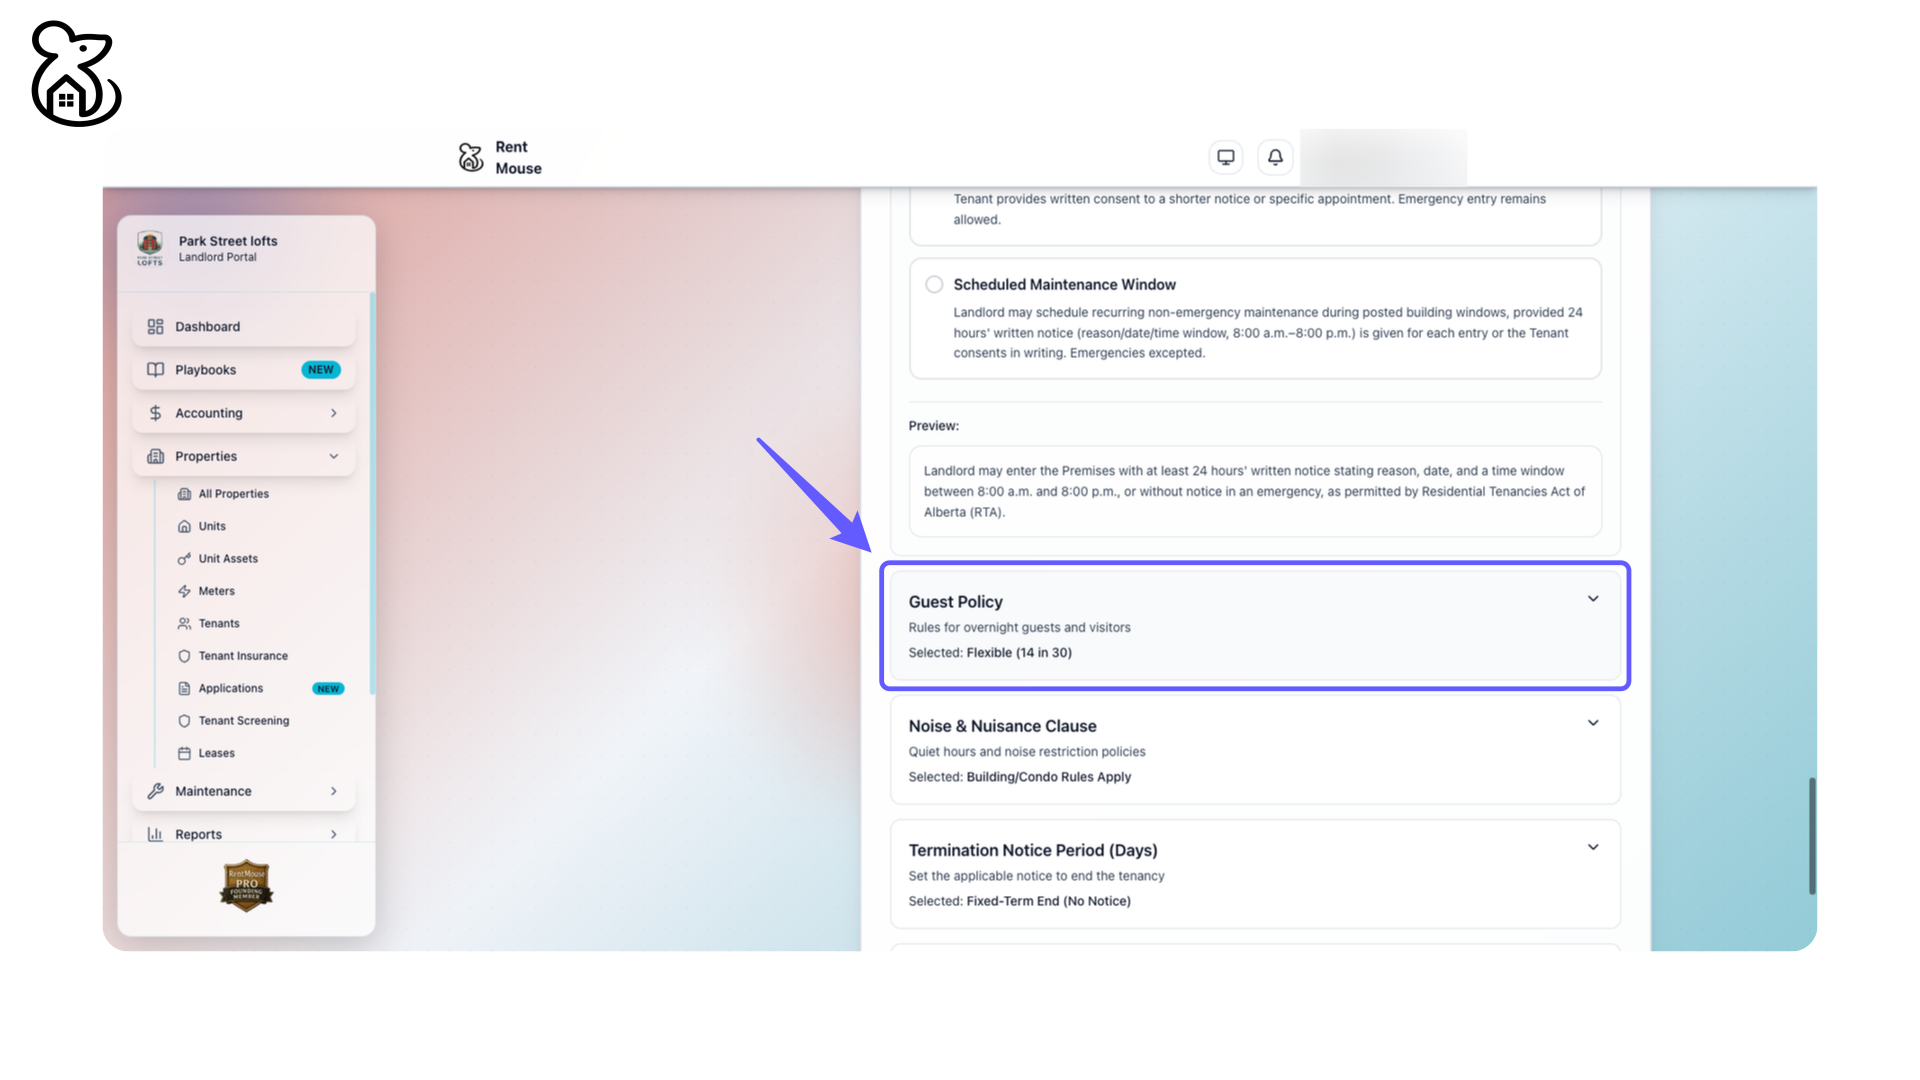
Step 66: Review Guest Policy
Check the rules for overnight guests and visitors in the guest policy section. Note the current selection of 'Flexible (14 in 30)'. Adjust policies as needed according to your requirements.
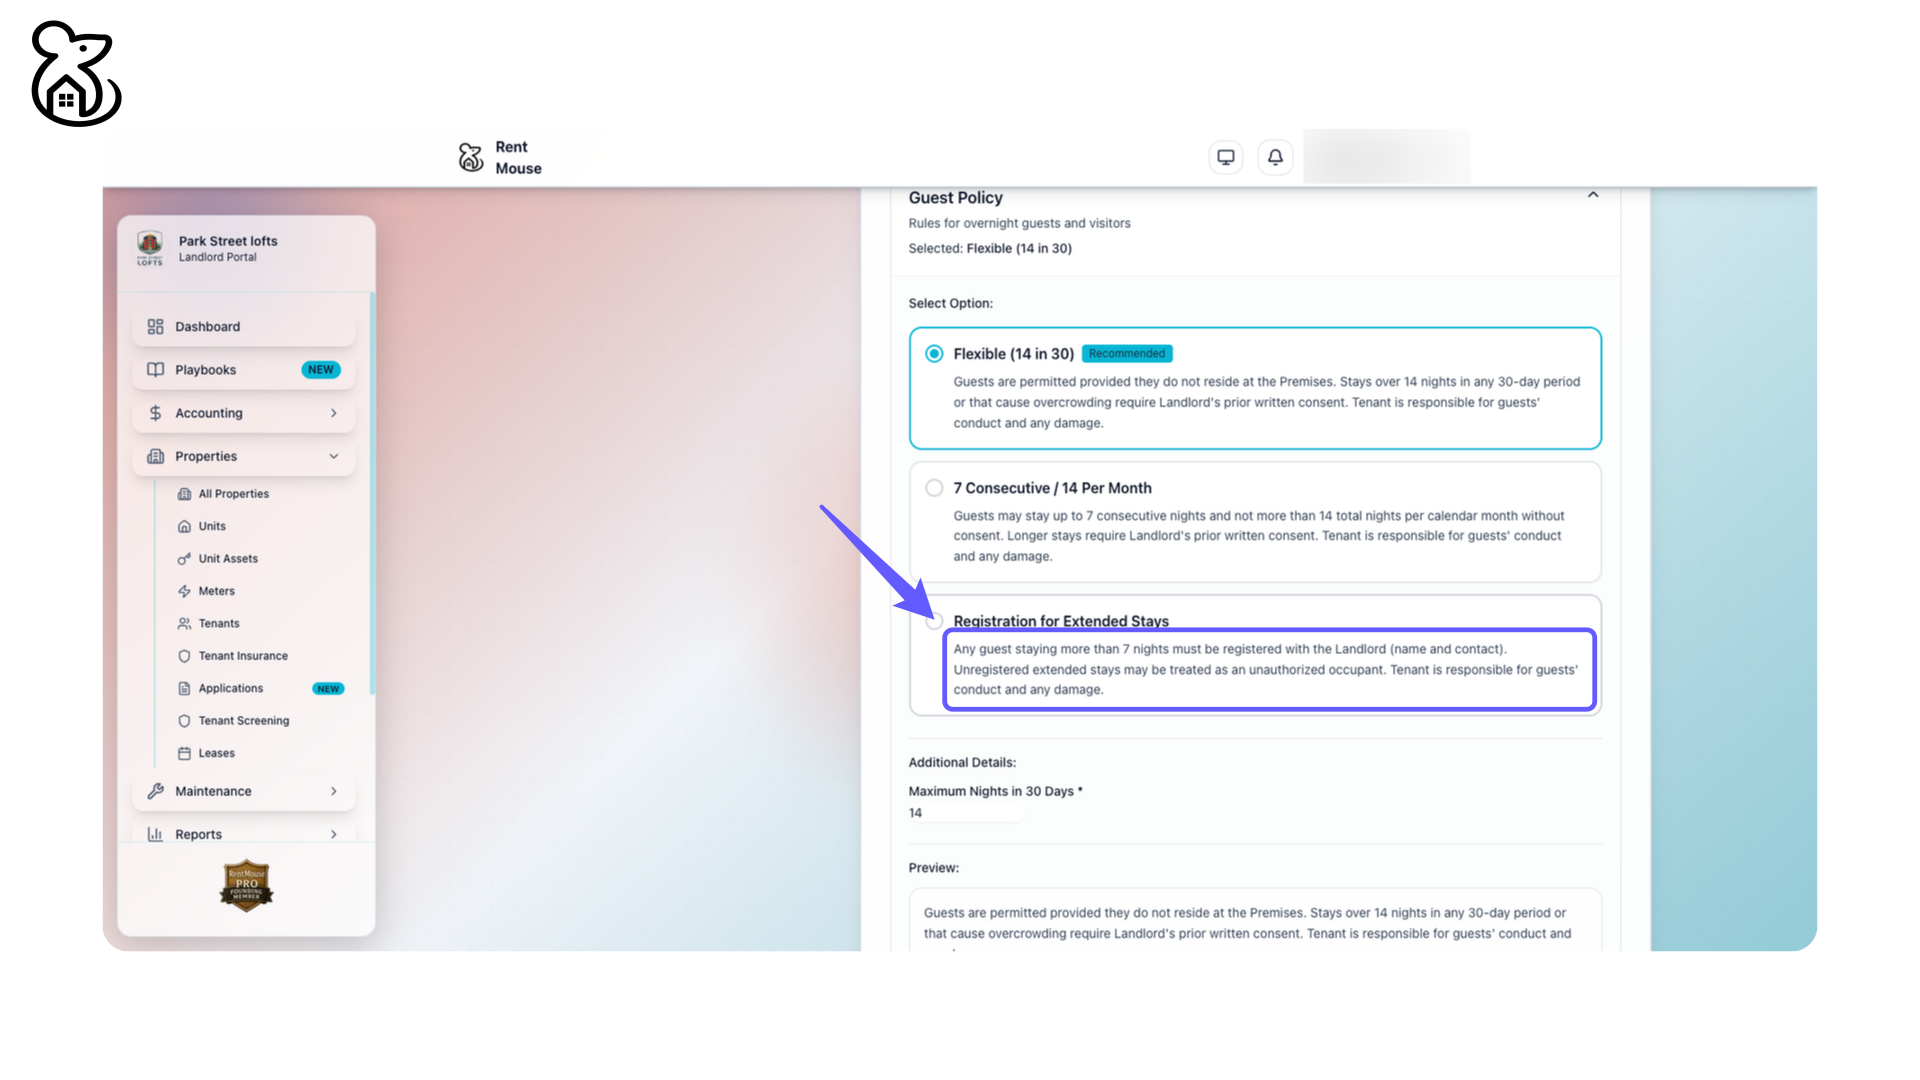
Step 67: Register Extended Stays
Ensure any guest staying over 7 nights is registered with the landlord with name and contact. Unregistered stays may be considered unauthorized. Tenant is accountable for guests' behavior and damages.
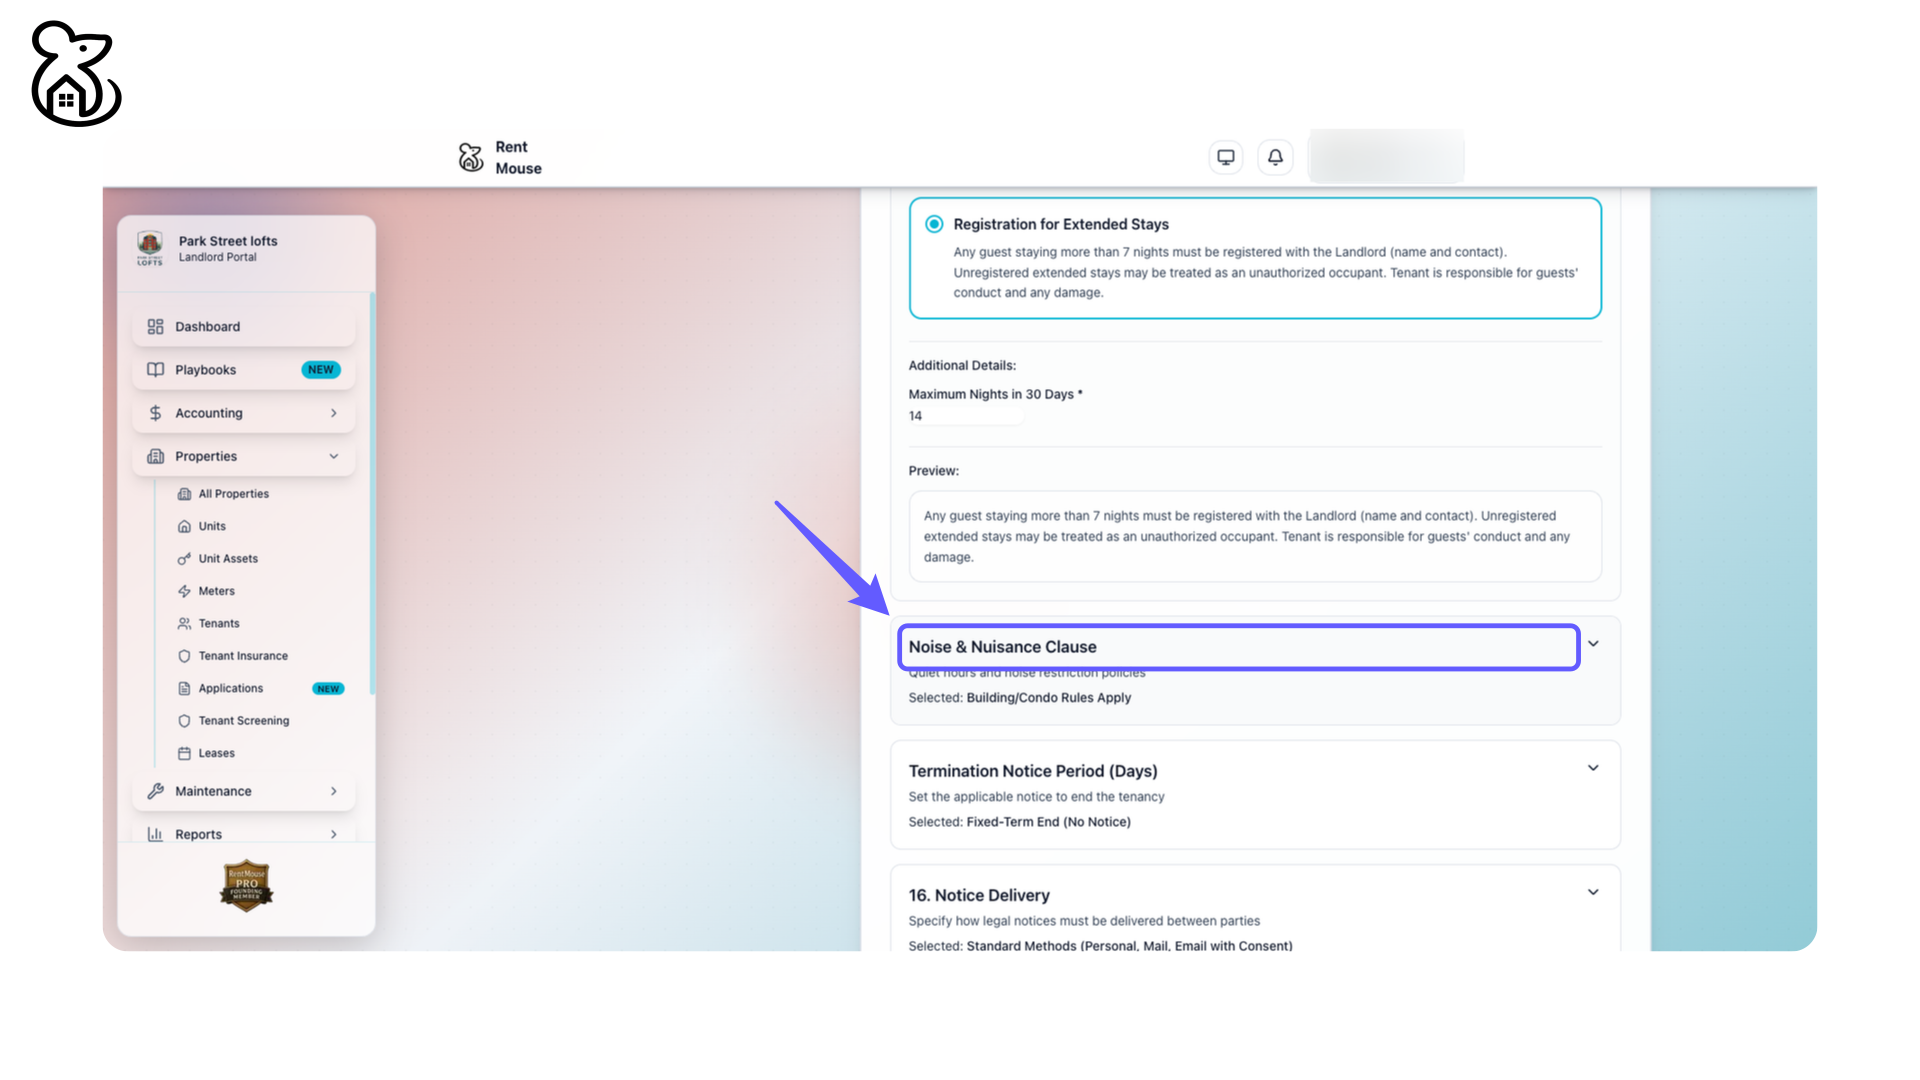
Step 68: Adhere to Noise Policies
Follow quiet hours and noise restriction policies. Ensure compliance with building or condo rules.
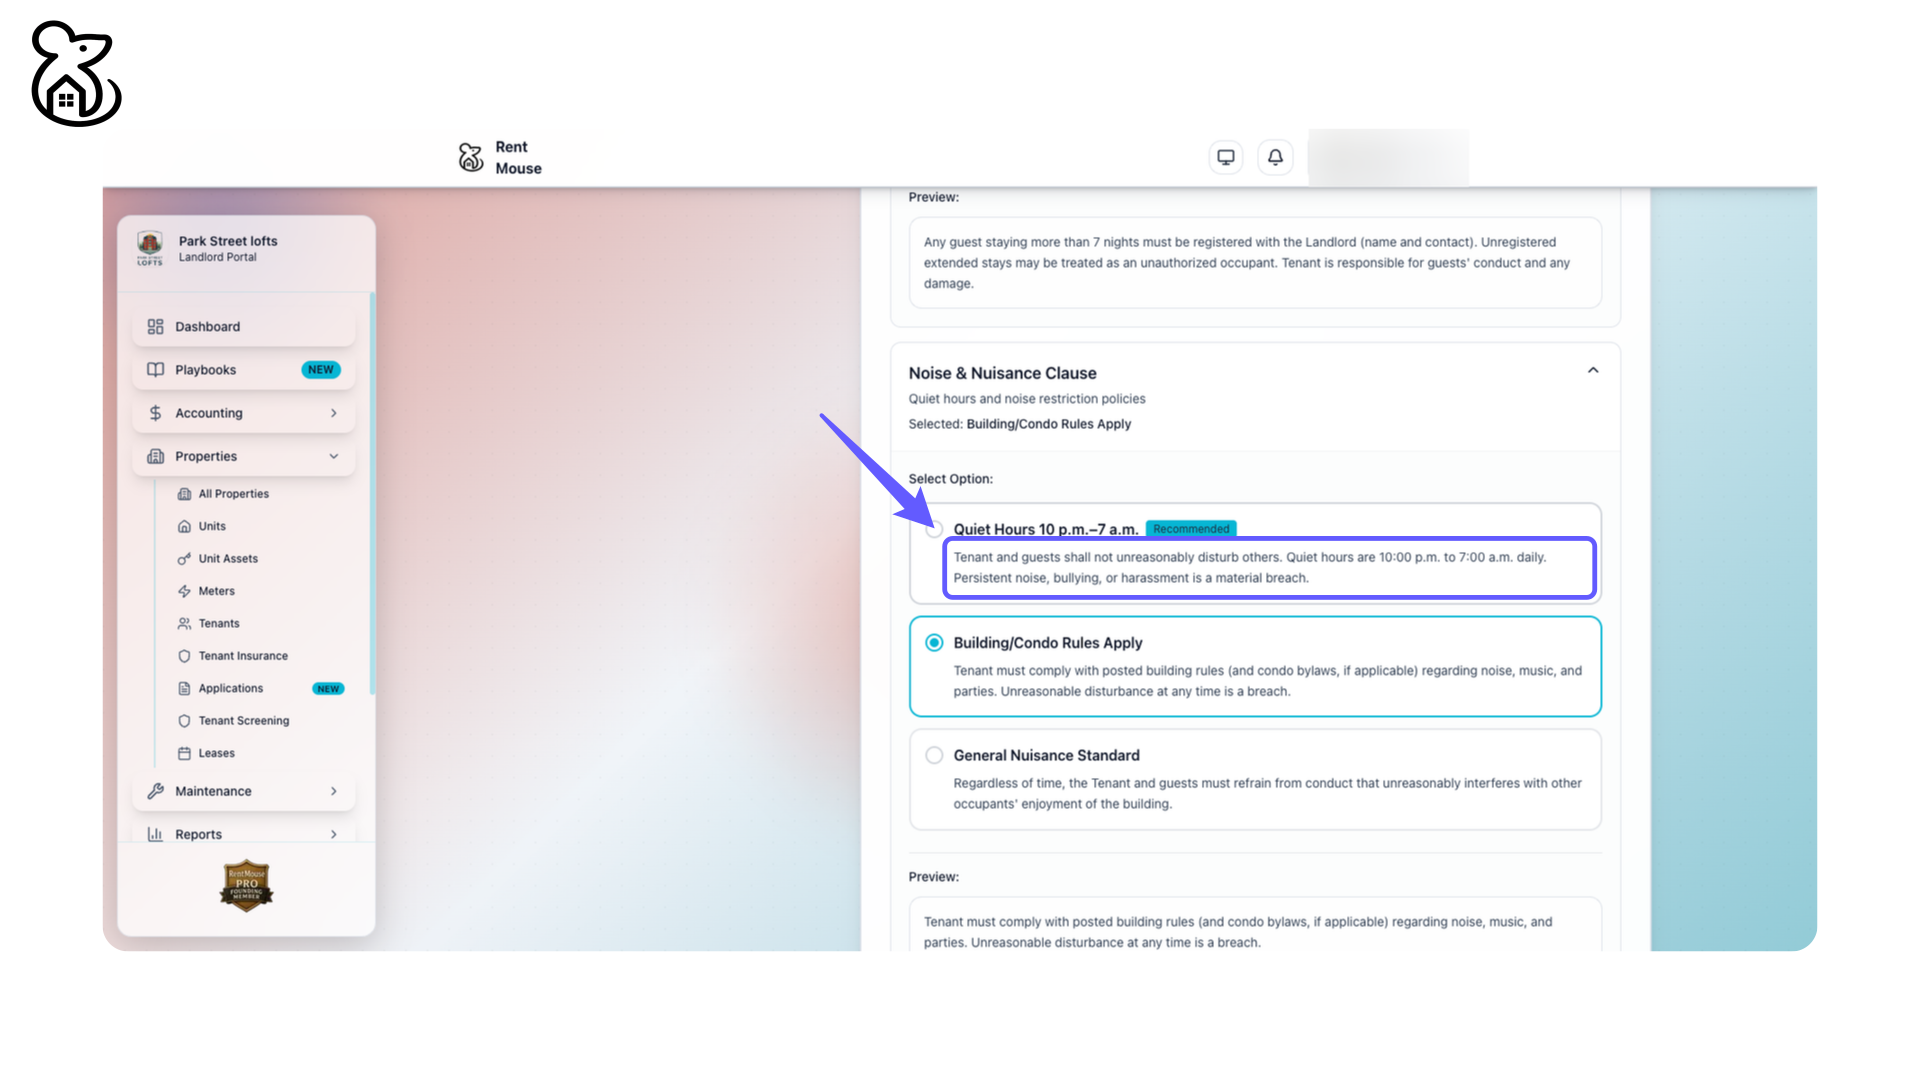
Step 69: Adhere to Quiet Hours
Ensure tenant and guests do not unreasonably disturb others. Observe quiet hours from 10:00 p.m. to 7:00 a.m. daily. Avoid persistent noise, bullying, or harassment as these are material breaches.
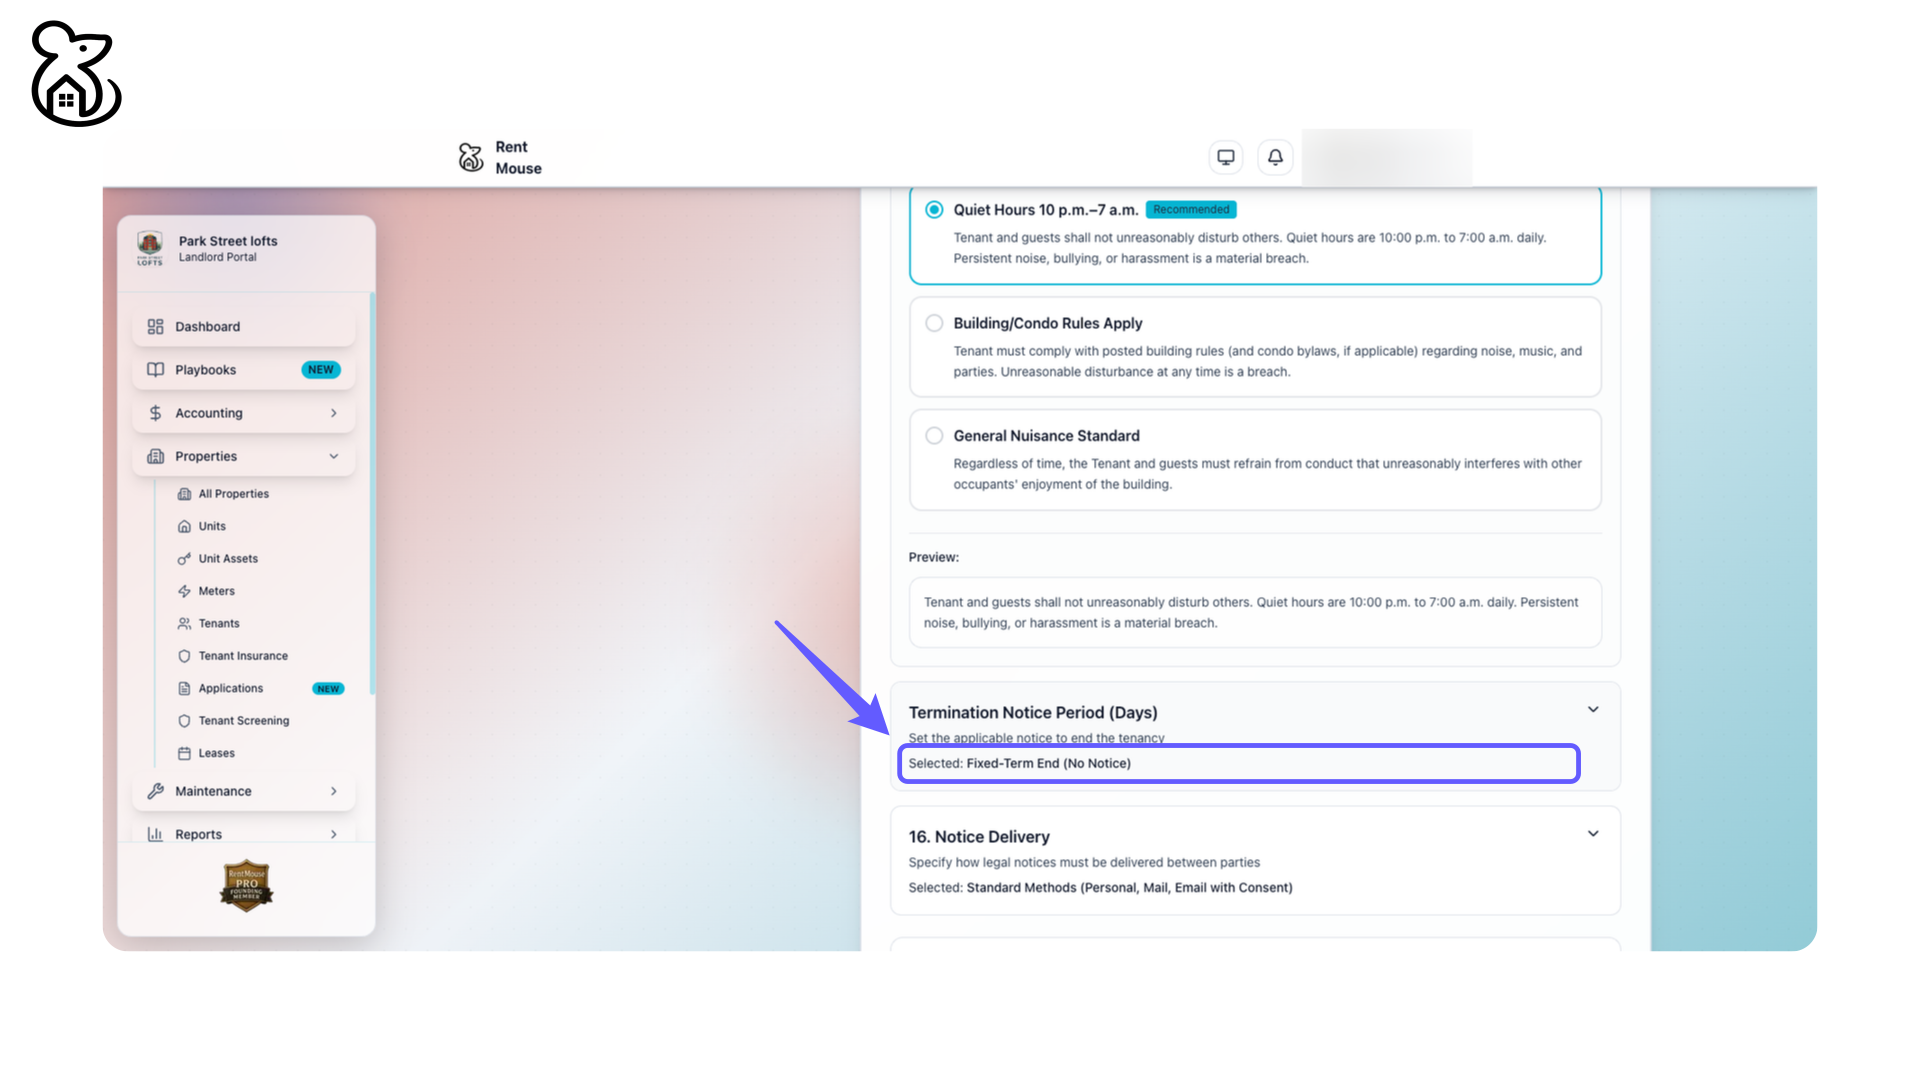
Step 70: Set Termination Notice Period
Set the appropriate notice to end the tenancy. Selected: Fixed-Term End (No Notice).
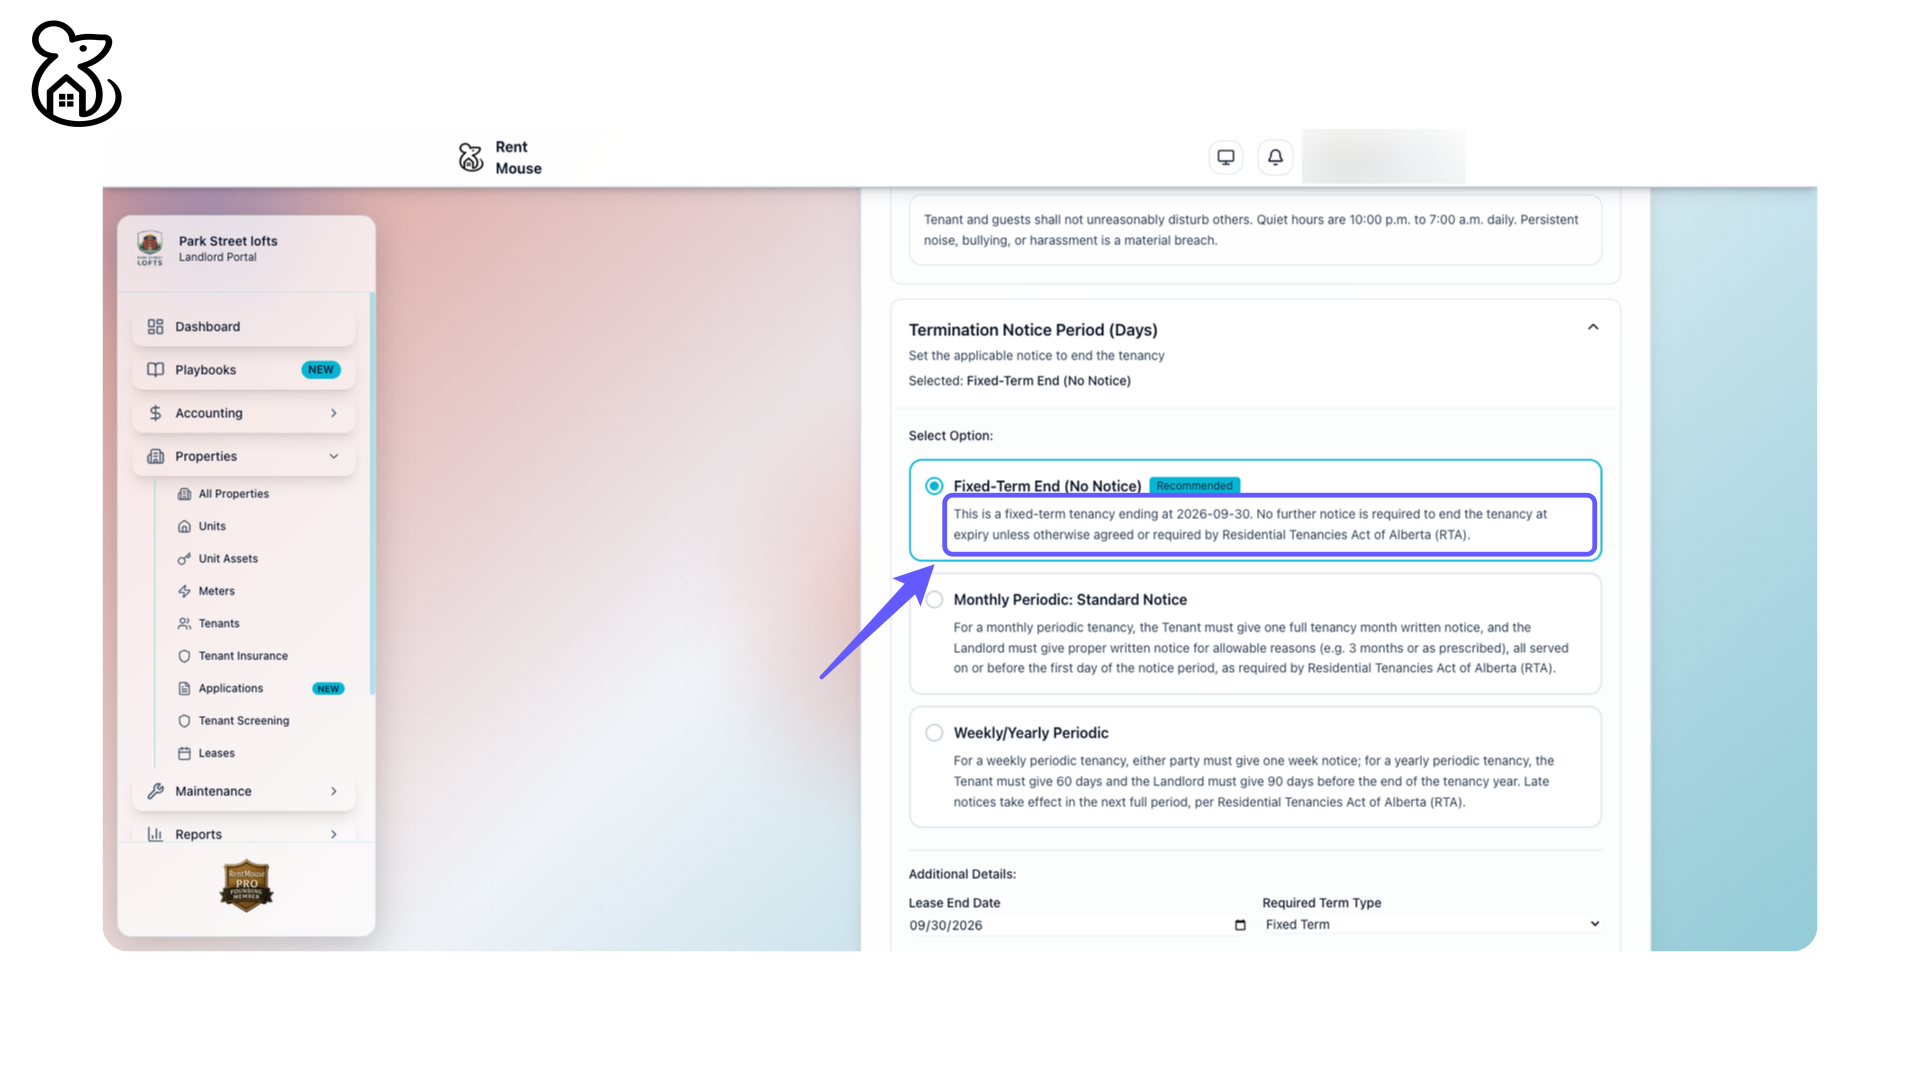
Step 71: Fixed-Term Tenancy Details
A fixed-term tenancy ends on the specified date. No further notice is required to end the tenancy at expiry unless otherwise specified by the Residential Tenancies Act of Alberta (RTA).
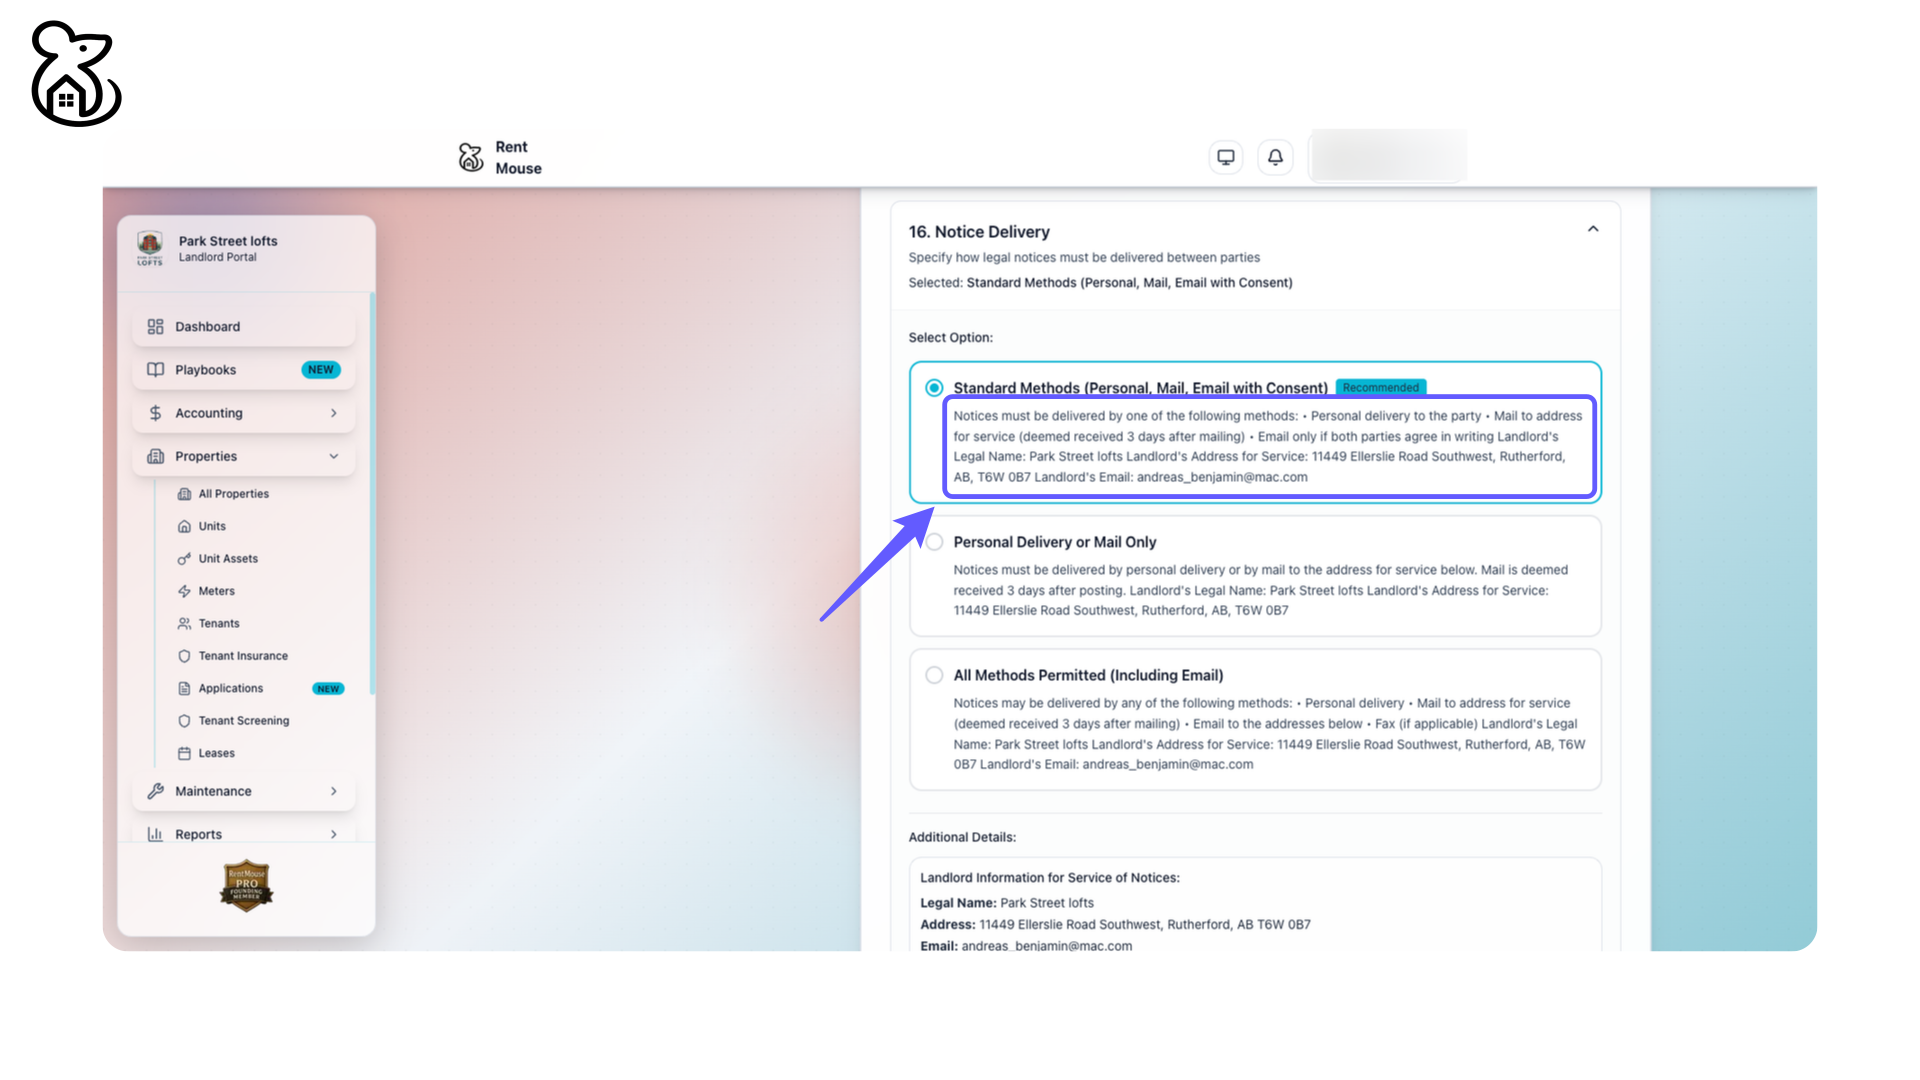
Step 72: Select Standard Notice Delivery Methods
Specify how legal notices must be delivered by selecting standard methods: Personal, Mail, Email with Consent.

Step 73: Choose a Notice Delivery Method
Select a delivery method for notices: personal delivery, mail to the provided address, or email if both parties consent in writing.
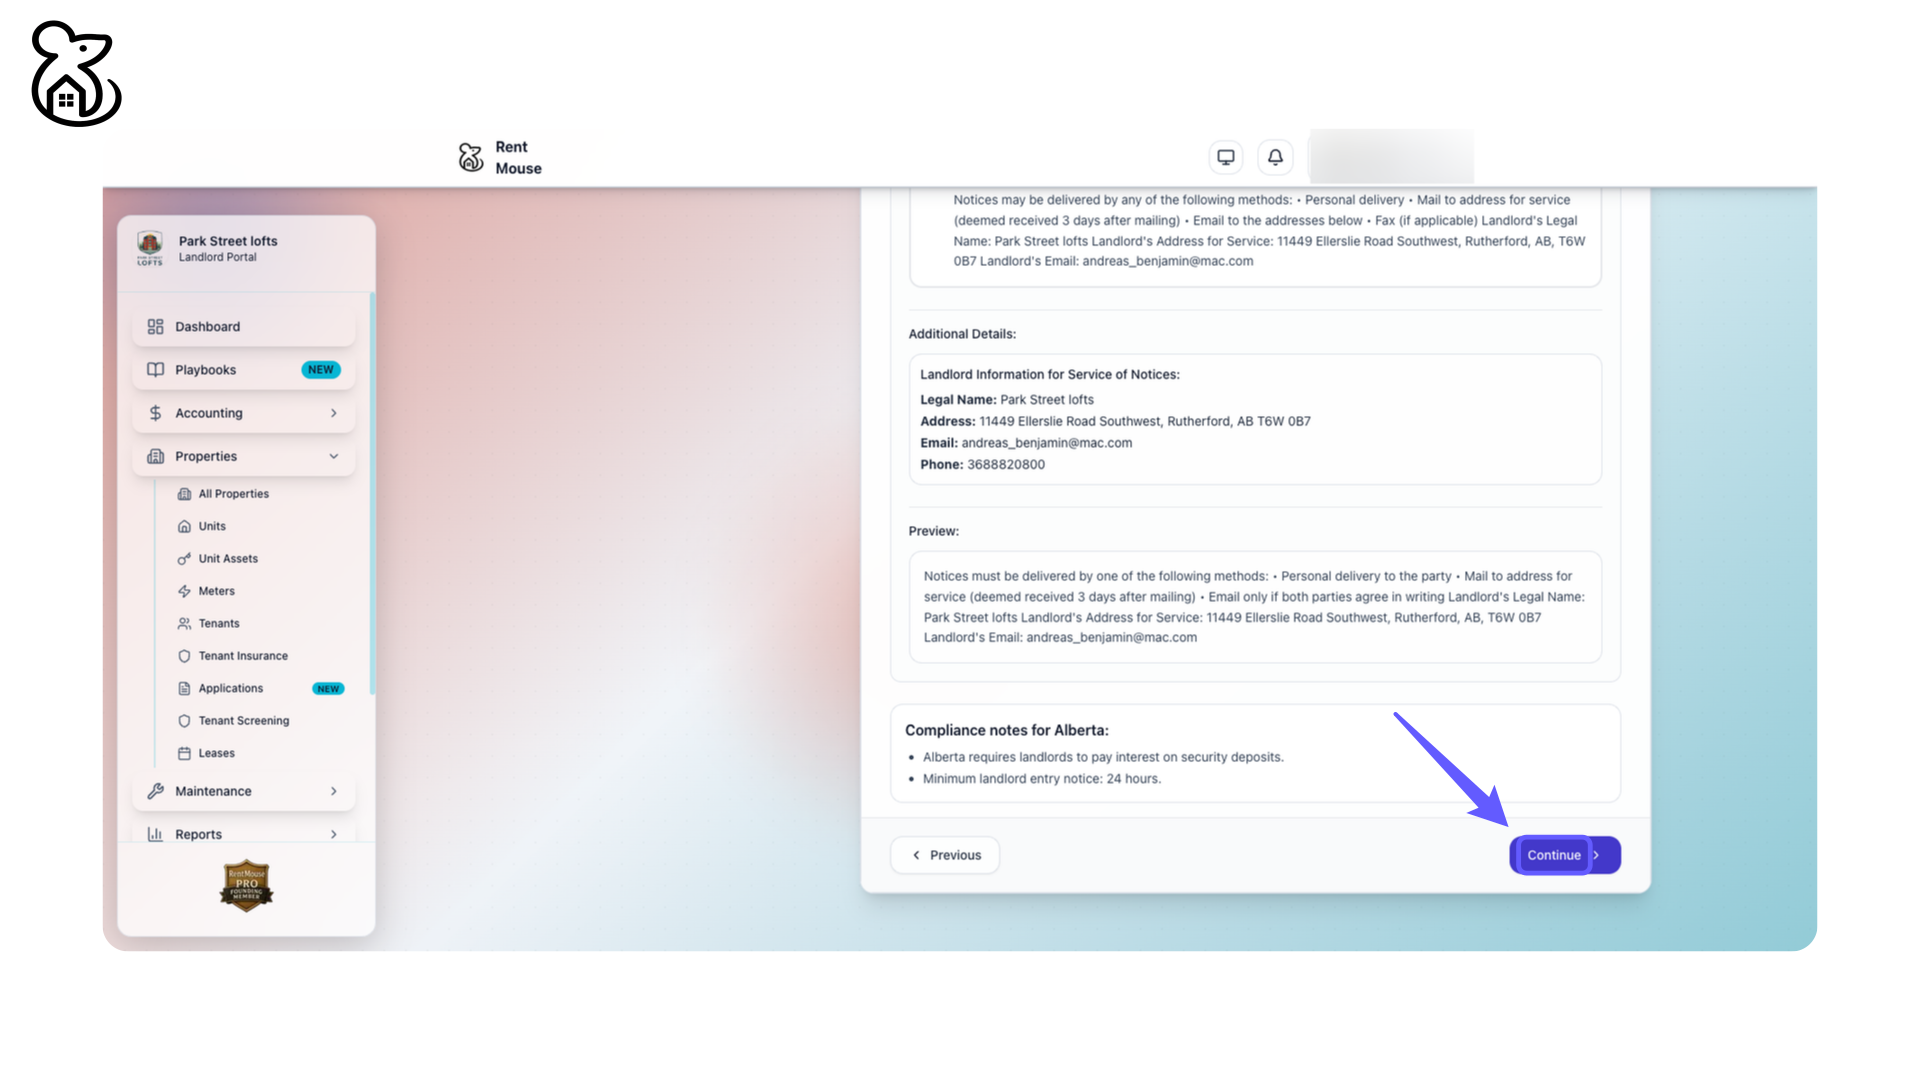
Step 74: Continue
Click 'Continue' to proceed to the next step.
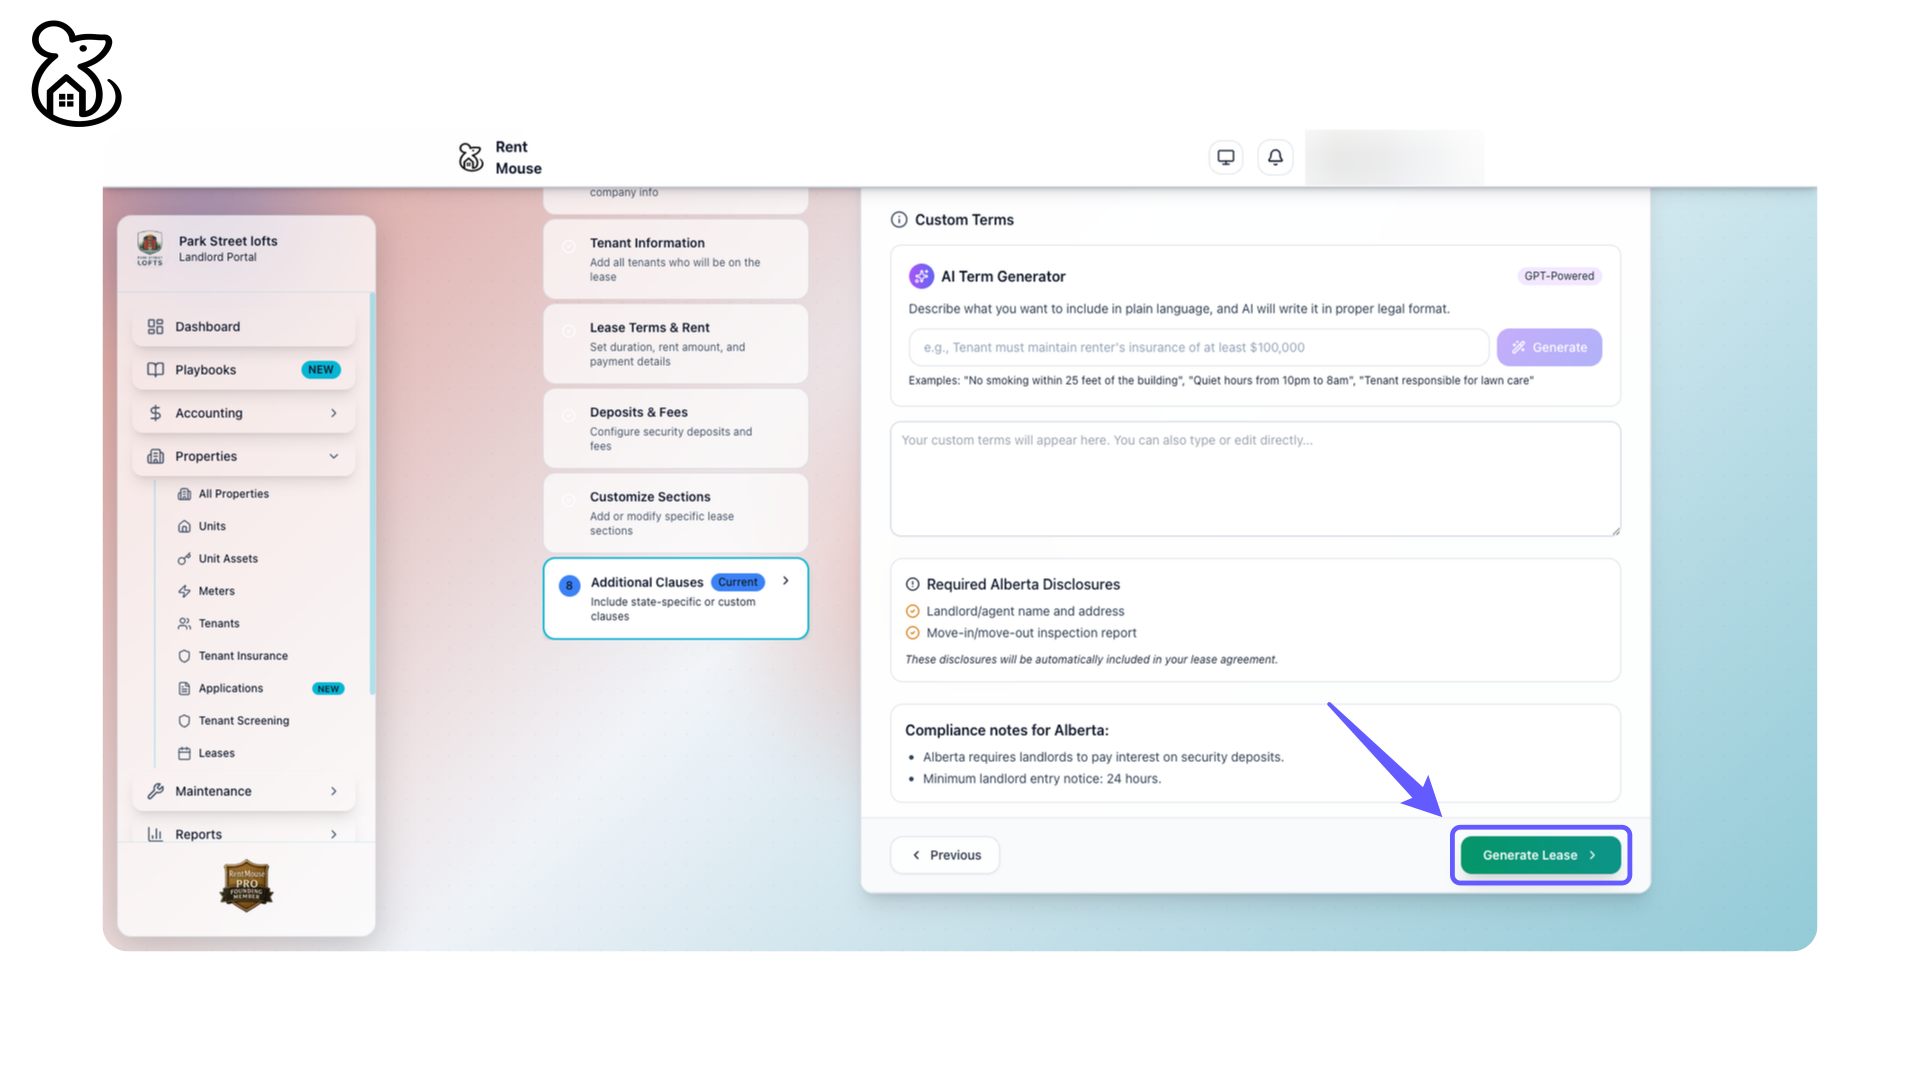
Step 75: Create Lease Document
Click 'Generate Lease' to start creating a new lease agreement with the provided terms and required disclosures automatically included.
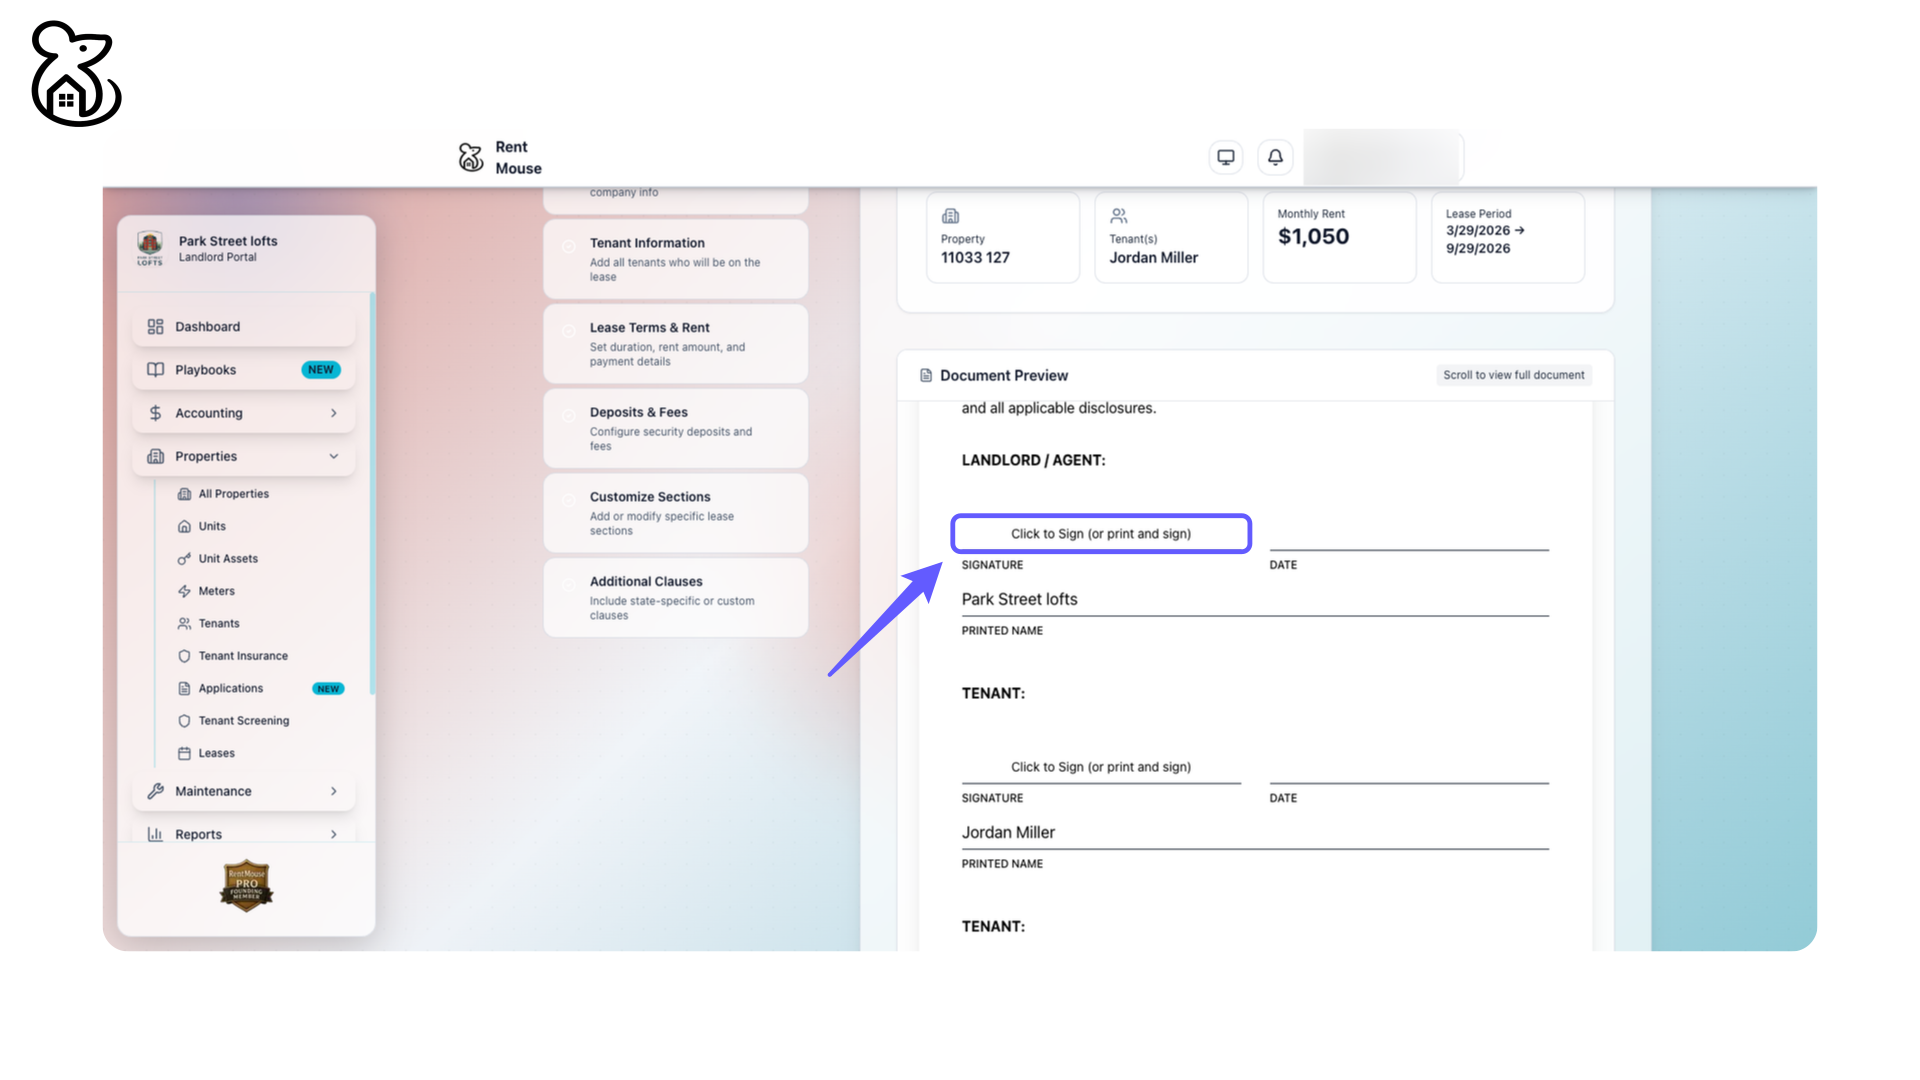
Step 76: Sign Document
Click to sign the document digitally, or print and sign manually for submission.
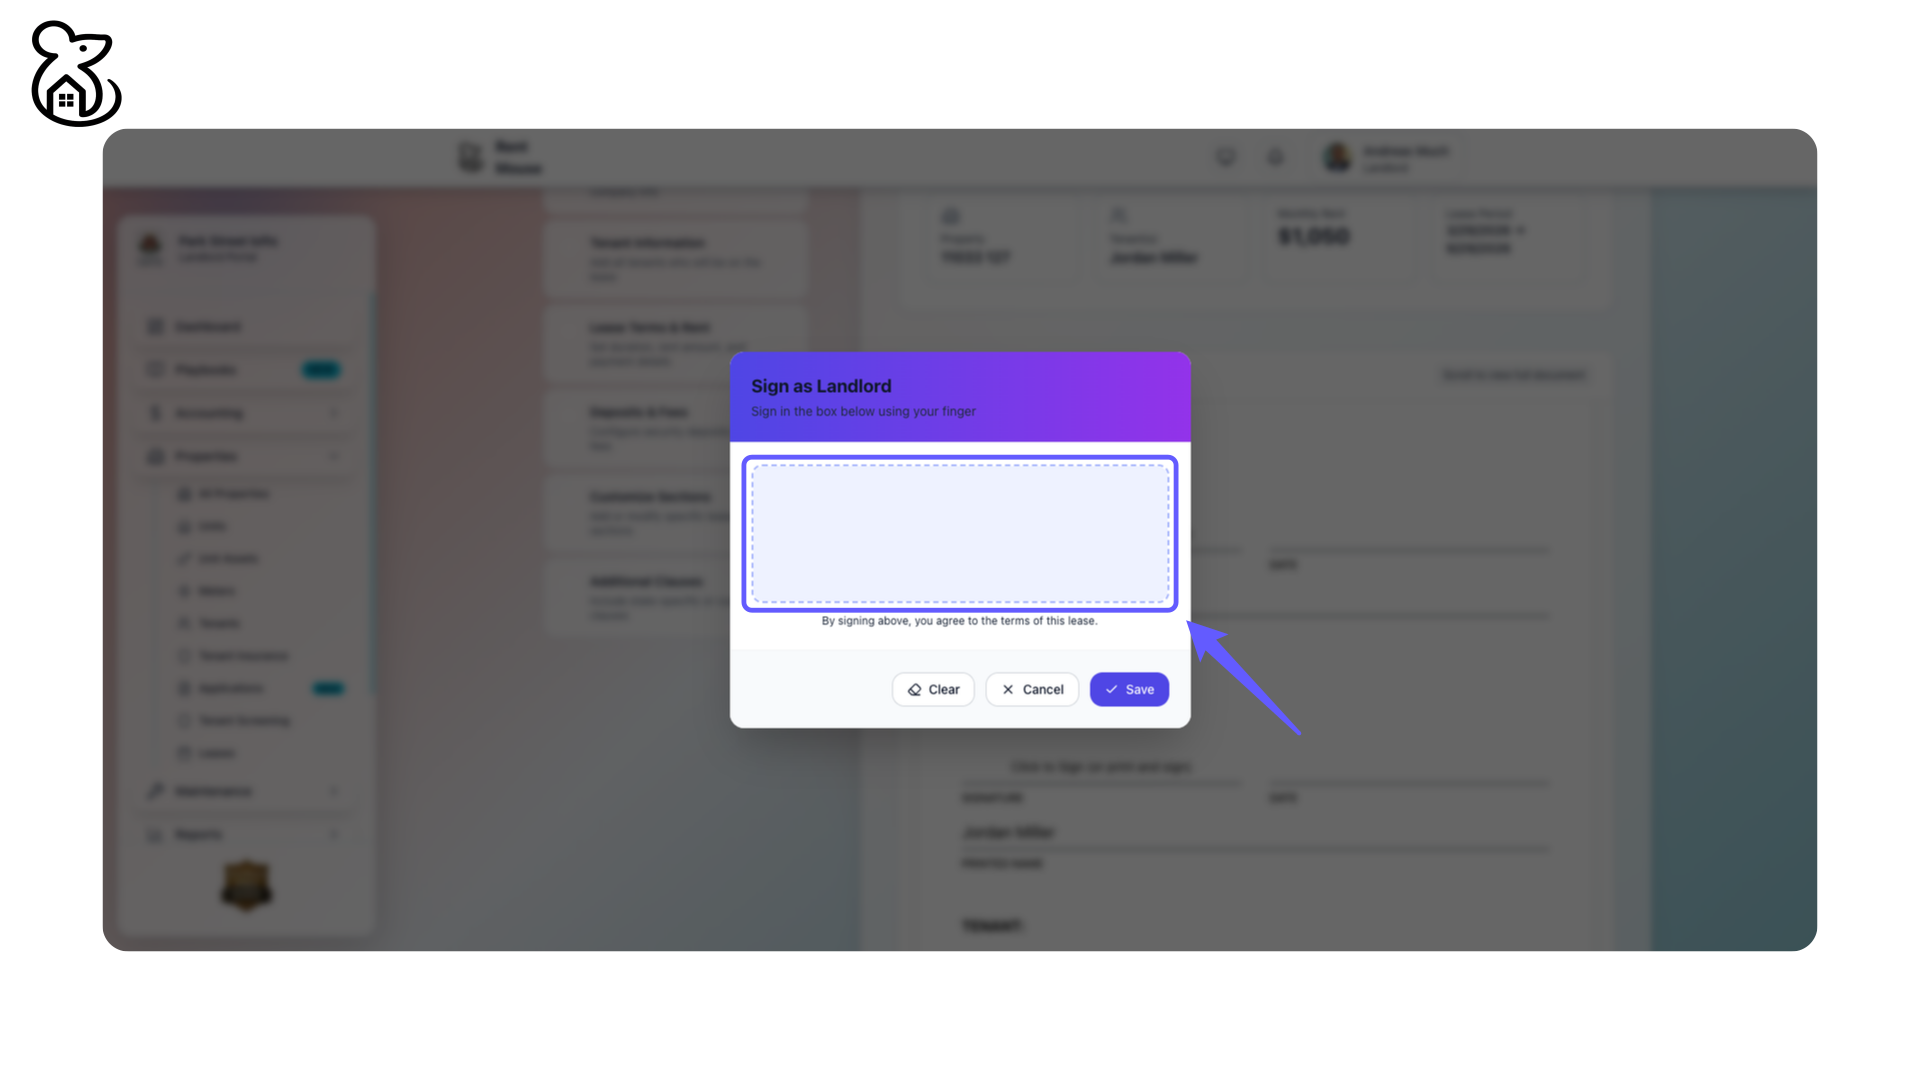
Step 77: Sign as Landlord
Sign in the box using your finger or mouse.
Step 78: Click Save to Confirm Signature
Click 'Save' to confirm your signature as a landlord on this document.

Step 79: Complete Lease Review
Click 'Save & Finish' to finalize your lease document after reviewing all details for accuracy.

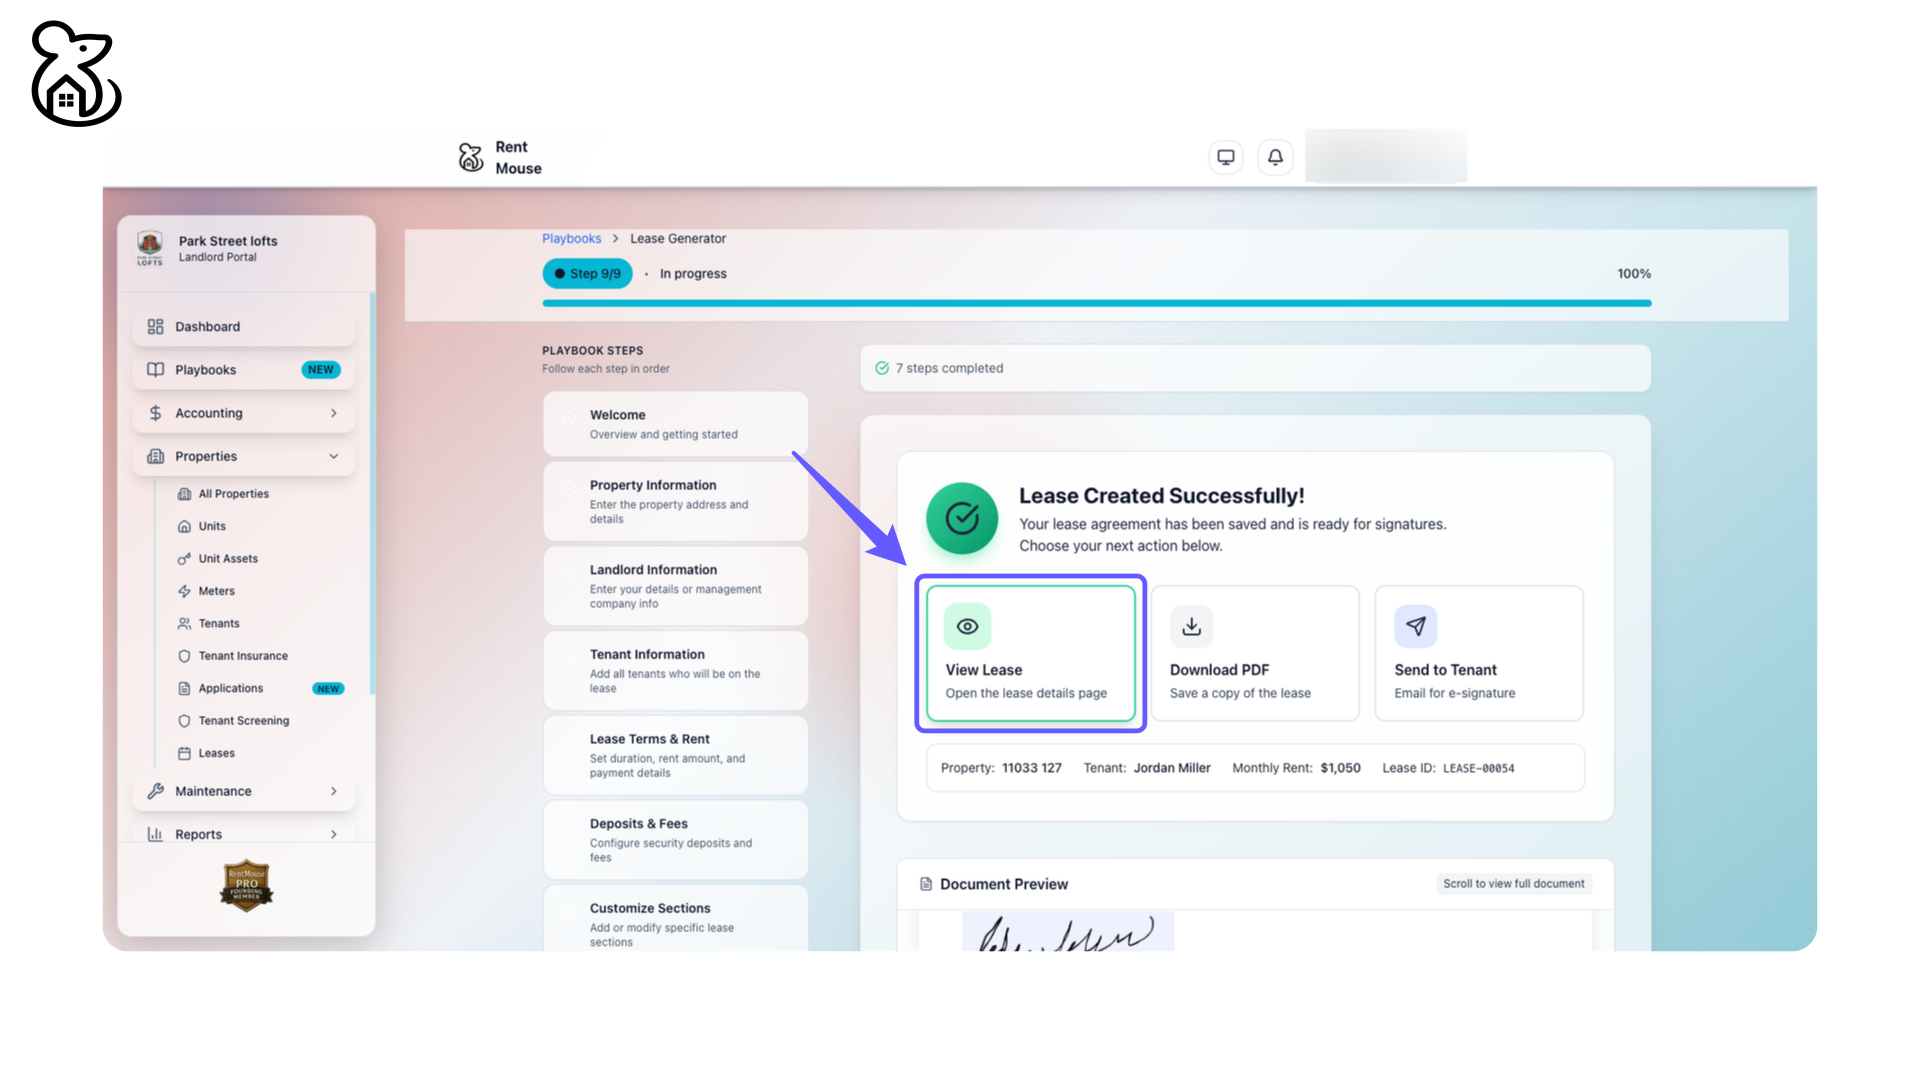
Step 80: Access Lease Details
Click 'View Lease' to open the lease details page.
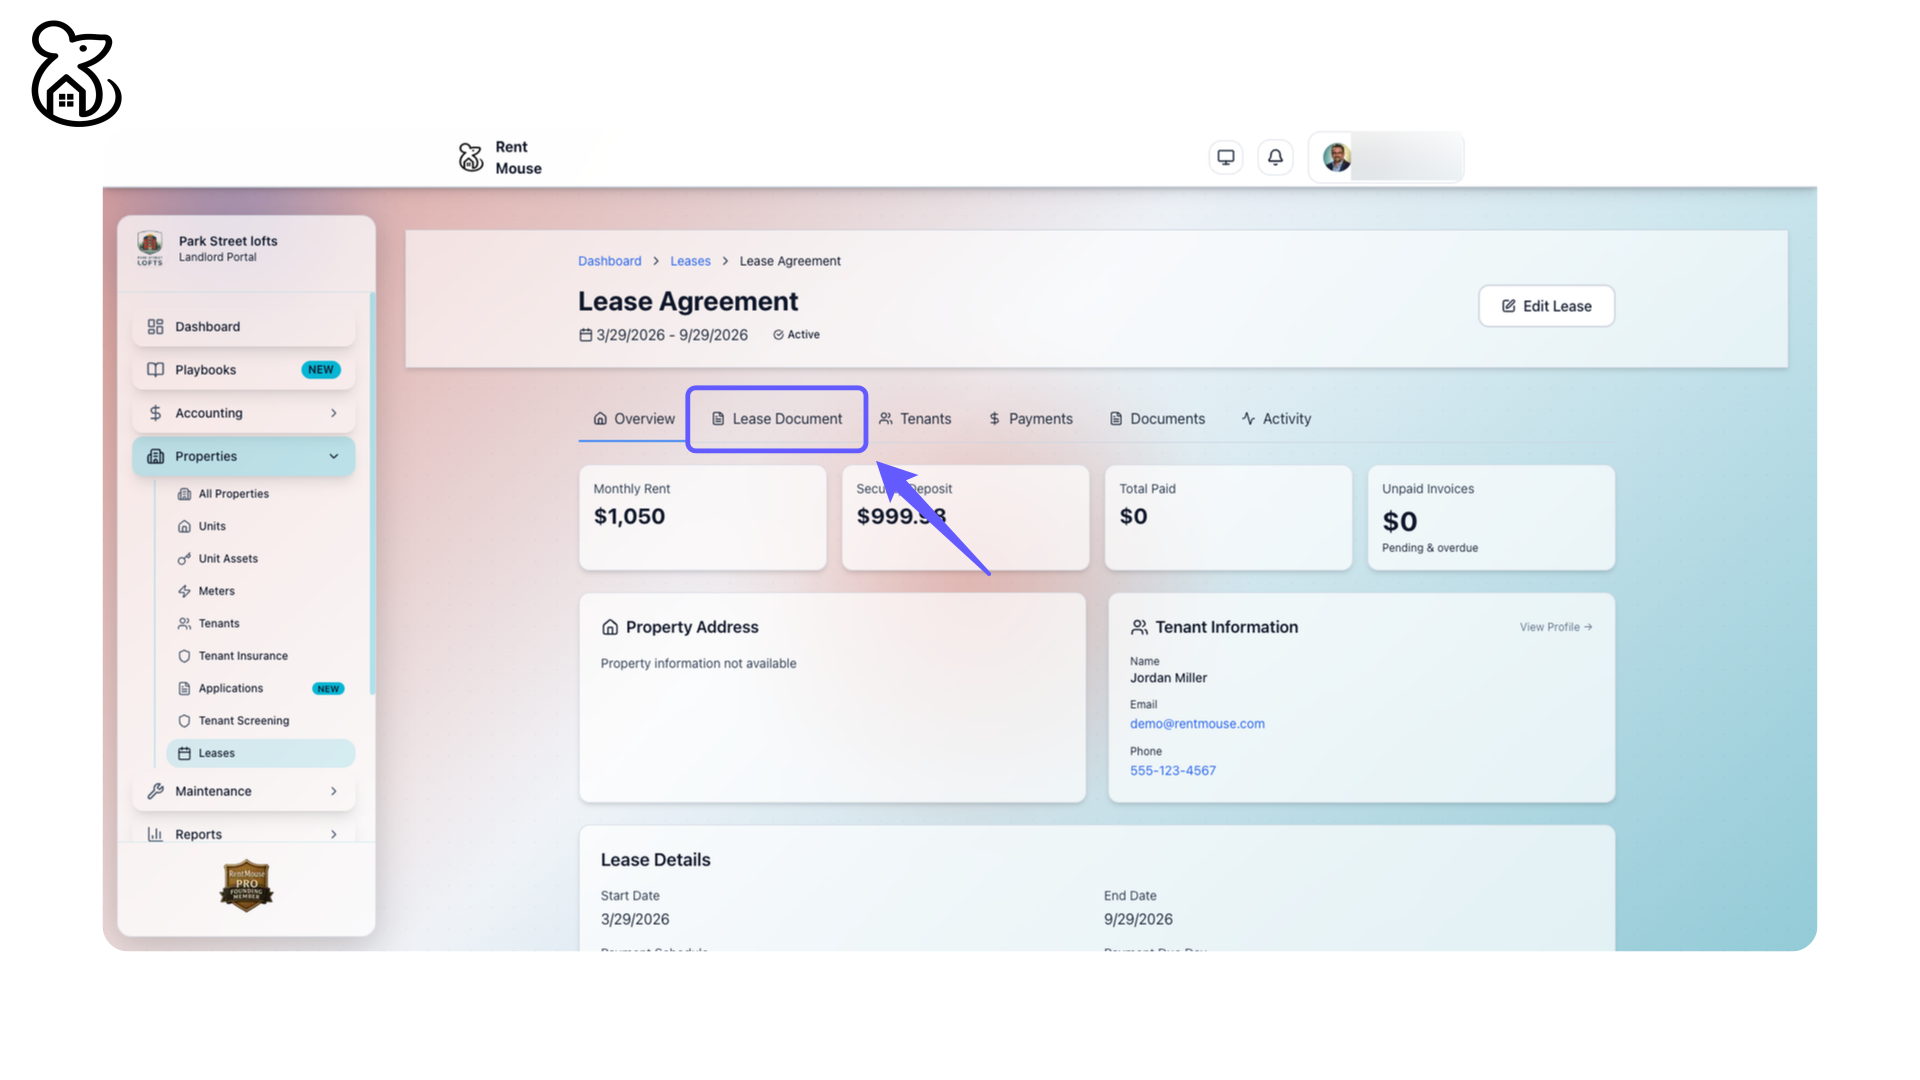
Step 81: Access Lease Document
Select 'Lease Document' to view the lease details.
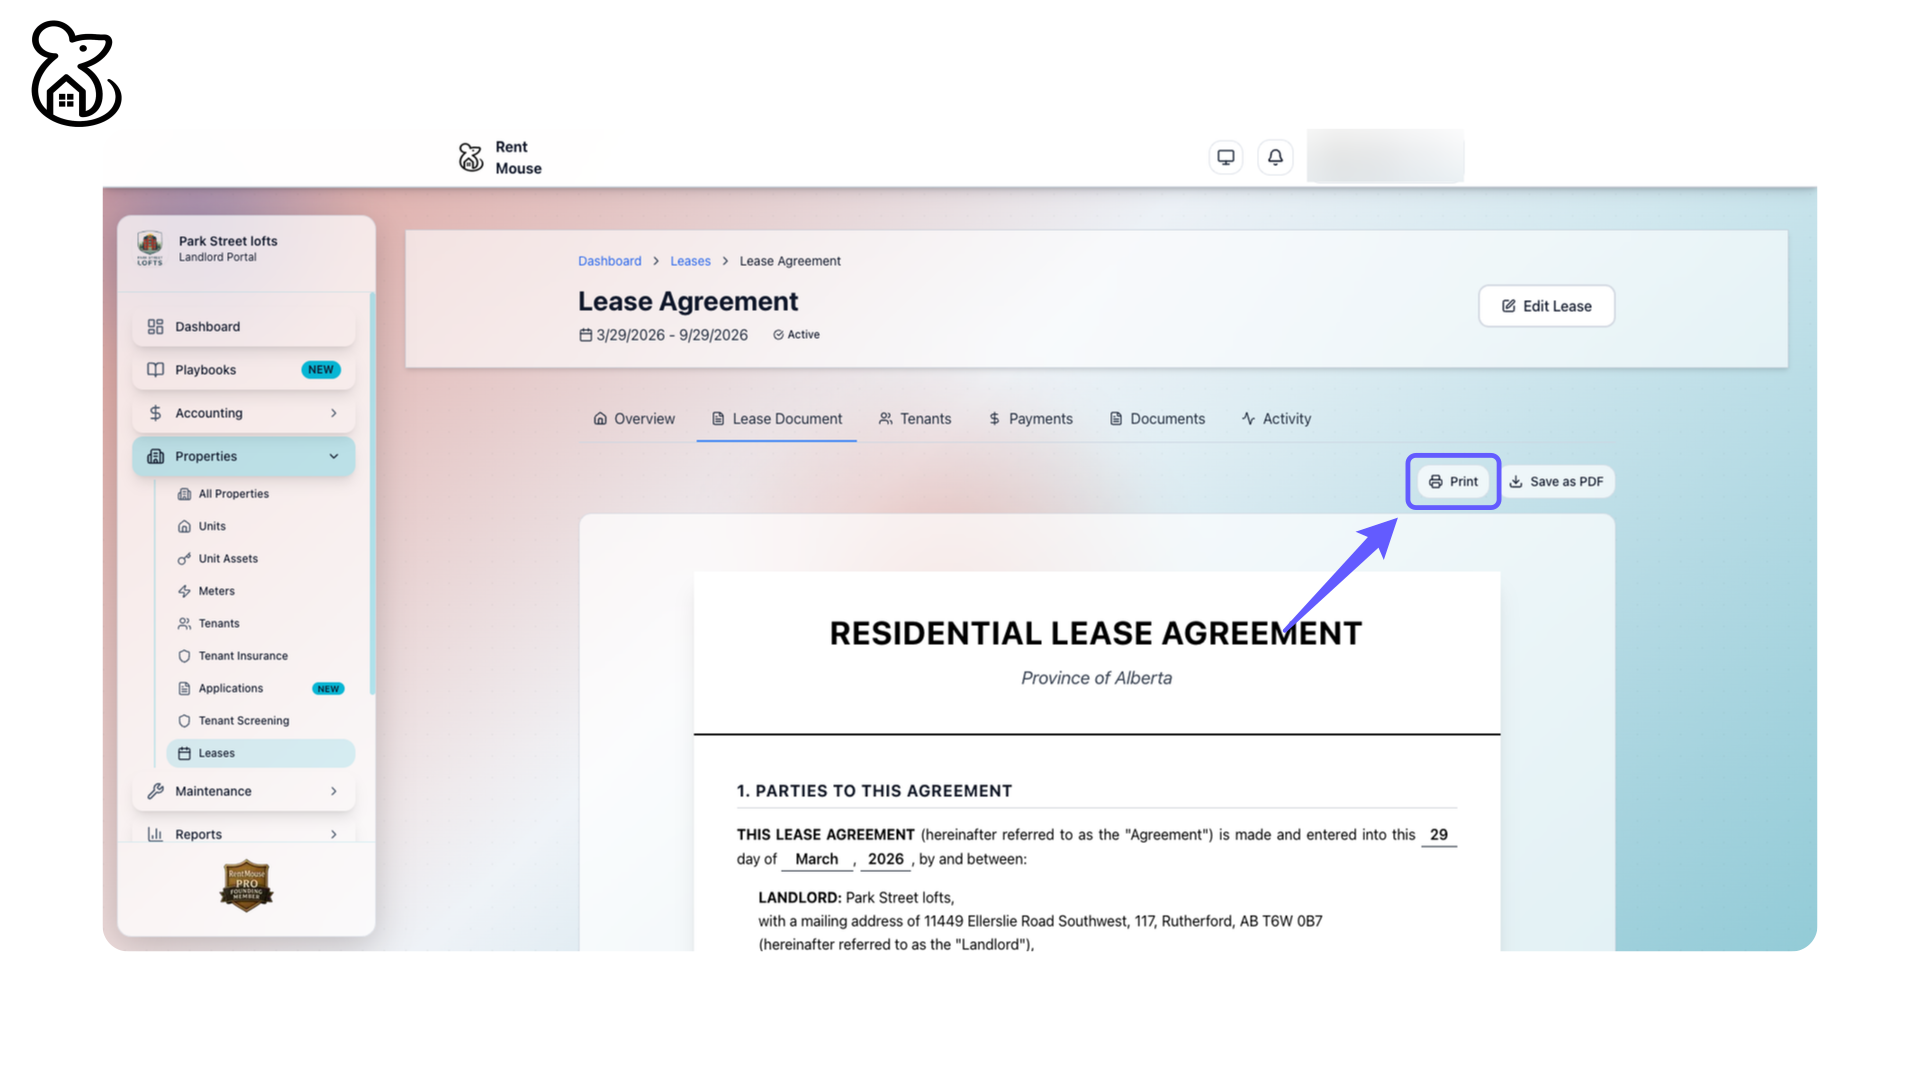
Step 82: Initiate Document Print
Click on 'Print' to initiate the printing process for the Lease Agreement document.
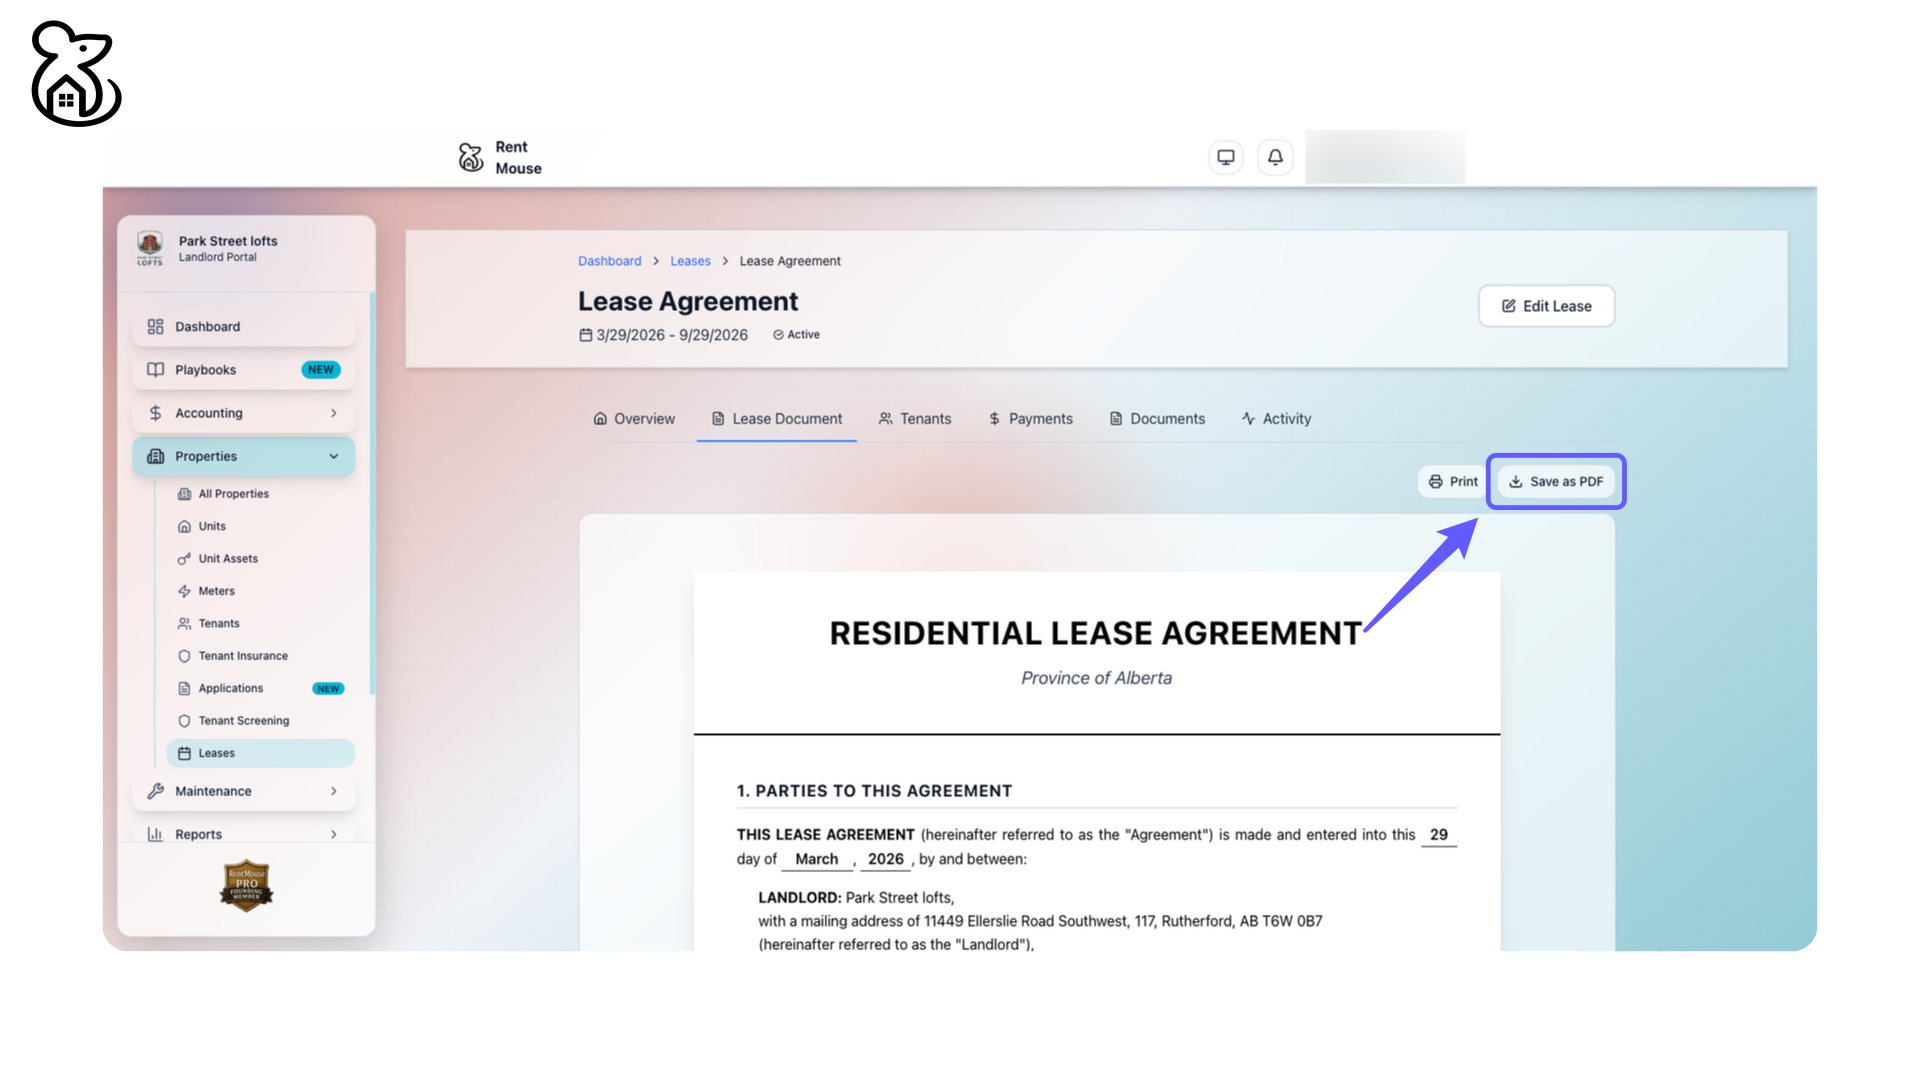
Step 83: Save Document as PDF
Click 'Save as PDF' to download the lease agreement document in PDF format.
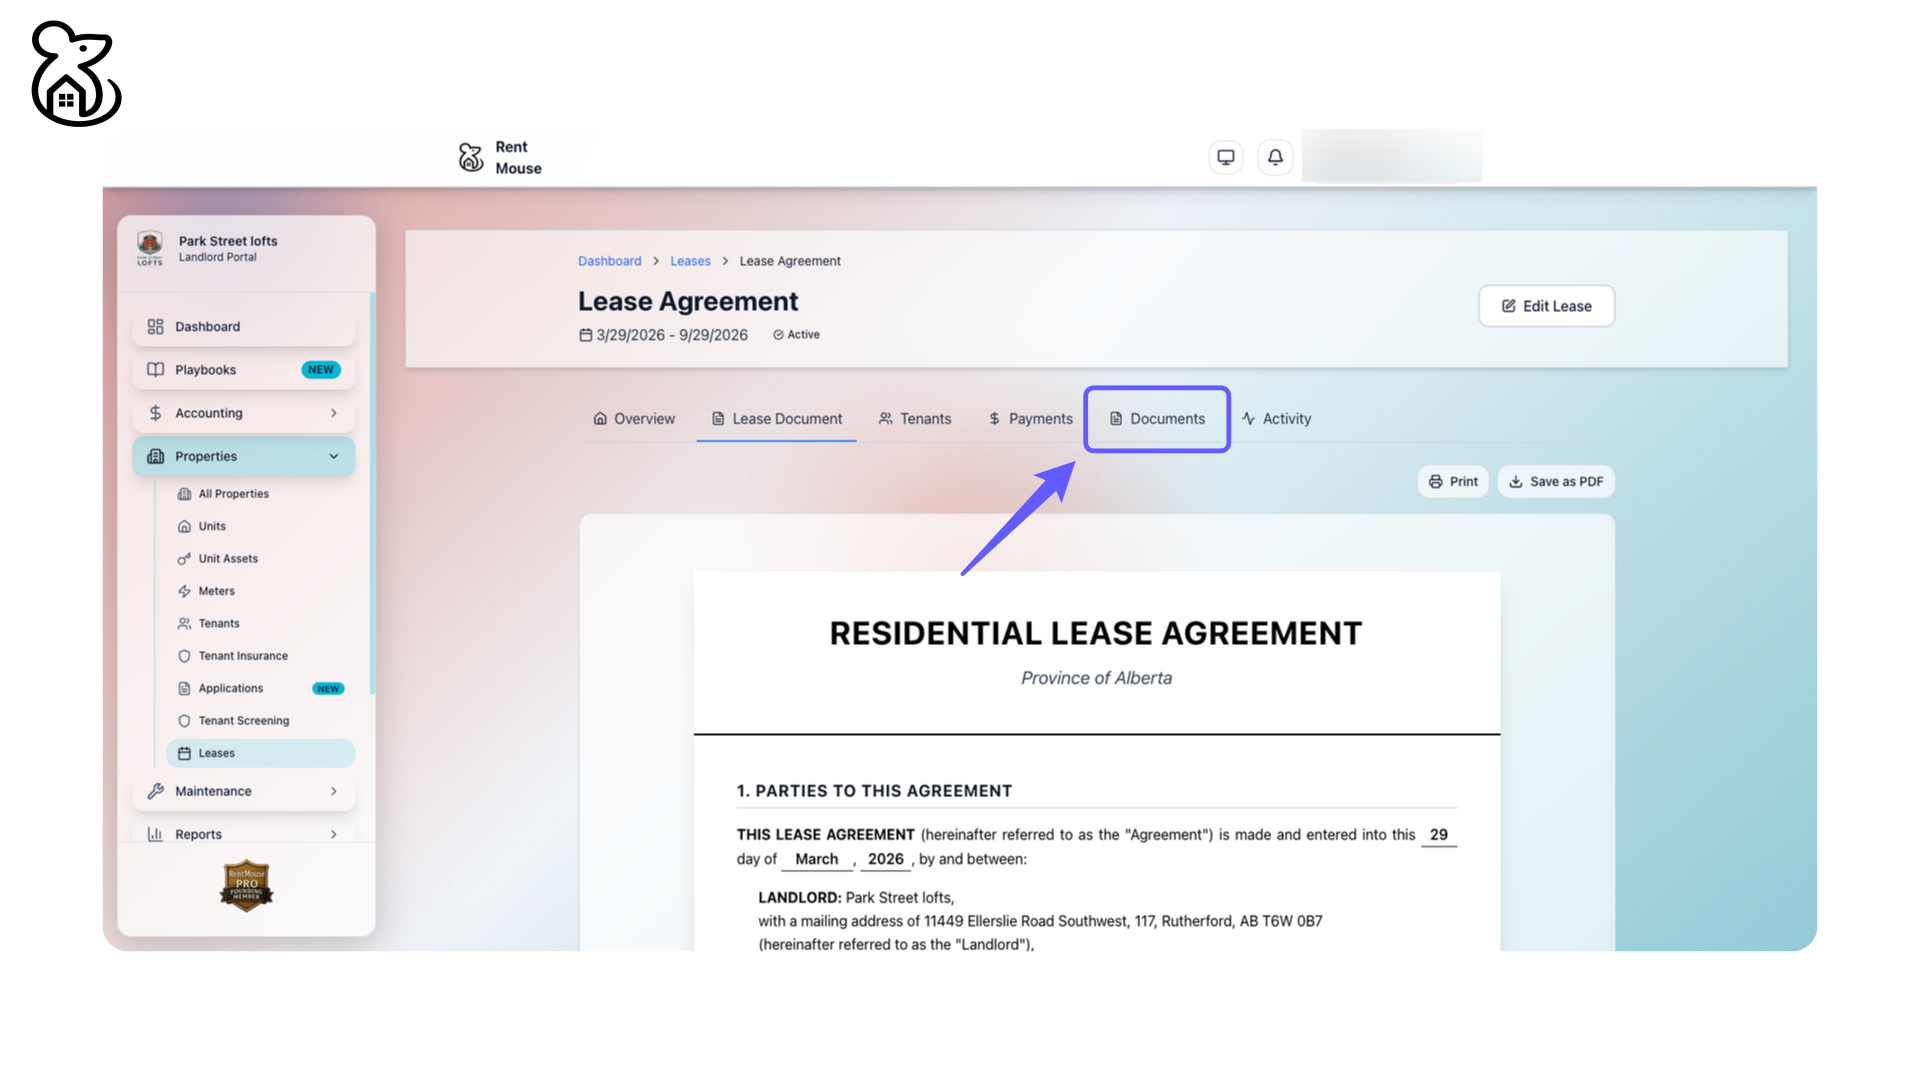
Step 84: Access Documents Section
Select the 'Documents' tab to view lease-related files and details.
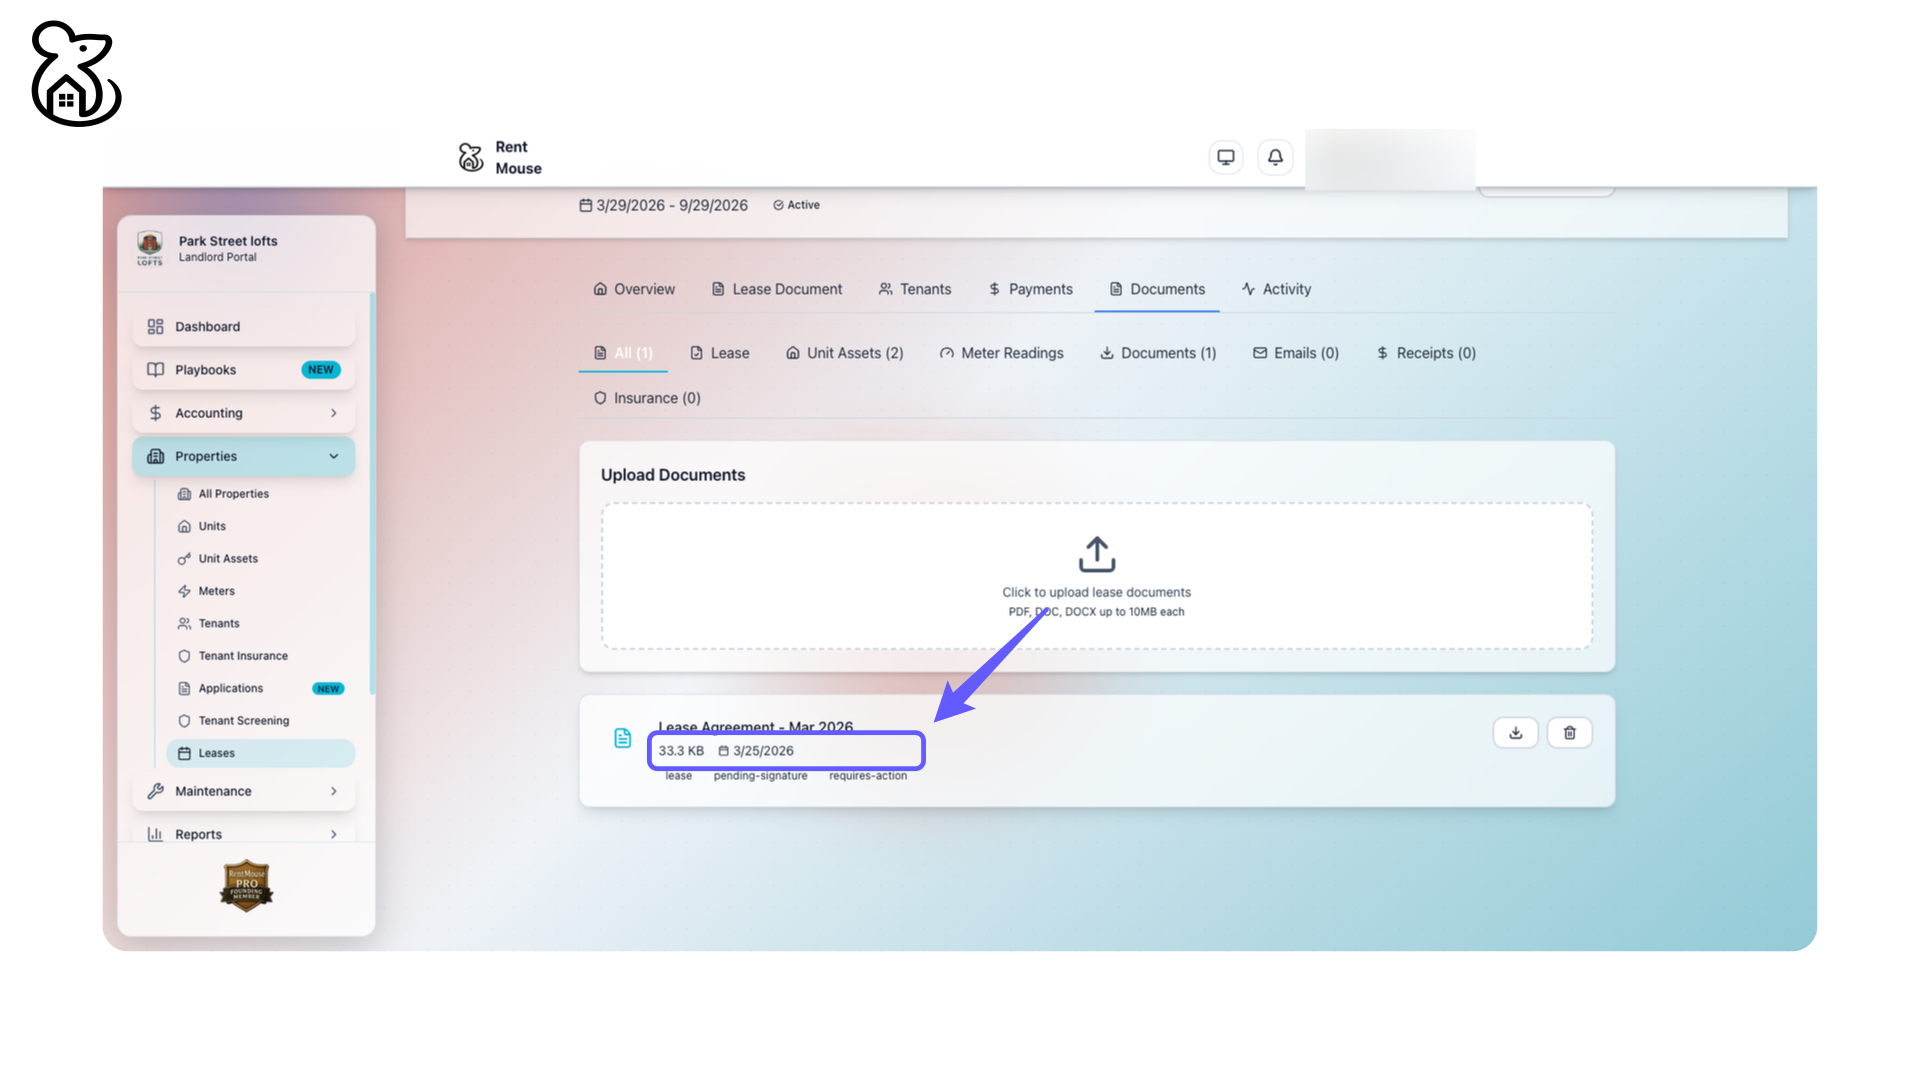
Step 85: Manage Lease Agreement
Access the Lease Agreement, available for download or deletion.
Step 86: View Leasing Document
Select 'View Document' to access leasing details.

Need Help?
If you have questions about creating leases or need assistance with specific clauses, contact our support team.